
We were very excited to learn that we can harvest birch syrup right in our literal back yard here in Fairbanks, AK.
With only 1,500 gallons of birch syrup produced world-over annually, this seemed to be a very special thing that we could do up here in Interior Alaska that is unique to the area.
With several dozen birch trees within a few yards of our house, we definitely wanted to get into it to see what it was all about.
Fortunately, yet again, the University of Alaska Fairbanks Extension Service were several steps ahead of us and provided all the information we needed to get started in backyard birch syrup harvesting.
The focus of this article is our experience practicing birch sap harvesting and the resulting birch syrup processing.
When To Tap Birch & Needed Equipment
Mid-April to early May is the season to get the good stuff, right about when temperatures first start warming up to about 50 degrees Fahrenheit.
The actual timing can be a little variable and depends on the season and your specific elevation. Sometimes the season can get pushed out to early May in a particularly heavy snowfall year or cool spring.
You can also watch the buds of the birch trees. You want to start after the buds form on the trees and before leaves emerge. Another indicator we use is when the snow just begins to recede around the base of our birch trees.
On average, you have about a 14 to 21 day window where the trees will produce sap. It is a significantly time sensitive process due to this production window.
There is a little bit of specialized equipment that you need for birch syrup tapping. The basics of equipment you will need are:
- 2, 3 or 5 gallon buckets
- Taps (found at local seed stores, we got ours at Alaska Feed)
- 7/16″ or 5/16″ drill bit, depending on tap size
We purchased five birch taps and five two gallon buckets with lids at the local feed store, so there was a minimal buy-in to get started.
The aluminum taps cost around $7 each and the buckets with lids cost around $6 each. All-in, a good kit is going to be between $50 and $100.
The taps also come in a plastic version. Both types can be used year after year for this purpose, but aluminum taps are more robust. We recommend the aluminum taps as they are stronger and will last longer.
This article talks about our evolution as birch tappers. We’ve slightly modified our equipment. We talk about this further down.
The Birch Tapping Process
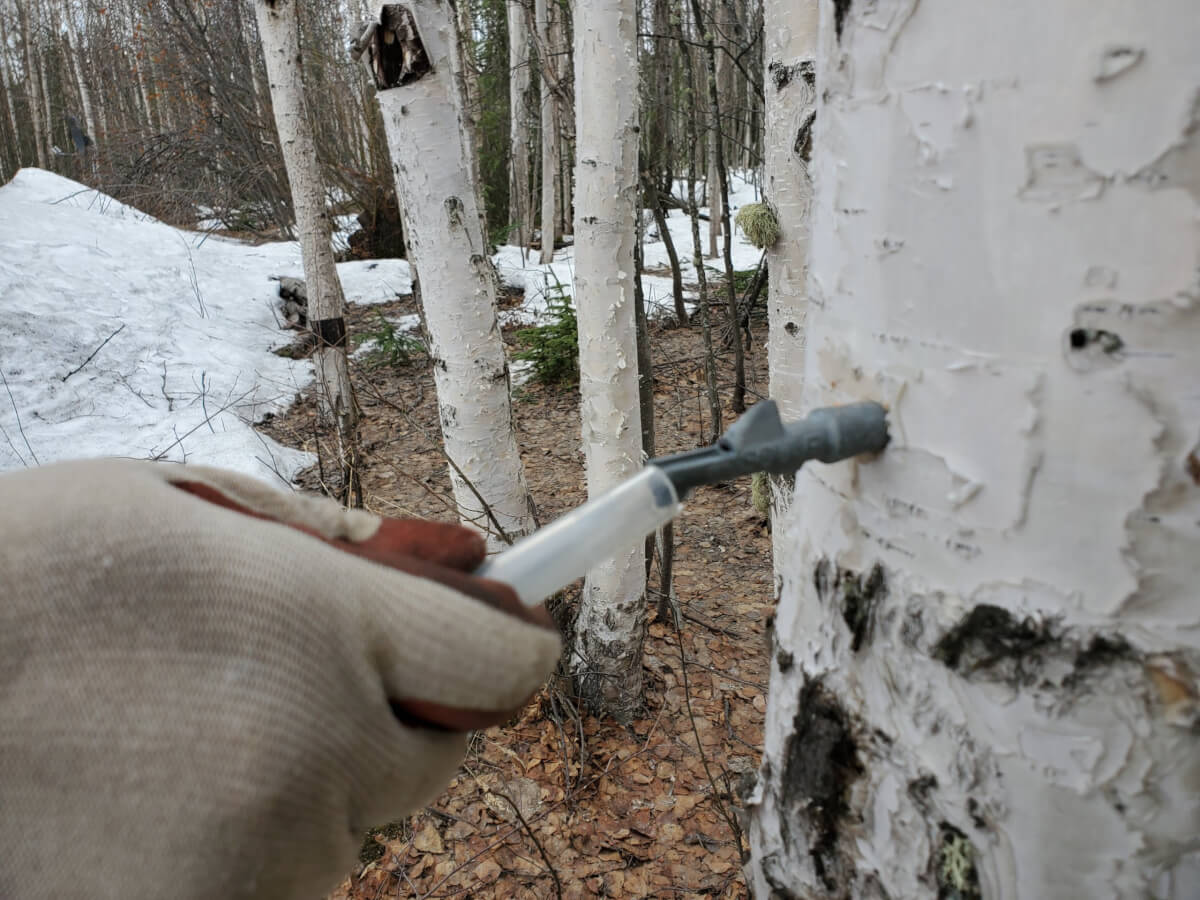
Once we had our equipment, the next step is to drill our first hole into a decent sized birch tree. We used our cordless drill to put an appropriate sized hole in the tree.
The bit size you’ll use size depends on your actual tap, typically either 5/16″ or 7/16″.
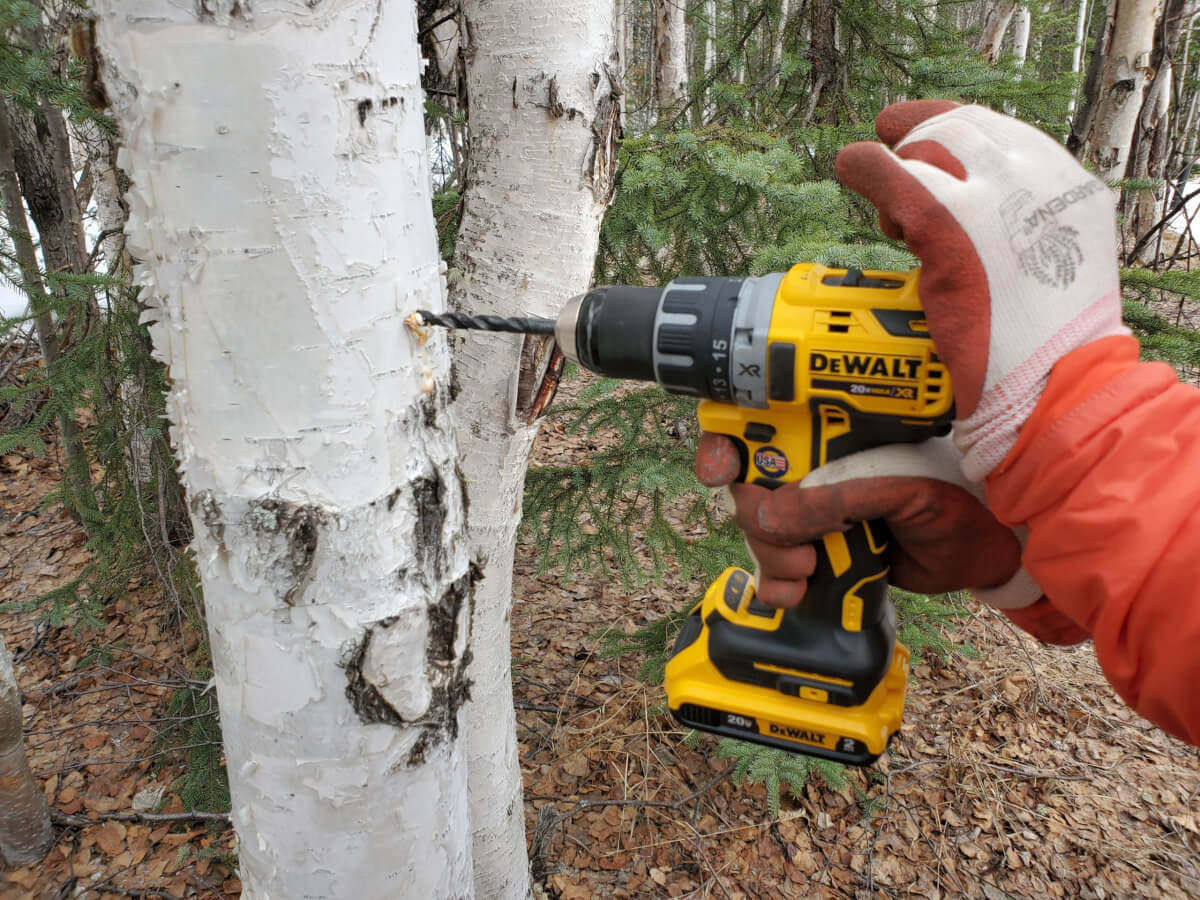
We generally look for trees that are at least 6 inches in diameter. Larger trees will produce more birch sap and that’s generally what we’re looking for.
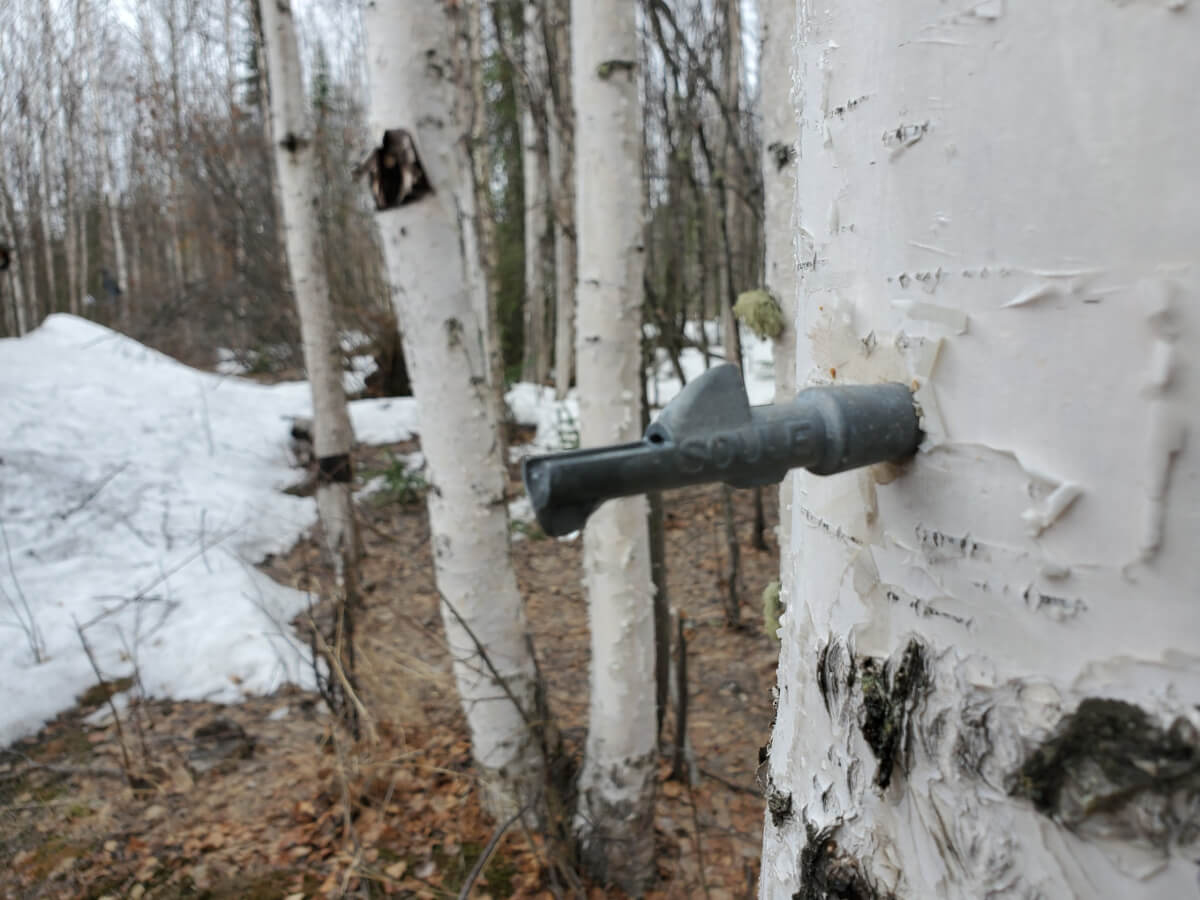
From there, we lightly hammer the tap into the tree with a rubber mallet or a regular hammer, whichever we have handy.

From here, we generally hope to see the tree flowing. You’ll know if you got your timing right if you immediately start to see sap flow out of the tap.
Sometimes, it doesn’t quite work out that way. If you don’t see anything, just be patient. Often times, you’ll start seeing results in a day or few.
How exciting…it actually works!
 Average sized (6 to 8 inch) birch trees will produce one to two gallons of birch sap per day for the 2-3 weeks that they are producing birch sap.
We usually tap four trees for our home scale birch syrup production. On average, this offers us about 4 to 5 gallons of raw birch sap to process, per day.
After a certain point, the birch sap becomes more bitter and doesn’t produce good syrup, so timing your birch tapping correctly is of the essence!
Evolving Our Process Of Birch Tapping
We initially started with two gallon buckets for our birch sap collection. Since the original publication of this post, we have upgraded our setup to use five gallon buckets.
We learned that the trees produce sap very quickly during certain periods of time. We were losing sap because we couldn’t empty the buckets fast enough.
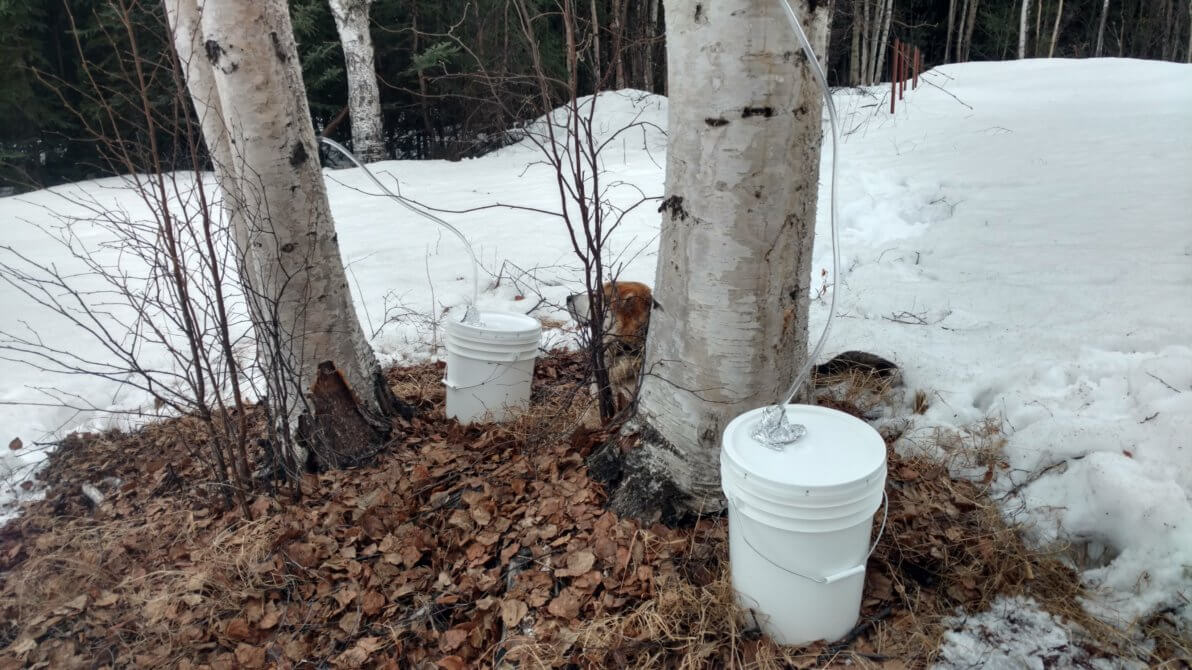
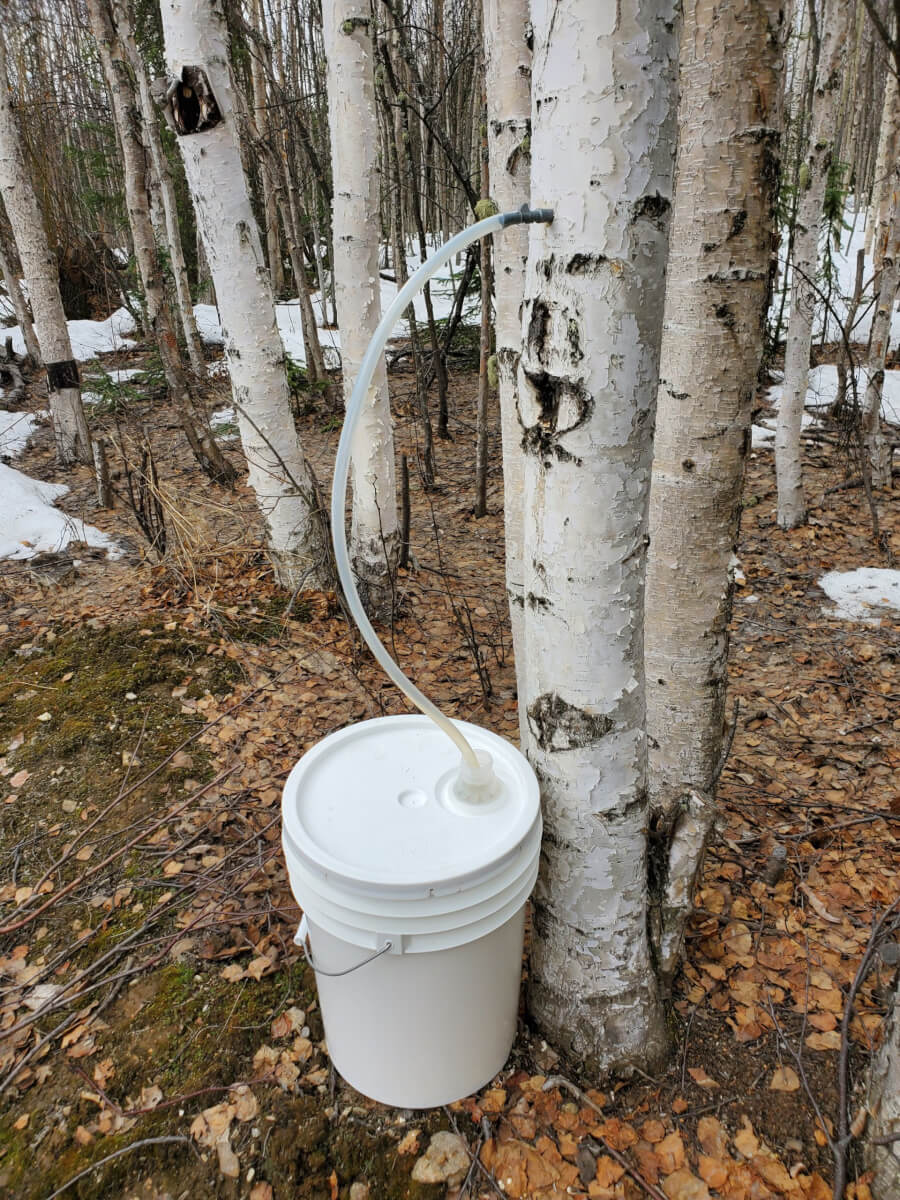
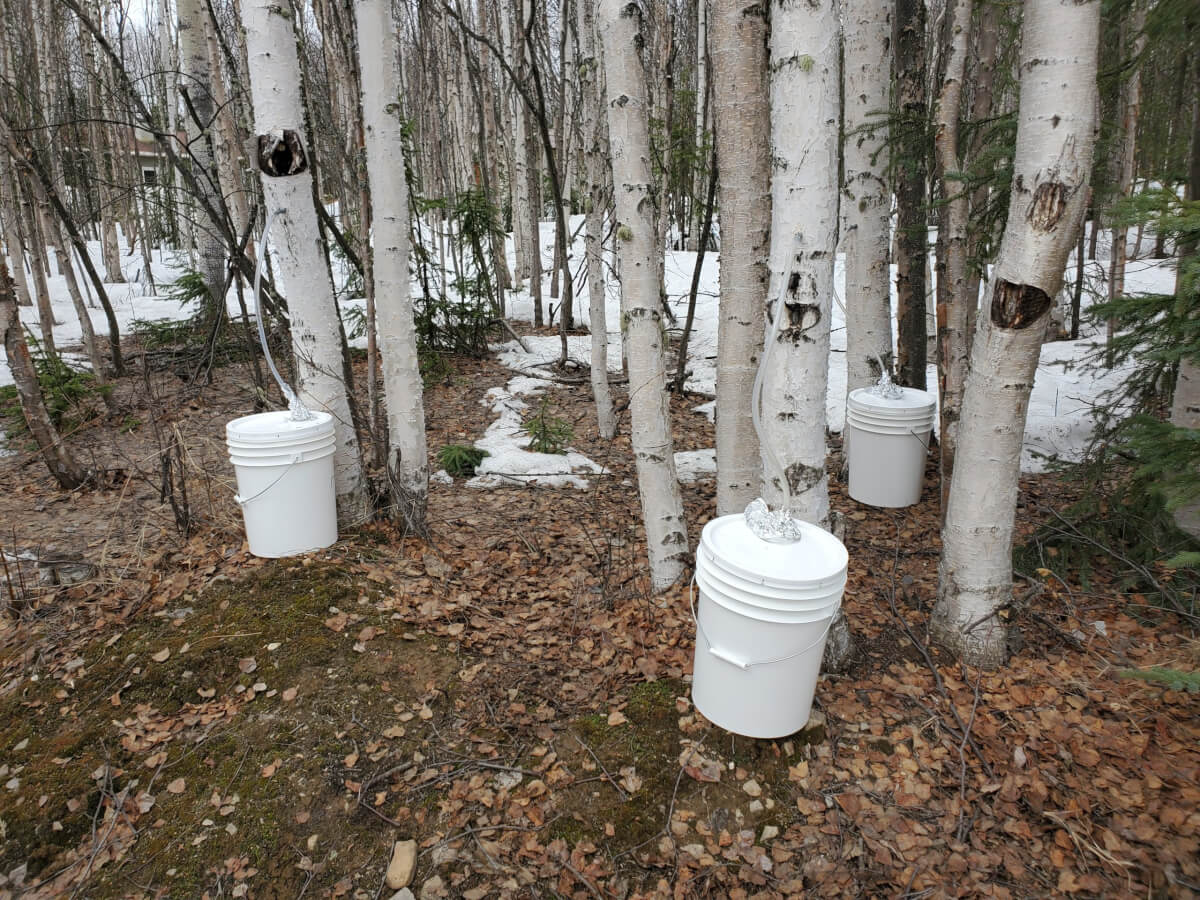
This photo shows our current birch tapping practice. The minor changes we discuss in this section really went a long way to improve the process for us.
Moving to five gallon buckets allowed us a bit more time and overall reduced the labor demands quite a bit. It was better to collect 3 gallons in a 5 gallon bucket than it was to lose a gallon of sap to the ground.
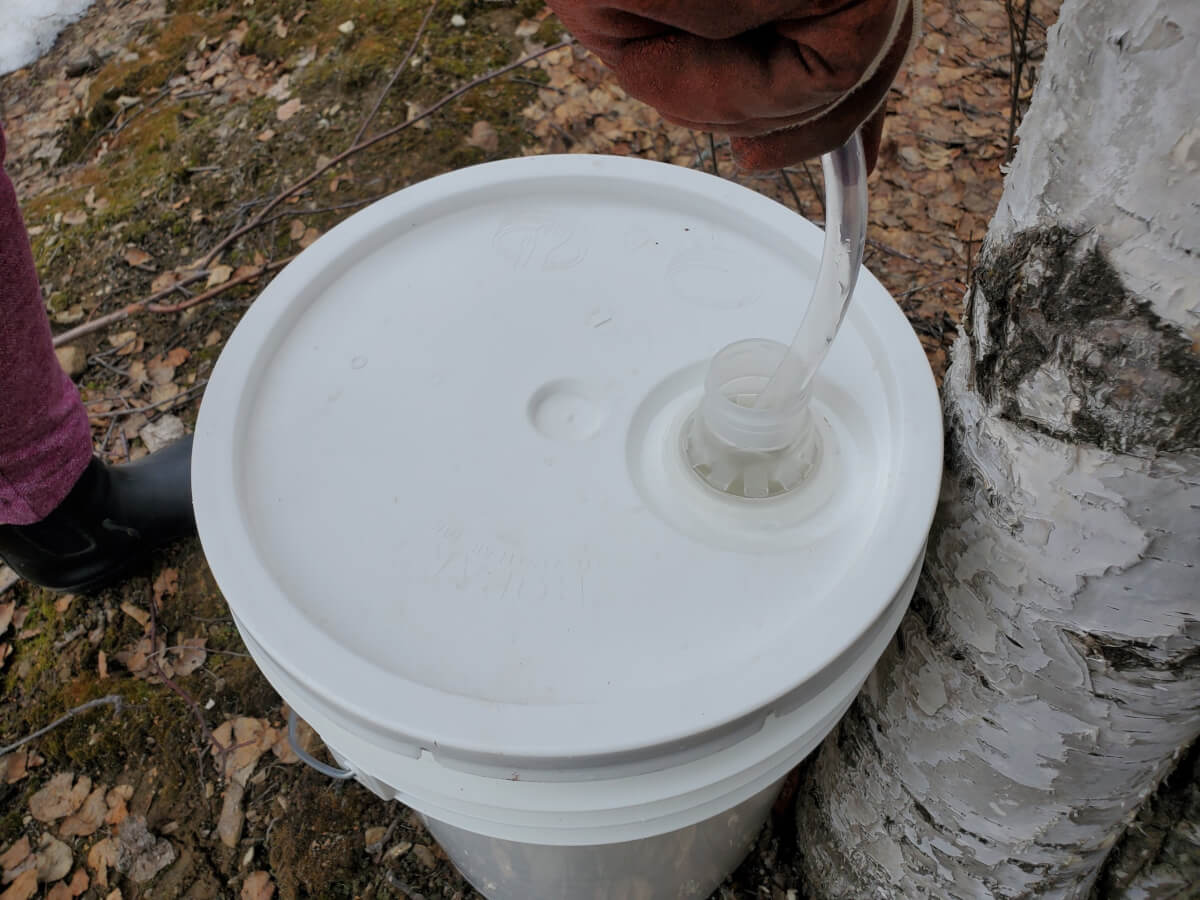
We also found that using a plastic tube connected between our tap and bucket was greatly beneficial.
This helps with keeping debris and bugs out because you’re able to use a lid on the bucket. We also no longer have to hang the bucket on the tree, which we are suspect reduces stress on the tree.
Our bucket lids have a little inlet, which allow us to put the tube right into the bucket. We cover this with a bit of aluminum foil to also help prevent bugs and debris from entering the bucket.
You can also double tap larger birch trees, typically those greater than 14 inches in diameter. This can help with reducing your labor efforts. Especially when it reduces the number of places you have to stomp through the snow to get to.
We’ve “figured out” that tapping four trees in each season offers us around five gallons of birch sap to boil down every day. We scaled our tapping efforts to our production limitations and this amount is perfect for our needs and abilities.
Most years, we try to keep our sap collection in a particular area. We change the trees that we use every season we tap our birch, offering previously tapped trees many years to recover.
What It Takes To Make Birch Syrup
The “hard part” of birch syrup production comes with making the actual syrup.
Birch syrup production requires around a 100 to 1 reduction in order to become actual syrup.
This means that 10 gallons of raw birch sap will produce only around 13 ounces of actual birch syrup.
If you are familiar with maple syrup production, this will strike you as significantly more intensive than maple syrup production.
The most common method of achieving this reduction is through the process of boiling.
Birch sap is perishable and must be stored in the freezer or refrigerator in order to prevent it from spoiling.
For us, storing many gallons of birch sap in cool conditions is a near impossibility. Thus, we decided to go about the sap reduction in two separate phases.
Processing Birch Sap Into Birch Sap Concentrate
For the first phase, we try to get a concentrate that is more easily stored. Instead of having to store many gallons of raw birch sap, we would prefer to store a concentrate that takes up much less space.
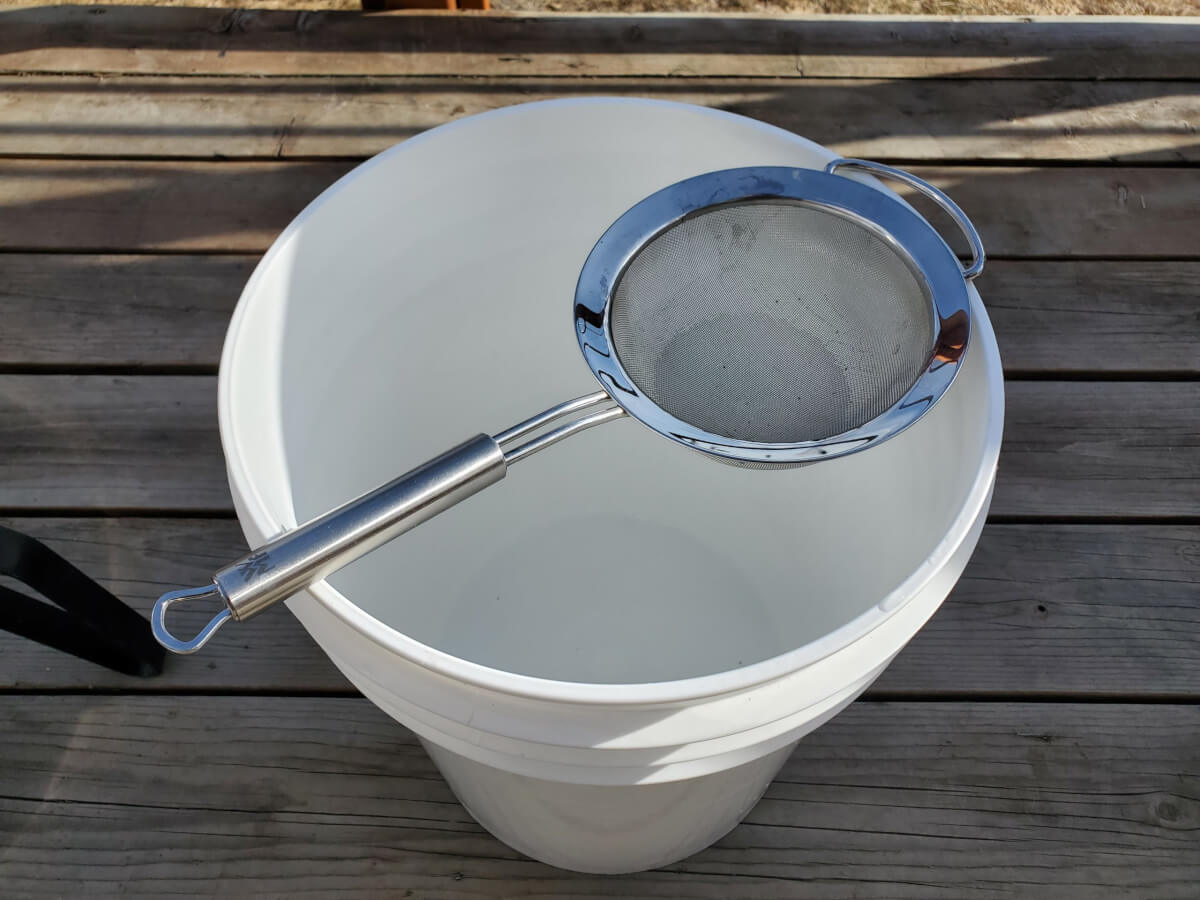
First, we fill our boiling vessel with our collected raw birch sap, filtered by a fine sieve to catch any debris, bugs or other undesirable things.
We then turn the heat to high and bring the birch sap to a boil.
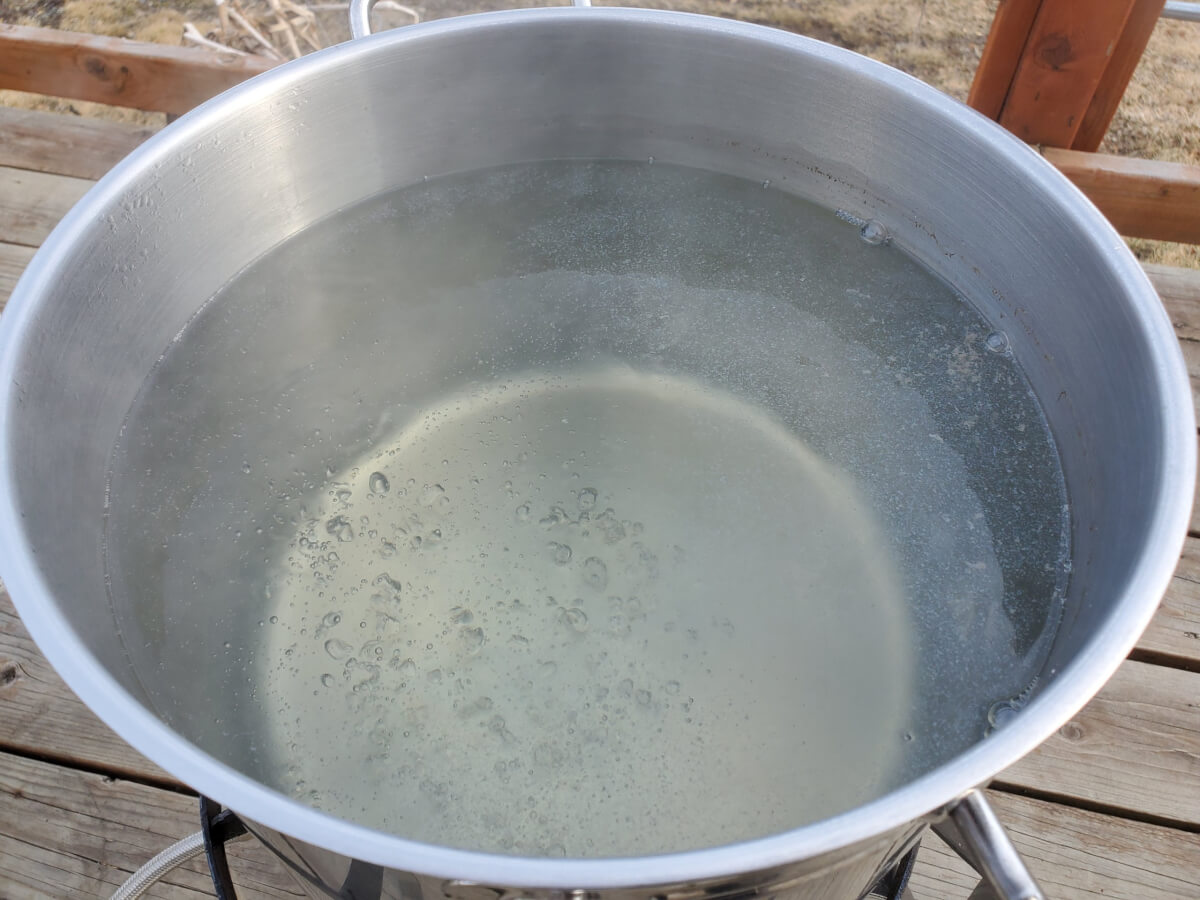
We are performing a basic reduction process where you boil the liquid to the point where it is a concentrate.
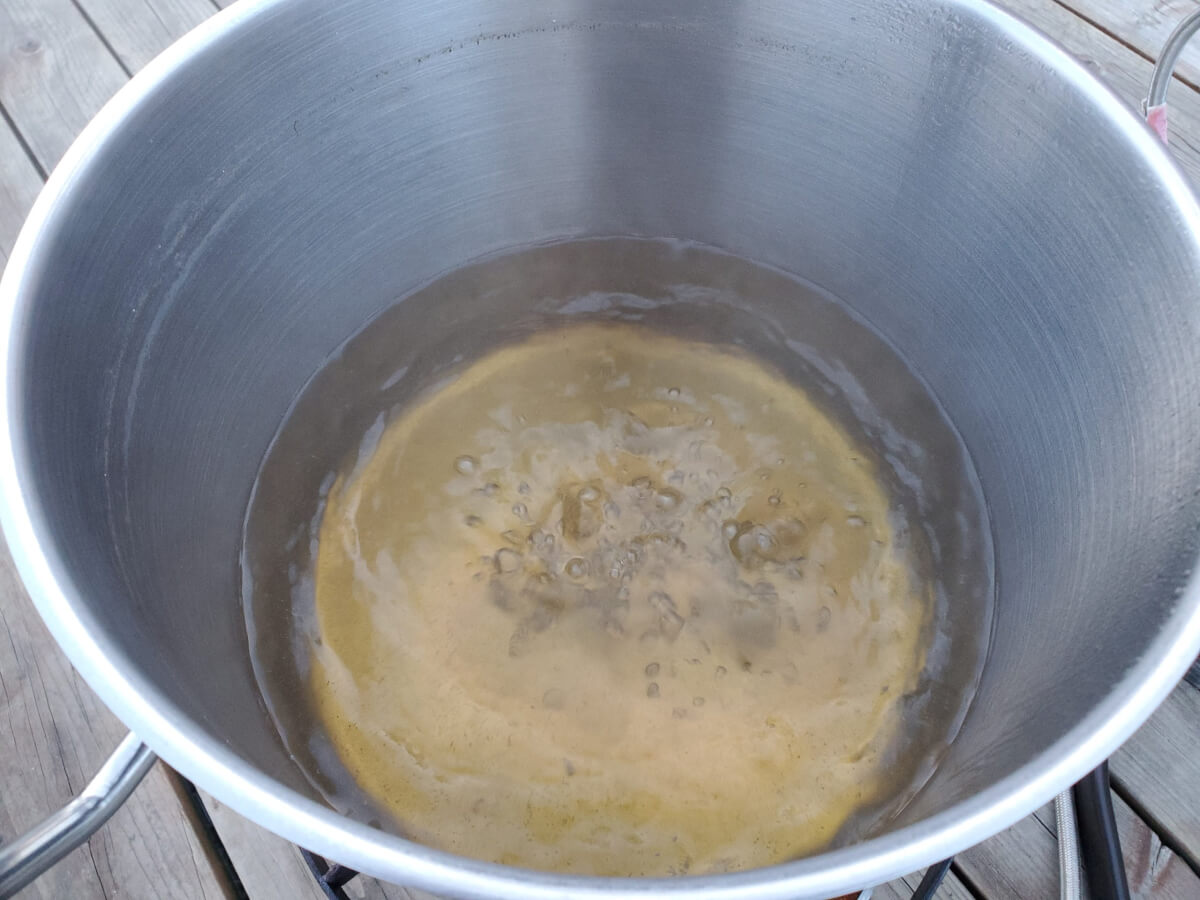
In this process, we aim to get every gallon of raw birch sap down to roughly a pint of concentrate. We typically process 5 gallons at a time, so we aim for around 5 pints of concentrate. Precision isn’t important at this stage!
As you might imagine, this process can take a long time. You can expect many, many hours of boiling your birch sap to get it into a concentrate.
Also, to allow the sap to properly evaporate, it’s best to leave any lids off. We sometimes put the lid on to speed up bringing the sap to a boil, but remove it for the remainder of the boiling session.
Typically, we process our raw birch sap every day that we are actively tapping. We want to get that perishable sap into storable form as soon as possible.
We use our kitchen sink with ice water to cool down our concentrate. From there, we typically store our concentrate in clean and sanitized growlers.
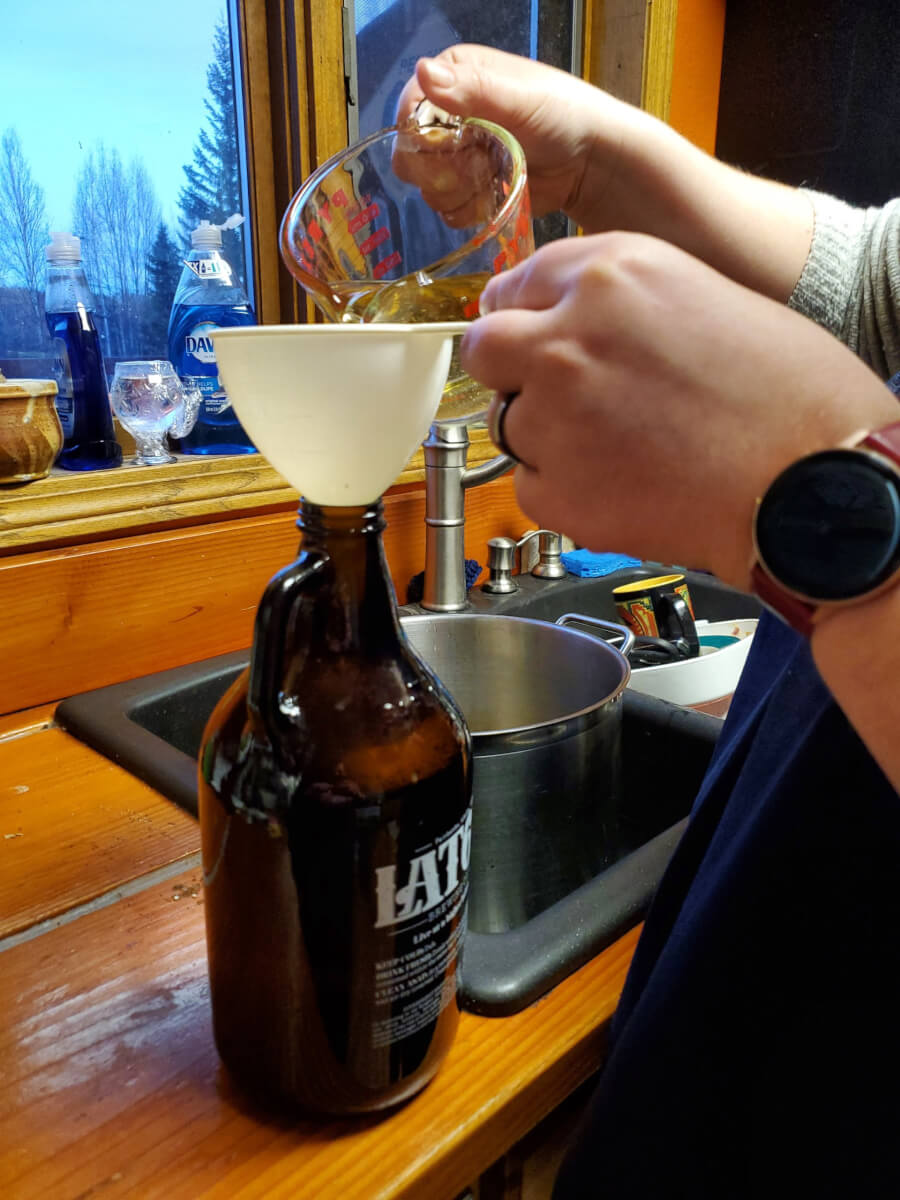
Once we get our concentrate into storable form, we store it in the freezer or refrigerator depending on how long it will be until we finish the processing. If storing in the freezer, be sure to allow enough extra air volume to account for expansion.
Oh Yeah. There’s A Thing Called Super Concentrate
Depending on our overall production needs, some years we need to explore the concepts of super concentrate.
This is where we boil down multiple batches of birch sap concentrate into one big “mega batch” of super concentrate.
We’ll typically combine our seasonal harvests of birch sap concentrate to create a “seasonal” aspect to our annual harvest. This is also a useful production technique, particularly when your batch sizes get into the partial to multiple gallon range.
You can continue to reduce your birch sap as is necessary to achieve the desired result. Some years, it takes us 3 to 4 reduction processes.
Processing Birch Sap Concentrate Into Birch Syrup
The second phase of our birch syrup production comes once we’ve collected all our raw birch sap for the season and have all of it reduced into concentrate.
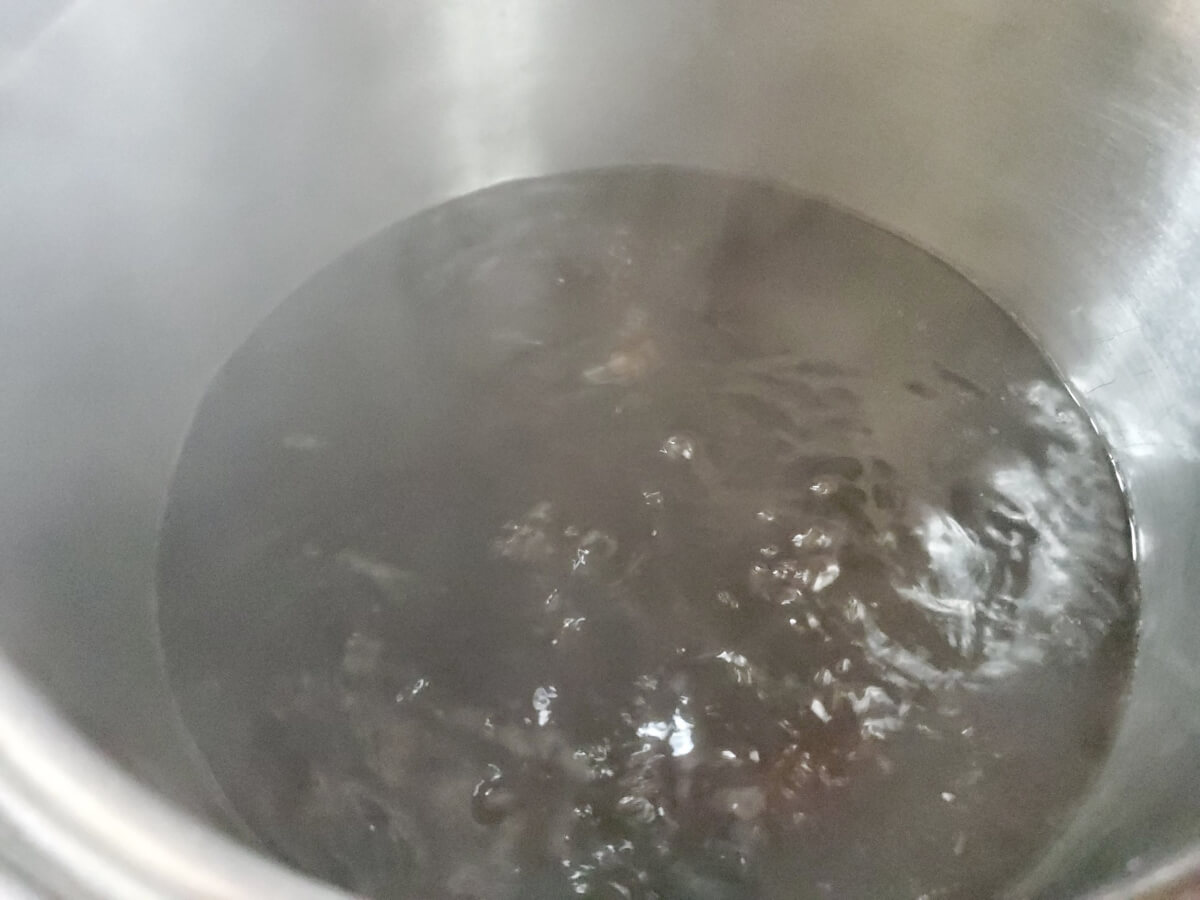
We combine all the concentrate from the season into our boiling vessel. We will then boil this concentrate down even further until it becomes actual birch syrup in a consistency that we prefer.
Figuring out when the syrup is actually done is really up to you. You’re not expecting a “thick” syrup. Home made birch syrup tends to be a bit lighter in consistency than other syrups out there.
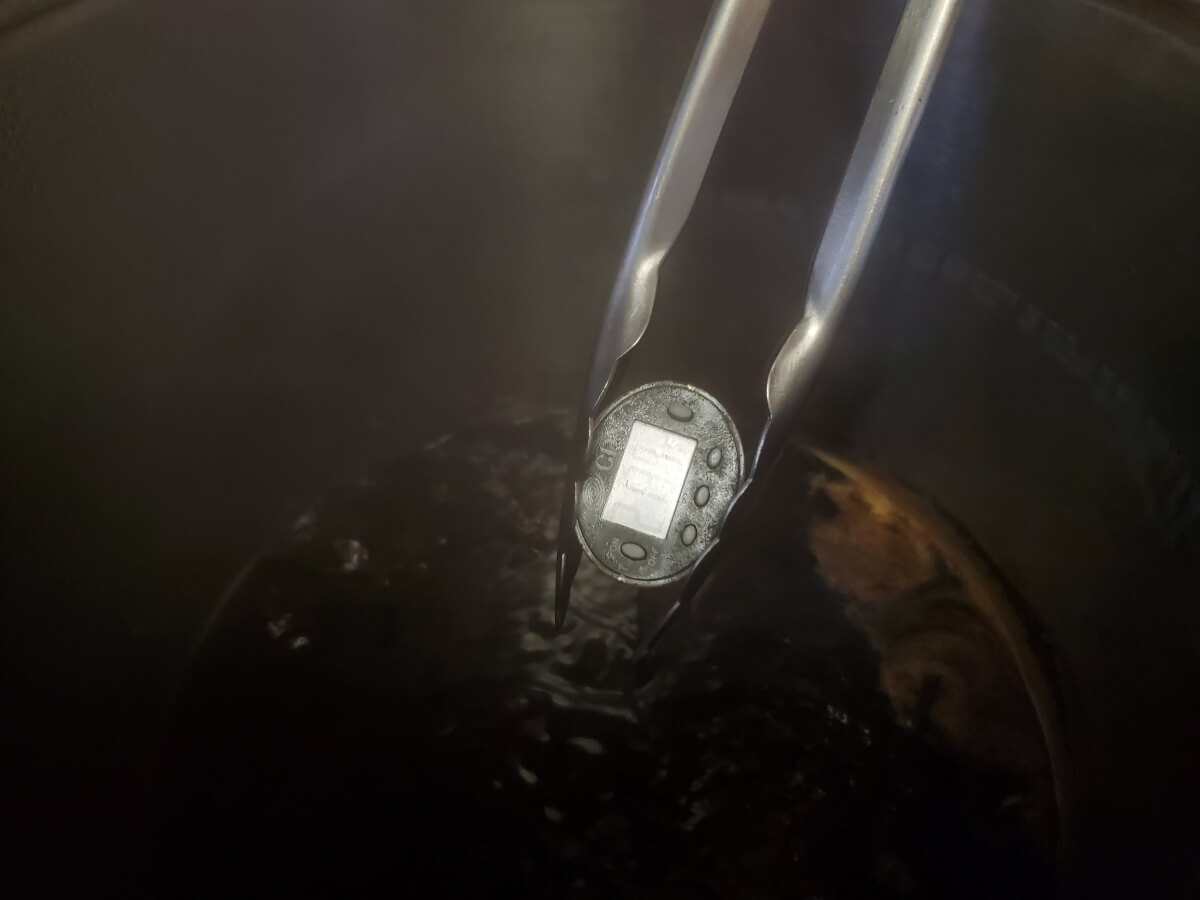
The method we use to determine when our birch syrup is “done” is by temperature.
Once all of the water boils off, you’re left with a sugary syrup. This syrup can be brought to temperatures above boiling temperatures of 212 degrees Fahrenheit.
We generally recommend between 215 and 220 degrees Fahrenheit as a rough target of “doneness.” Lower temperatures will result in a lighter, thinner syrup. Higher temperatures will be a more thick, darker syrup.
Once this process is completed, we’ll then slightly cool the syrup in preparation of putting our finished birch syrup into sanitized bottles or jars.
We like to use a coffee filter as a “final” sieve, to separate any impurities that might have made it through the process. Our common canning gear comes in helpful here.
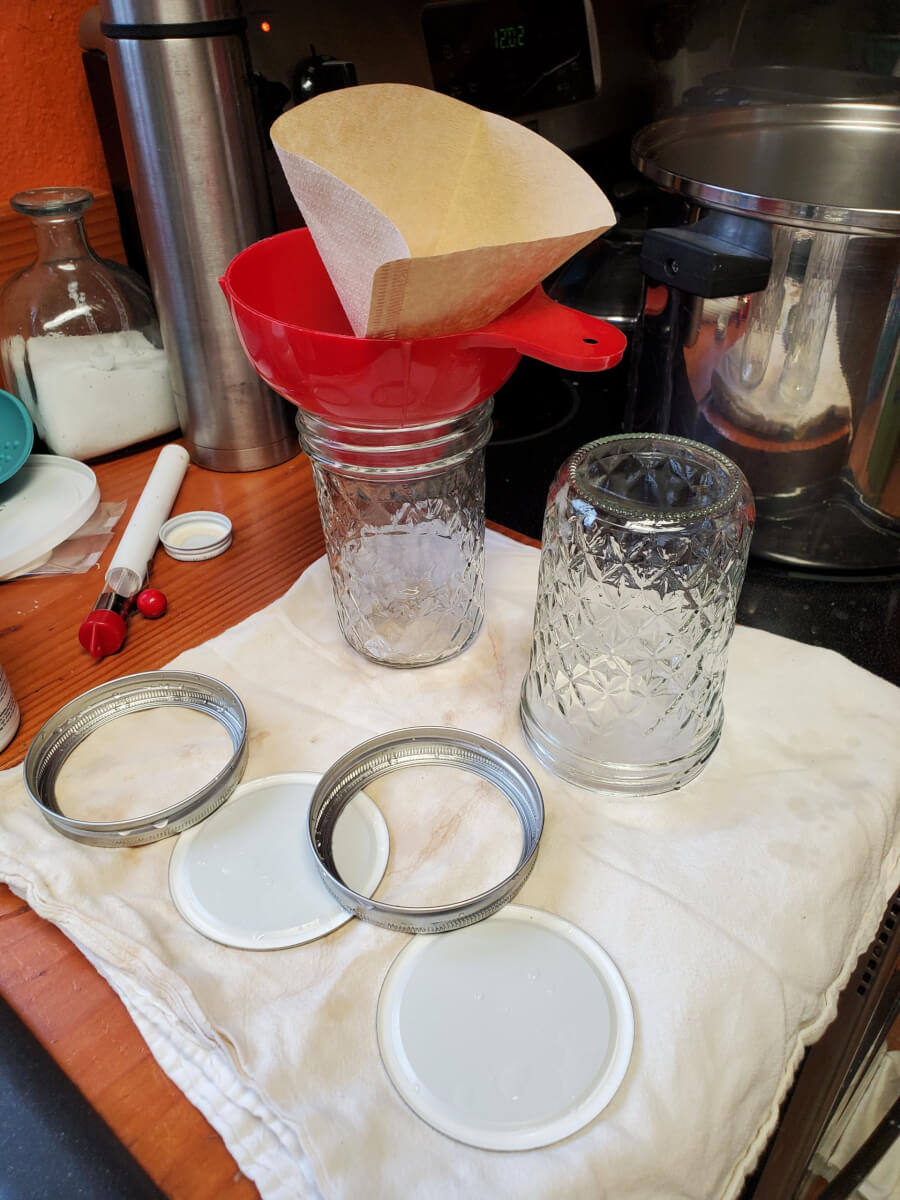
Once our syrup is finished, we put it into our clean and sanitized jars or bottles. These can be stored in the refrigerator or freezer (observing headroom requirements!) for long term storage.
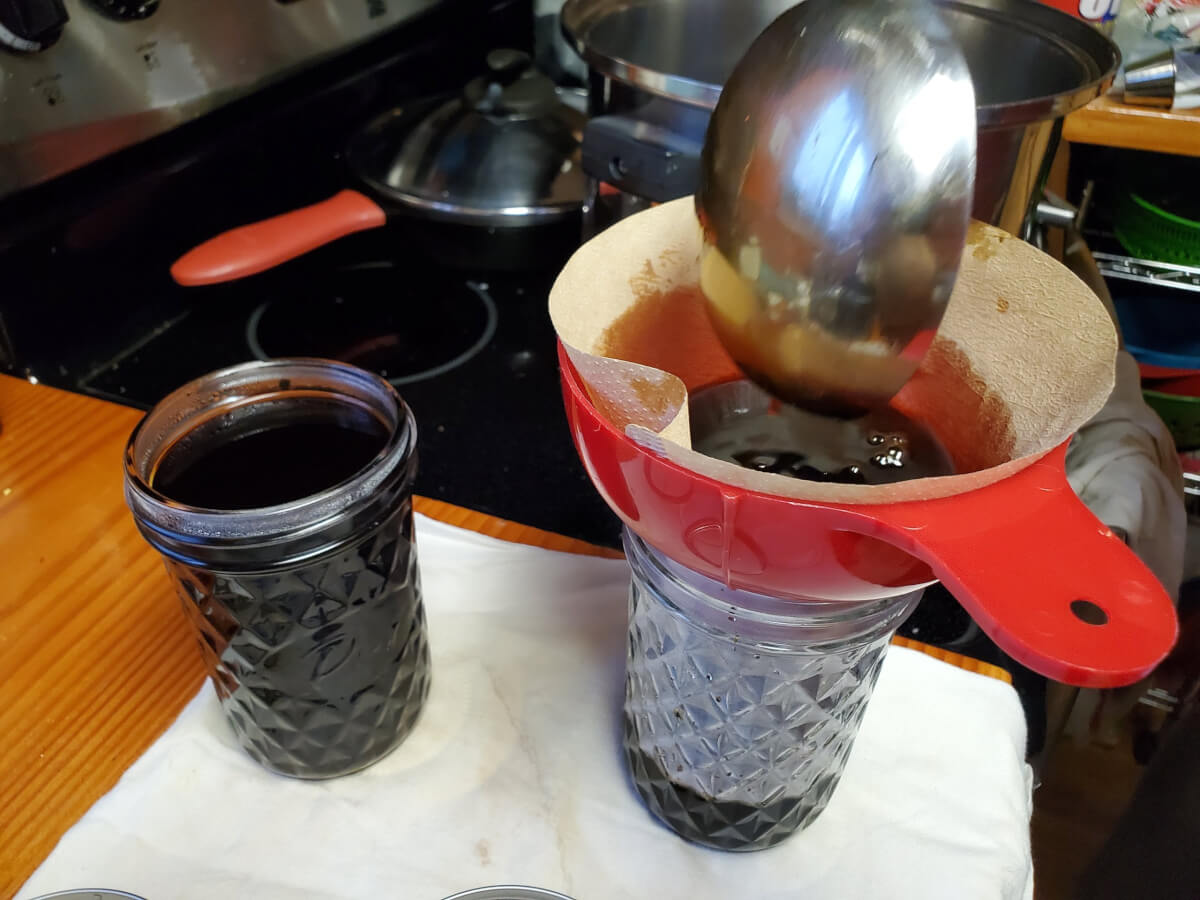
For reference of scale, we are expecting to store about 26 ounces of birch syrup from this harvest. This started as around 20 gallons of actual birch sap.
A Word Of Warning About Processing Syrup Indoors
One thing we didn’t quite predict was how much moisture this process would create. We initially did our reduction processes on our home stove. This turned out not to be the best of ideas.

Boiling birch sap into birch syrup is a somewhat time consuming process that requires a lot of time boiling down. Expect a lot of steam!
In our first birch syrup attempt, we accidentally set off our fire alarms quite frequently. As it turns out, many fire alarms can inadvertently detect high levels of humidity as smoke.
Even opening our windows and running fans on full blast wasn’t enough to remove the humidity fast enough.
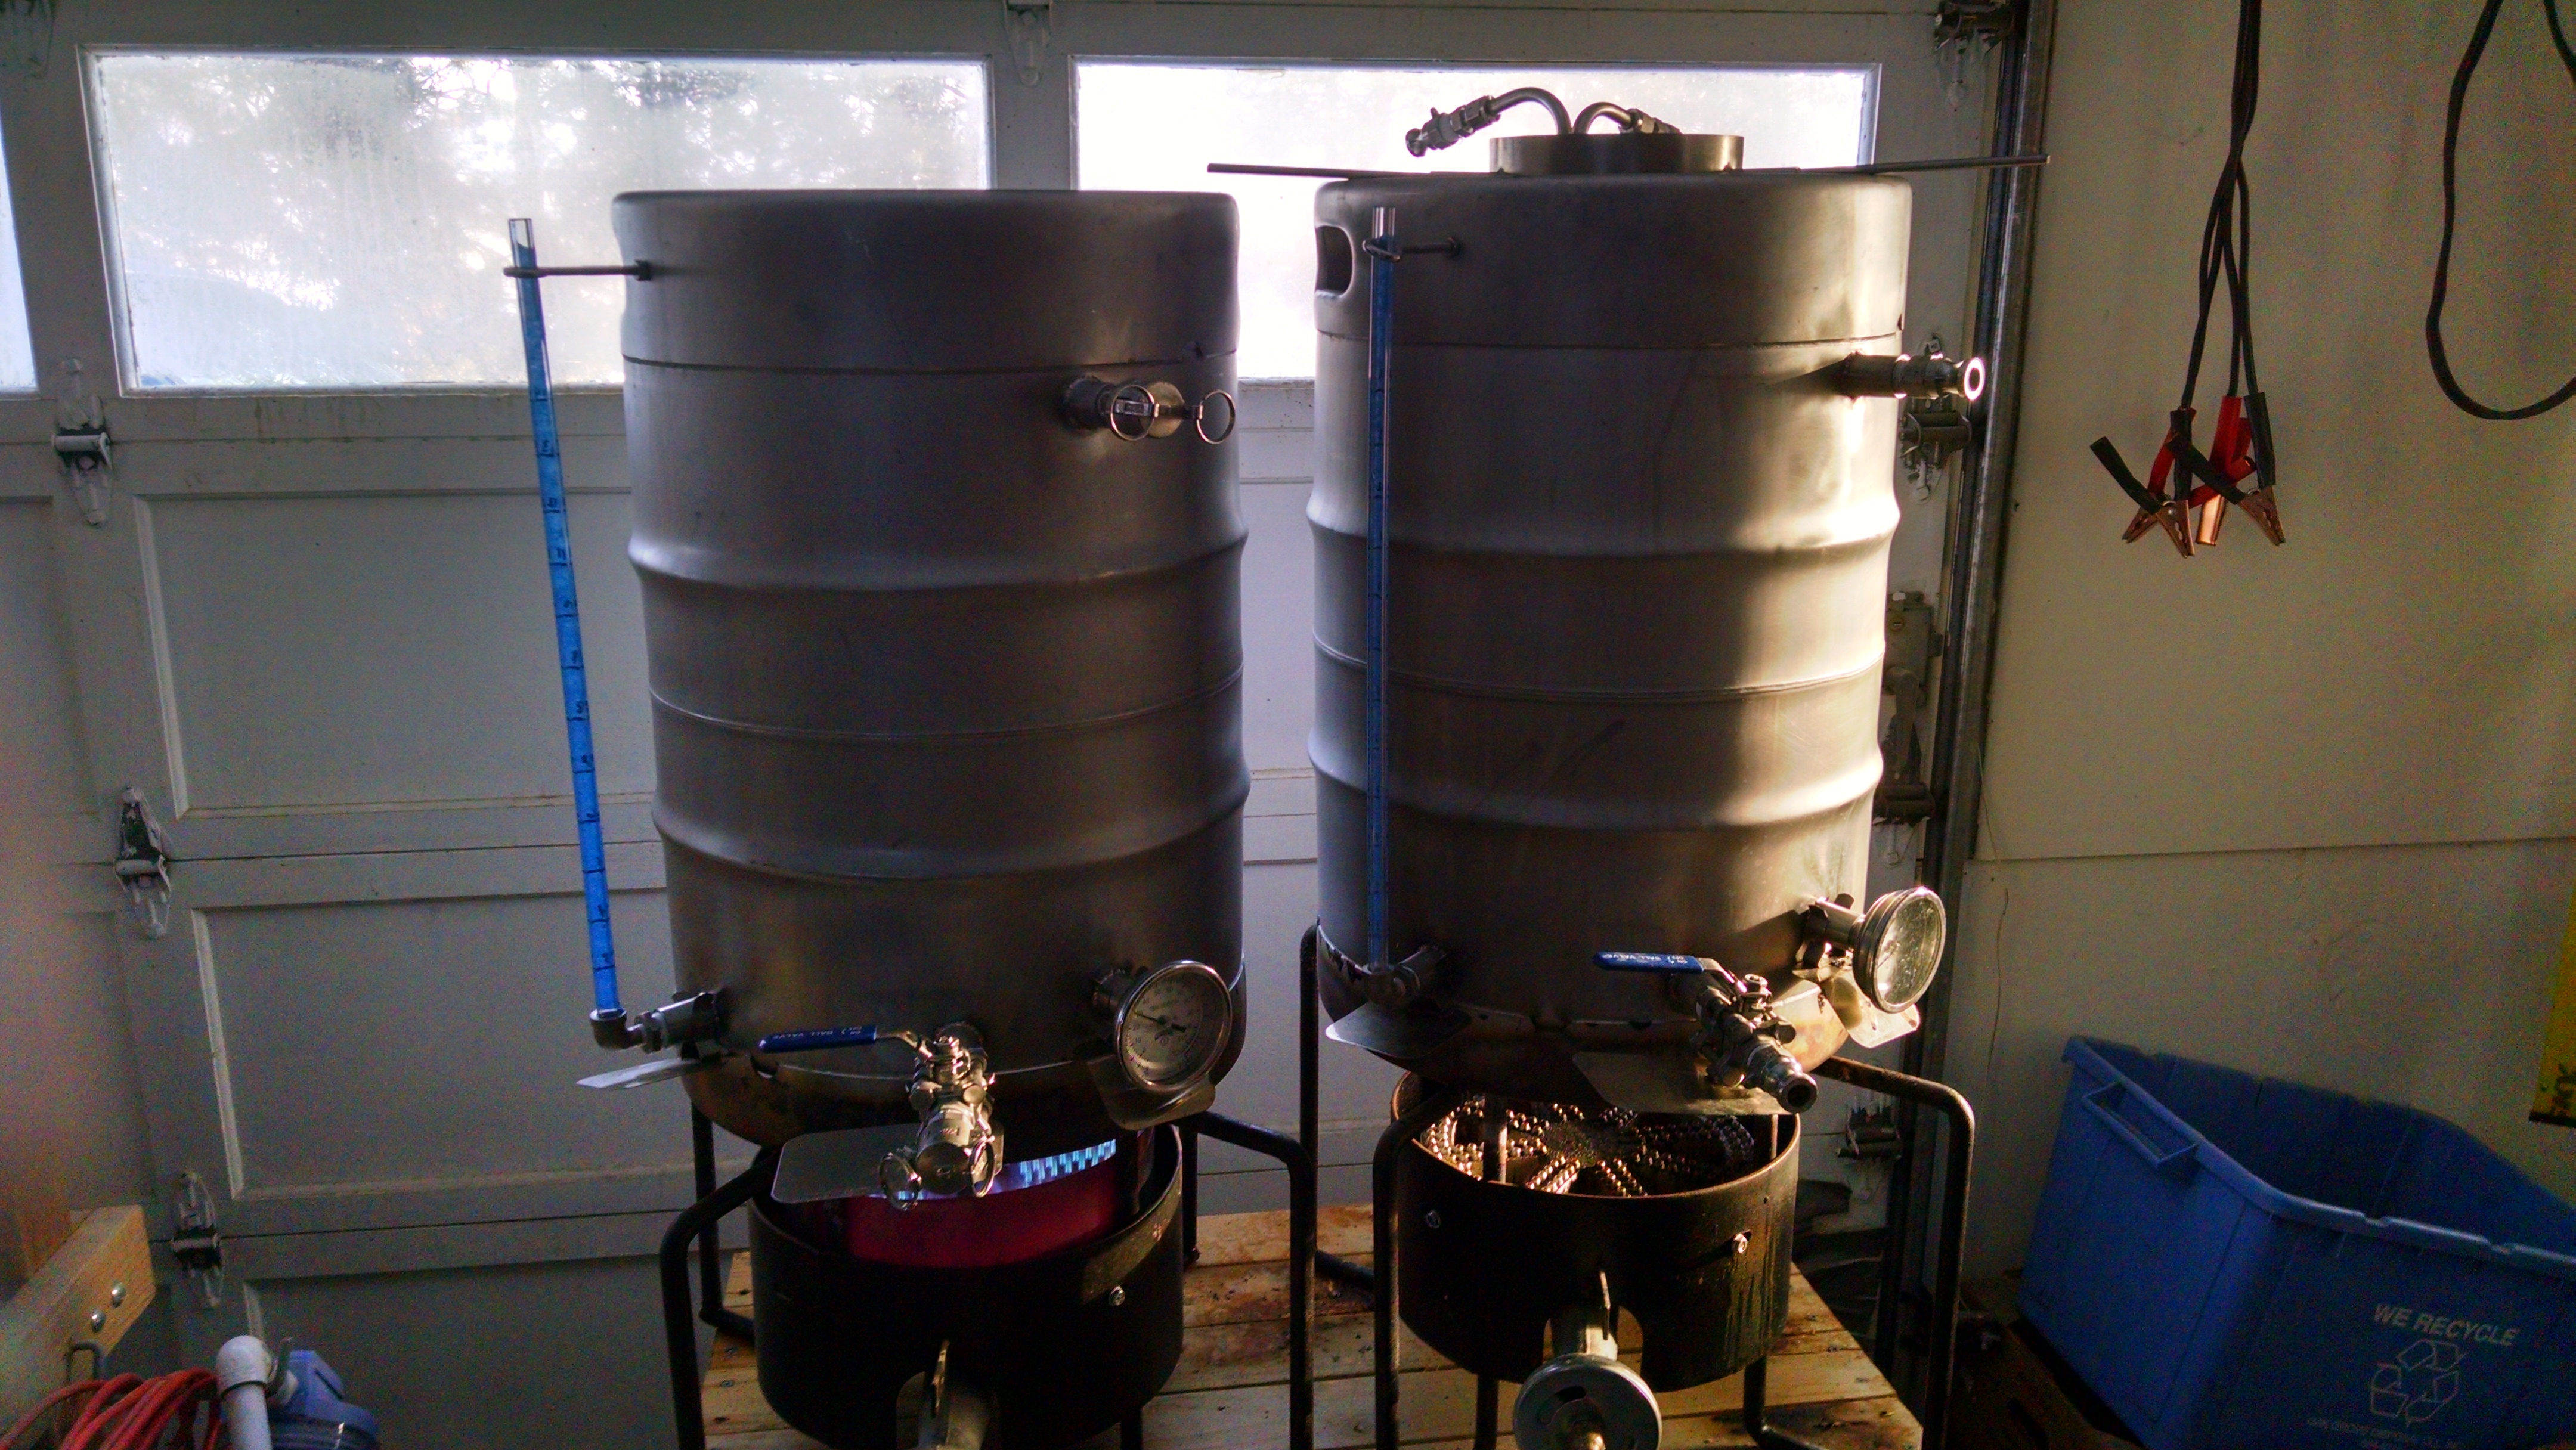
We have since moved our syrup production outdoors, using a propane burner.
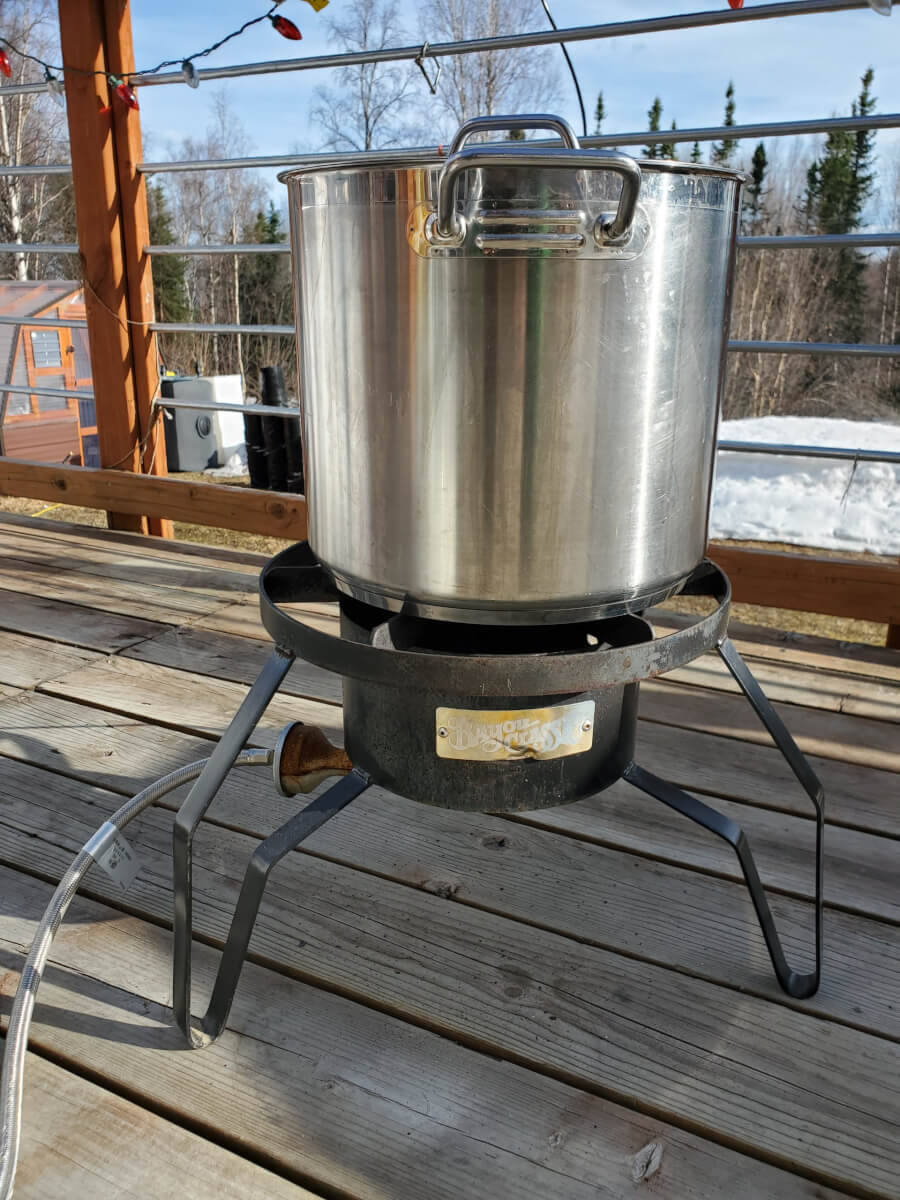
We do tend to “finish” our syrup indoors on our stove. This gives us a lot of granular heat control. While it still produces steam, typically it’s not as much as raw birch sap processing.
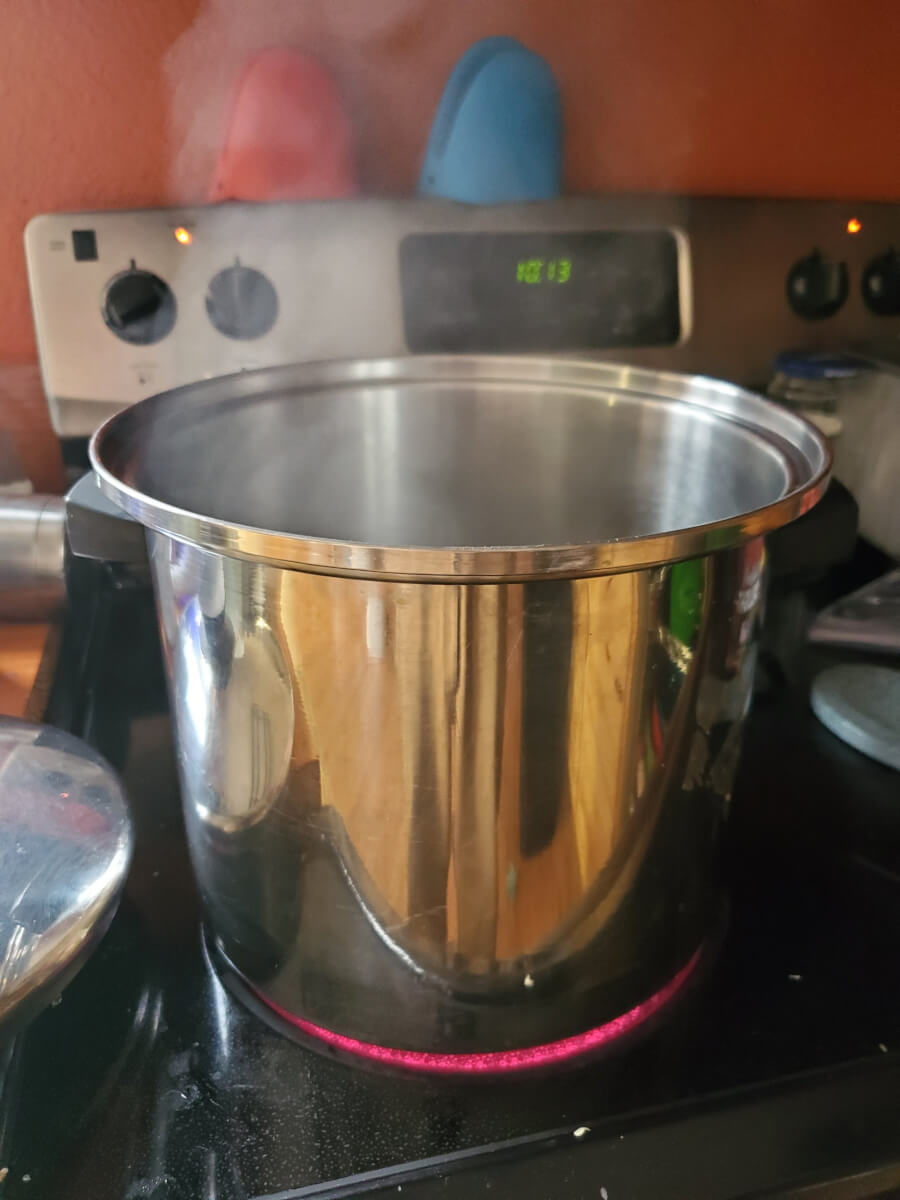
Also, we started our birch processing journey with a 2 gallon pot as our boiling vessel, but found this really increased the time involved by a lot. Having a larger 5 gallon boiling pot has been beneficial, given the quantities of liquid that we’re dealing with.
These changes have significantly eased the process and also made it much faster.
While there is a cost for propane, there was also a cost to running the stove for many hours over the day.
Notes About Birch Syrup Sanitation
While it’s not commonly stated that food safety is a factor in birch syrup production, we know that is.
Cleaning and sanitation are two different things. Cleaning is simply the process of making something clean. Sanitation, however, is about killing unseen bacteria and other bad critters from your equipment.
It’s a good idea to sanitize anything that will touch either birch sap or birch syrup. Especially once the boiling processes are fully completed. Your final storage containers, any utensils used and your immediate workspace should be properly sanitized.
This will help reduce your exposure to problems with spoilage and also other bad things that can occur. Birch sap is a sugary mixture, highly prone to spoilage. Sanitation can offer many years of trouble free storage.
We like to use a product called Starsan. It’s a commonly available sanitizer used in home-brewing and professional brewing applications.
Starsan is a great sanitizer because it’s no-rinse when used in the appropriate concentrations. We like to put this in a spray bottle that can then be applied to anything we need to sanitize quite easily.
There are other sanitation techniques you can use such as bleach solutions, but these are definitely NOT no-rinse! You can also boil equipment for 15 minutes, however, this doesn’t work for plastic.
You can also go one step further in cleanliness, which is sterilization. In the home setting, this means putting your jars and utensils into a pressure canner at 15PSI for 15 minutes.
Doing this ensures nothing is alive. While sterilization is heartily recommended, we’ve found adequate results using commercial grade acid based sanitizers.
Caring For Your Birch Trees & Long Term Strategies
Obviously, this process is slightly intrusive for the tree. It does not harm the overall health of the tree, or reduce the expected lifespan.
In general, there are two philosophies about what to do with the left over hole. We prefer to allow the tree to heal itself naturally. Others choose to put wood chips, sawdust or a dowel in the hole.
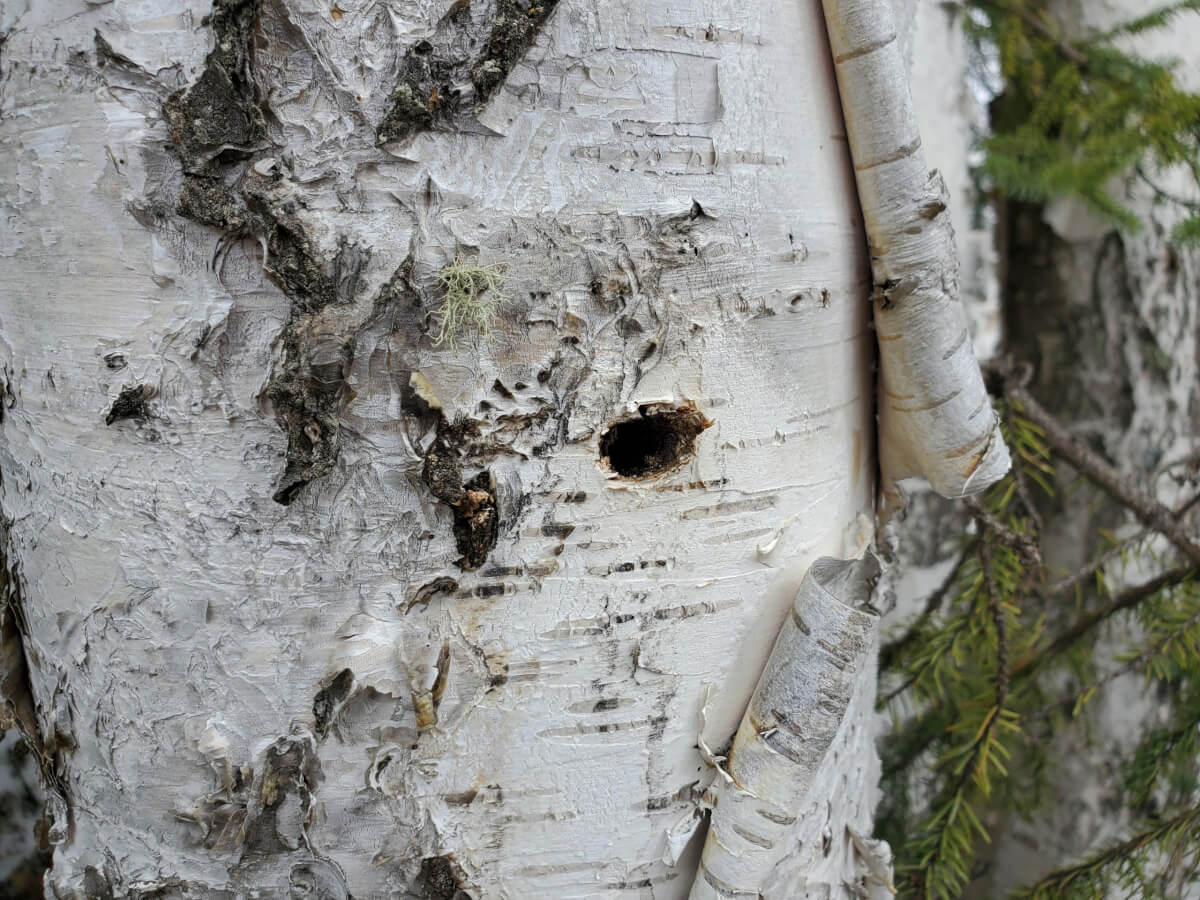
This picture illustrates a tap hole, about three years after it was tapped. The tree does not “continue to flow” out of the hole, it has repaired itself.
Trees have a natural ability to heal themselves, so we think that’s best. It also doesn’t present risk of infection or foreign, non-natural products getting in the tree. There are also no concerns about the tree flowing out of the hole in subsequent seasons.
Also, we alternate our trees every season that we tap. We want to offer the tree many years in between tapping, allowing it appropriate time to fully recover. We haven’t run into a point where we have to re-tap trees that we’ve previously tapped.
Notes On Cleaning Your Equipment
Obviously, it’s important to use clean equipment.
For the most part, everything we’re using relating to birch tapping is easily hand washed or put into a dishwasher.
We even put our buckets in the dishwasher. This is sometimes an option for many modern dishwashers that are powerful enough to clean large items.
What we really wanted to touch on was hose cleaning. This isn’t something commonly practiced outside of homebrewing, a few other niche hobbies and in our case, birch tapping.
While you can just immerse the tubing or run water through it, it’s prone to missing spots due to air bubbles getting trapped. This can allow bacteria to thrive unabated, which is definitely something you want to avoid.
We use a small aquarium pump with a friction fit hose barb for hose our cleaning process. We simply put this in our sink with a little bit of cleaning agent, attach the hose and run the pump for a few minutes. You can use dry dishwasher detergent, dish soap or specialty chemicals like Powdered Brewery Wash (PBW).
Typically, we wash our hoses just before the start of the season and also after the season is completed. Since we only tap every 2-3 years, we think it’s a good idea to do both.
Small Scale Birch Production Is Totally Doable!
Small scale birch syrup production is easily done in the home. Although it is somewhat time intensive, it has become a very rewarding hobby for us.
We generally tap our trees once every two or three years, once our supplies have dwindled down.
Birch syrup is a fantastic DIY treat that you will appreciate every time you use it.
If you’ve never had birch, it’s a bit more savory and complex than maple syrup. While it’s not a culinary equivalent to maple syrup, it can be used in many similar ways.
For larger scales of production, you might require some specialized and specific equipment. I have considered using my home brewing equipment for getting to larger scale production in the future, should we desire such a thing.
Larger birch syrup production houses use dedicated reverse osmosis systems in their production process. This is obviously a bit beyond the scope of this post, but we wanted to mention it to any reader that is looking to take that next step.
We are so excited to embrace this “living off the land” culture. It truly is amazing that the harsh climate of interior Alaska offers so much opportunity to those that choose to pursue it.
That’s All We Wrote!

Having a good time? We have an ever growing list of insightful and helpful subarctic & cold climate gardening articles, waiting out there for you!
- Cold Climate Gardening Basics 👉
- Growing Your Garden From Seed Indoors 👉
- Advanced Cold Climate Gardening Techniques 👉
- Plant Specific Cold Climate Growing Guides 👉
- Subarctic Perennial Food Forests & Foraging 👉
- Indoor Garden Lighting & Grow Rooms 👉
- Greenhouses & Temperature Control 👉
- Harvesting & Food Preservation 👉
- Solving Cold Climate Garden Problems 👉
- 1 Minute Reads On Tons Of Garden Topics 👉
FrostyGarden.com is 100% ad-free and we do not use affiliate links! This resource is voluntarily supported by our readers. (Like YOU!) If we provided you value, would you consider supporting us?
BTW, from some tree nurseries in Canada & parts of the northern & northeastern states both butternut (white walnut) & black walnut trees can grow in zone 2 not for mature nut production but can be used for other purposes & the sap from nut bearing trees is like maple syrup. The sub artic can be a place for these types of trees for syrup. It would be interesting if there are any hardy maple trees for zone 2. Also it seems like sugar beets can grow in zone 2 & if you can get sugar & molasses from sugar beets. I know honey can be produced in the sub artic with packaged bees just for each season & some types of Siberian honey bees that can over winter with additional care.
One question, is there anything you have to do to the hole left in the tree when you remove the tap?
This is new to me. A lot of good info! Thanks!
There are two primary schools of thought on that. Ours is that the tree will recover on its own, given enough time. We spread out our harvest among many mature birch across multiple years to allow that time. So that’s how we roll.