
Every year, we grow many hundreds of flowers and vegetables from seed. In this post, we are sharing the equipment and techniques we use to grow a huge diversity of garden starts.
If you’re brand new to seed germination and growing your own garden starts, you might want to start with this overview piece first.
While our seed germination and garden starting methods and equipment have changed over the years, we’ve tried to focus on building an extensible and standardized process, regardless of the plants we are growing.
Our techniques utilize equipment that optimizes the space we have to grow as many high quality garden starts as is possible.
Step One! Figure Out Your End Goal
As we learned and built our seed germination setup, we continually found ourselves having to balance quality against quantity.
Our indoor gardening space was so cramped and we were always running into various problems.
This wasn’t the proposition we wanted.
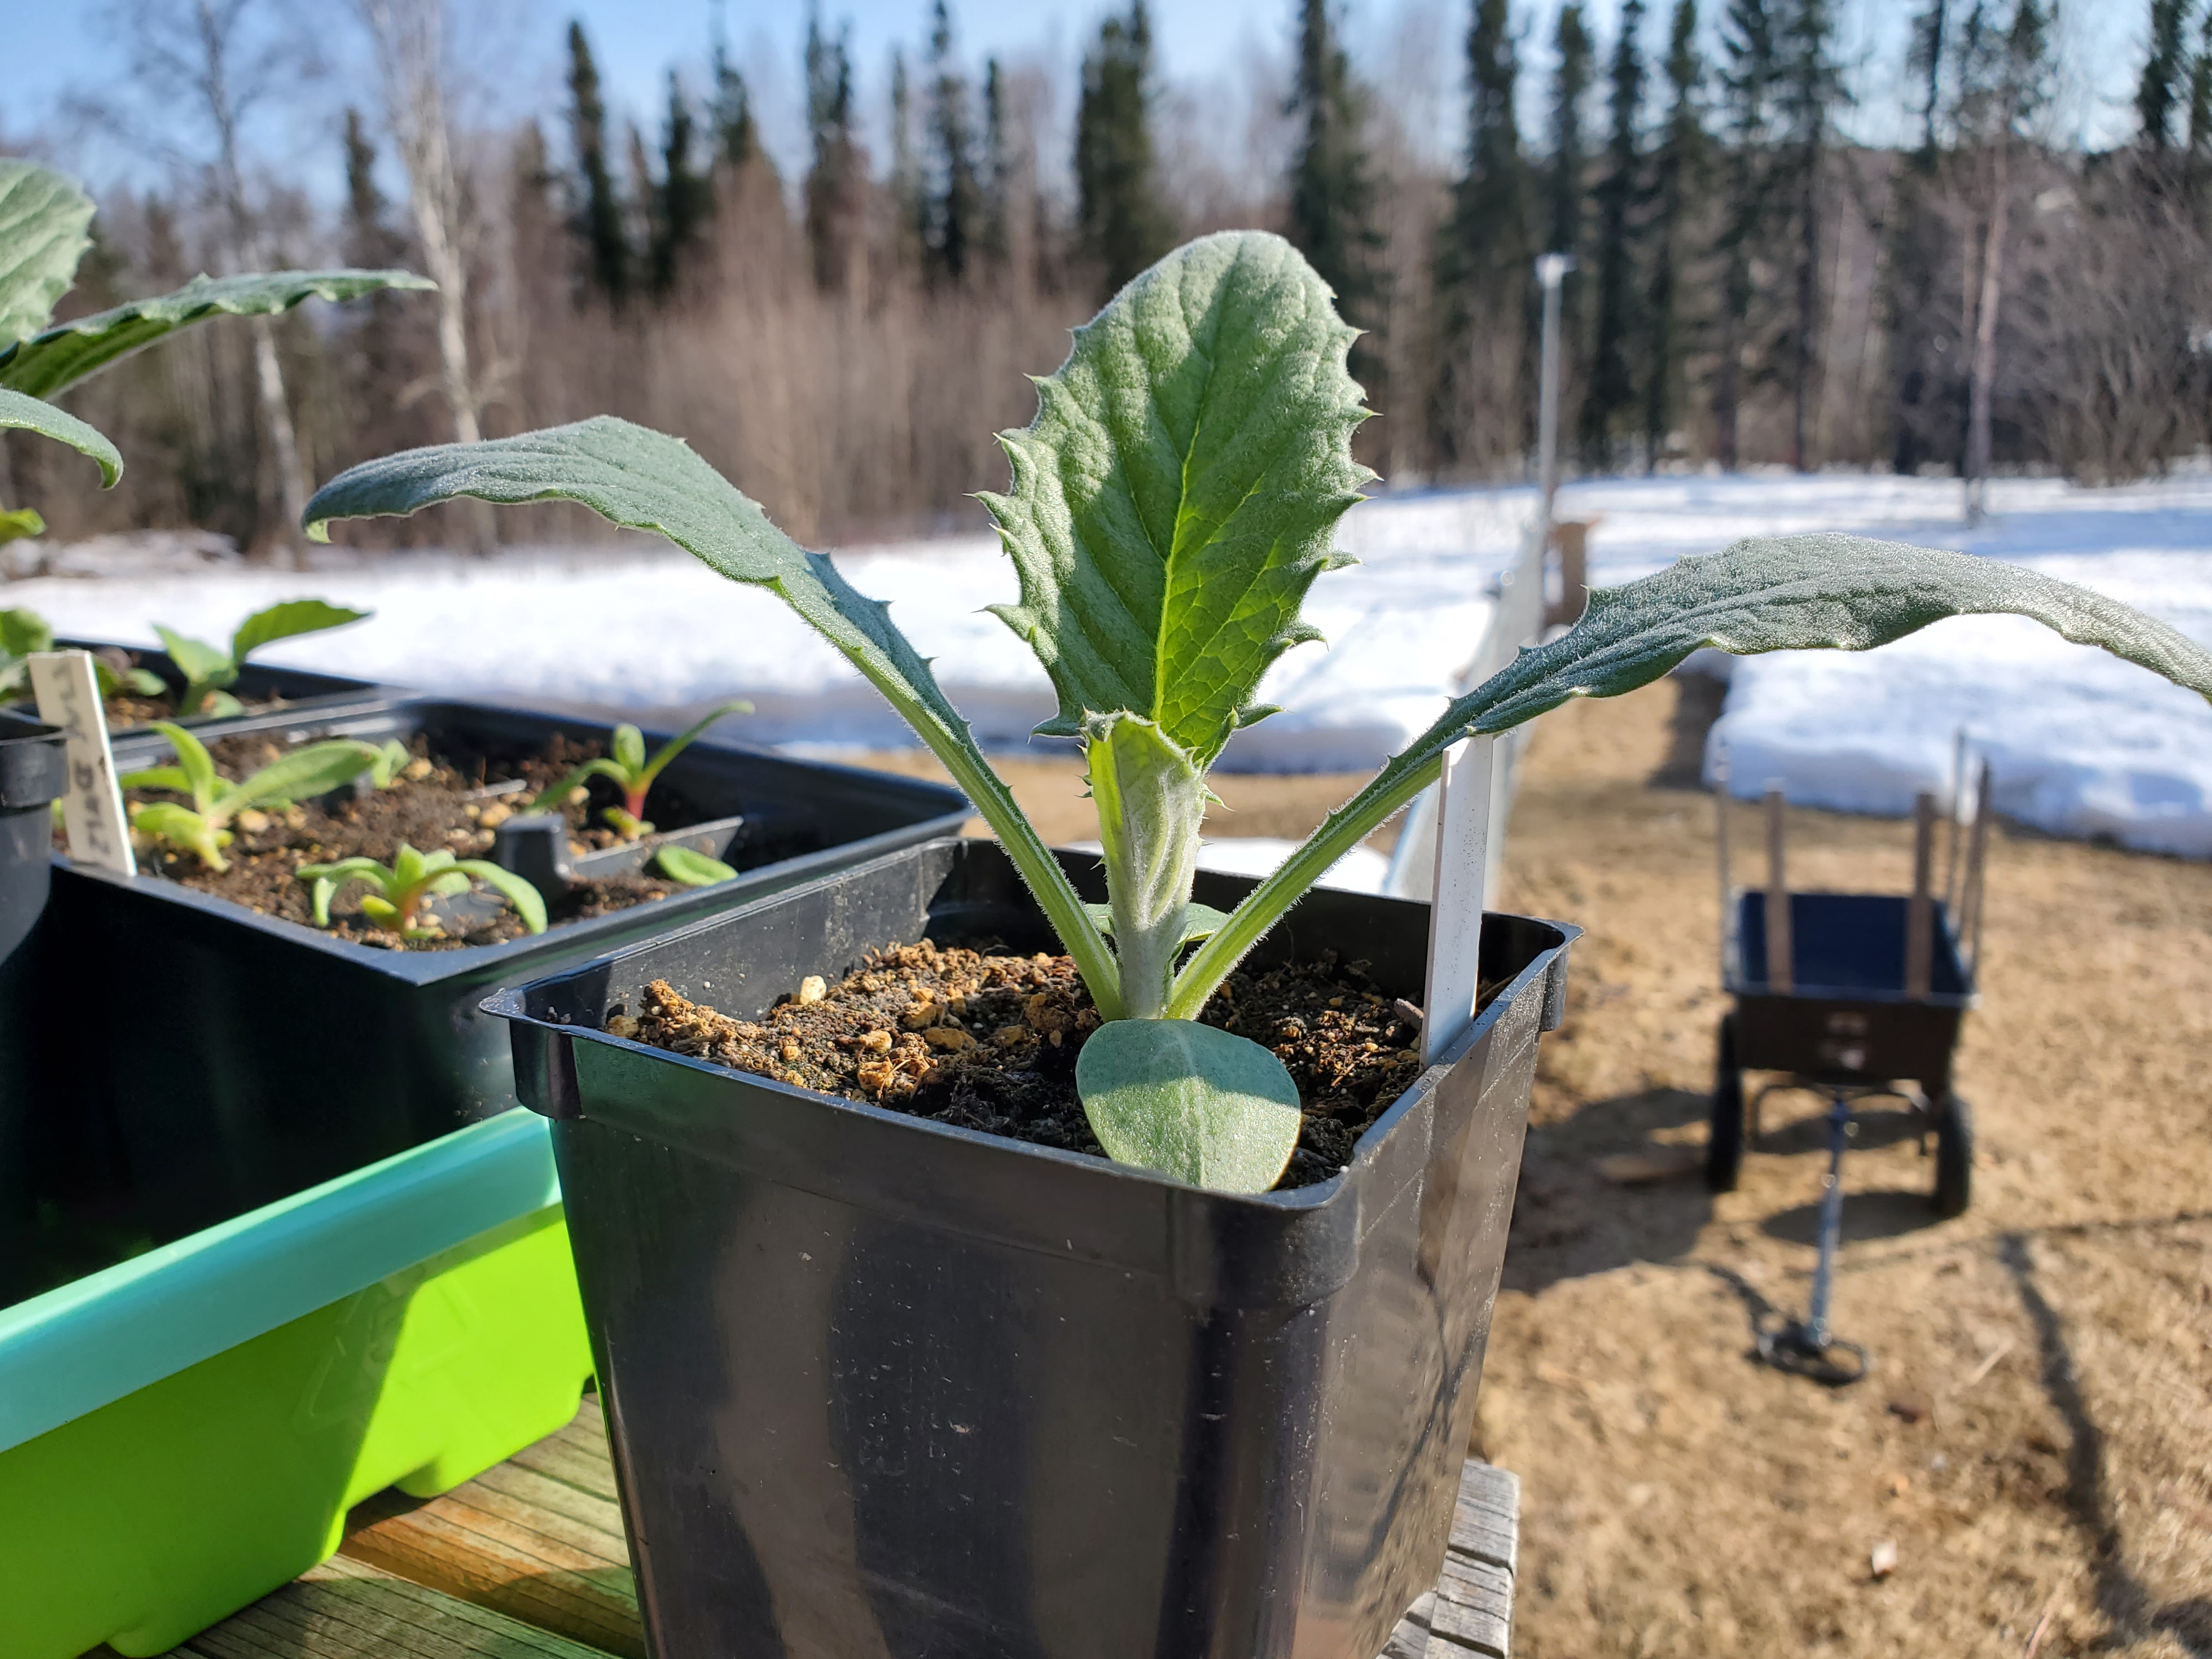
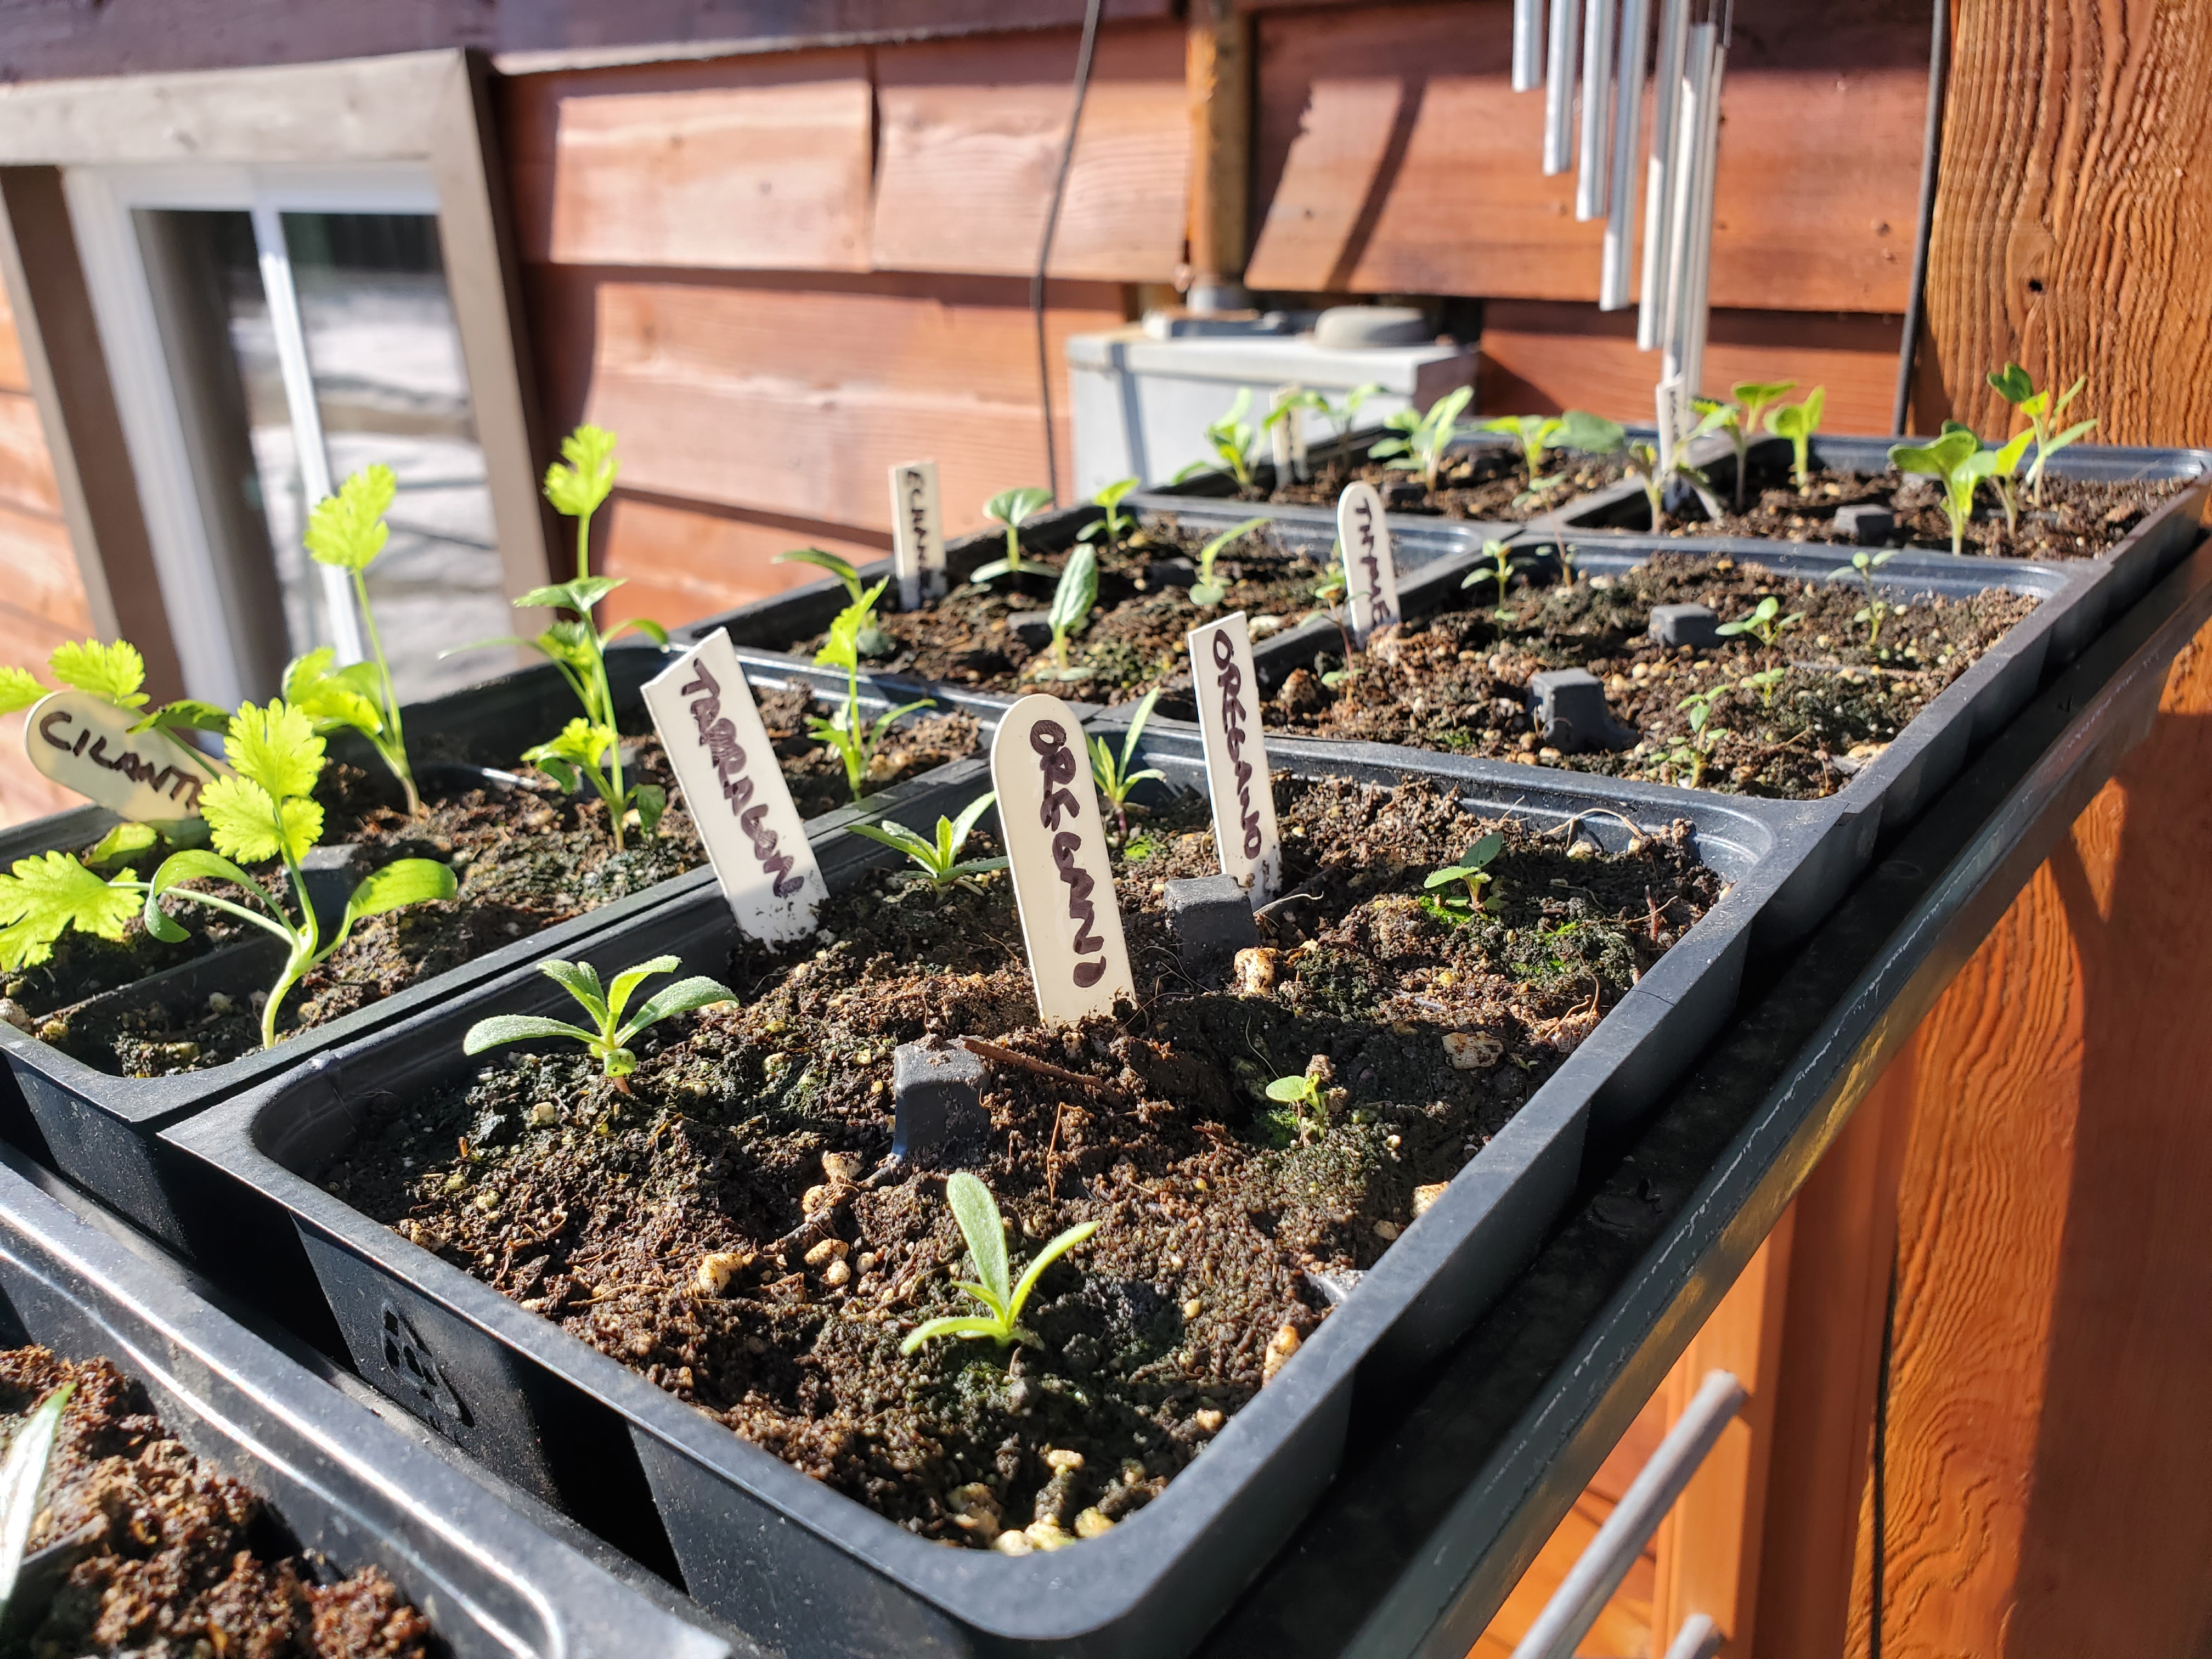
This is an artichoke that is several weeks old. We lovingly grew it from seed and have begun the process of hardening it off for outdoors!
We decided to essentially create a list of priorities of what was important to us and built our entire seed starting methods around it. Those priorities were:
- System must be relatively compact and also be capable of growing many hundreds of plants of different varieties
- We want to grow high quality garden starts, similar to what we might buy
- Our equipment needs to be relatively sustainable and re-useable, as much as possible
- Use as few parts and pieces as was possible, especially less “snowflakes” we have to manage
While we didn’t want to spend a lot of money, we decided not to put a cost factor into our priorities. Basically, we decided to spend what it took to do it right, but no more.
The Major Components Of Our Seed Germination System
It would be helpful to provide a basic overview of the equipment that we use, before we get into the details of how we use the equipment.
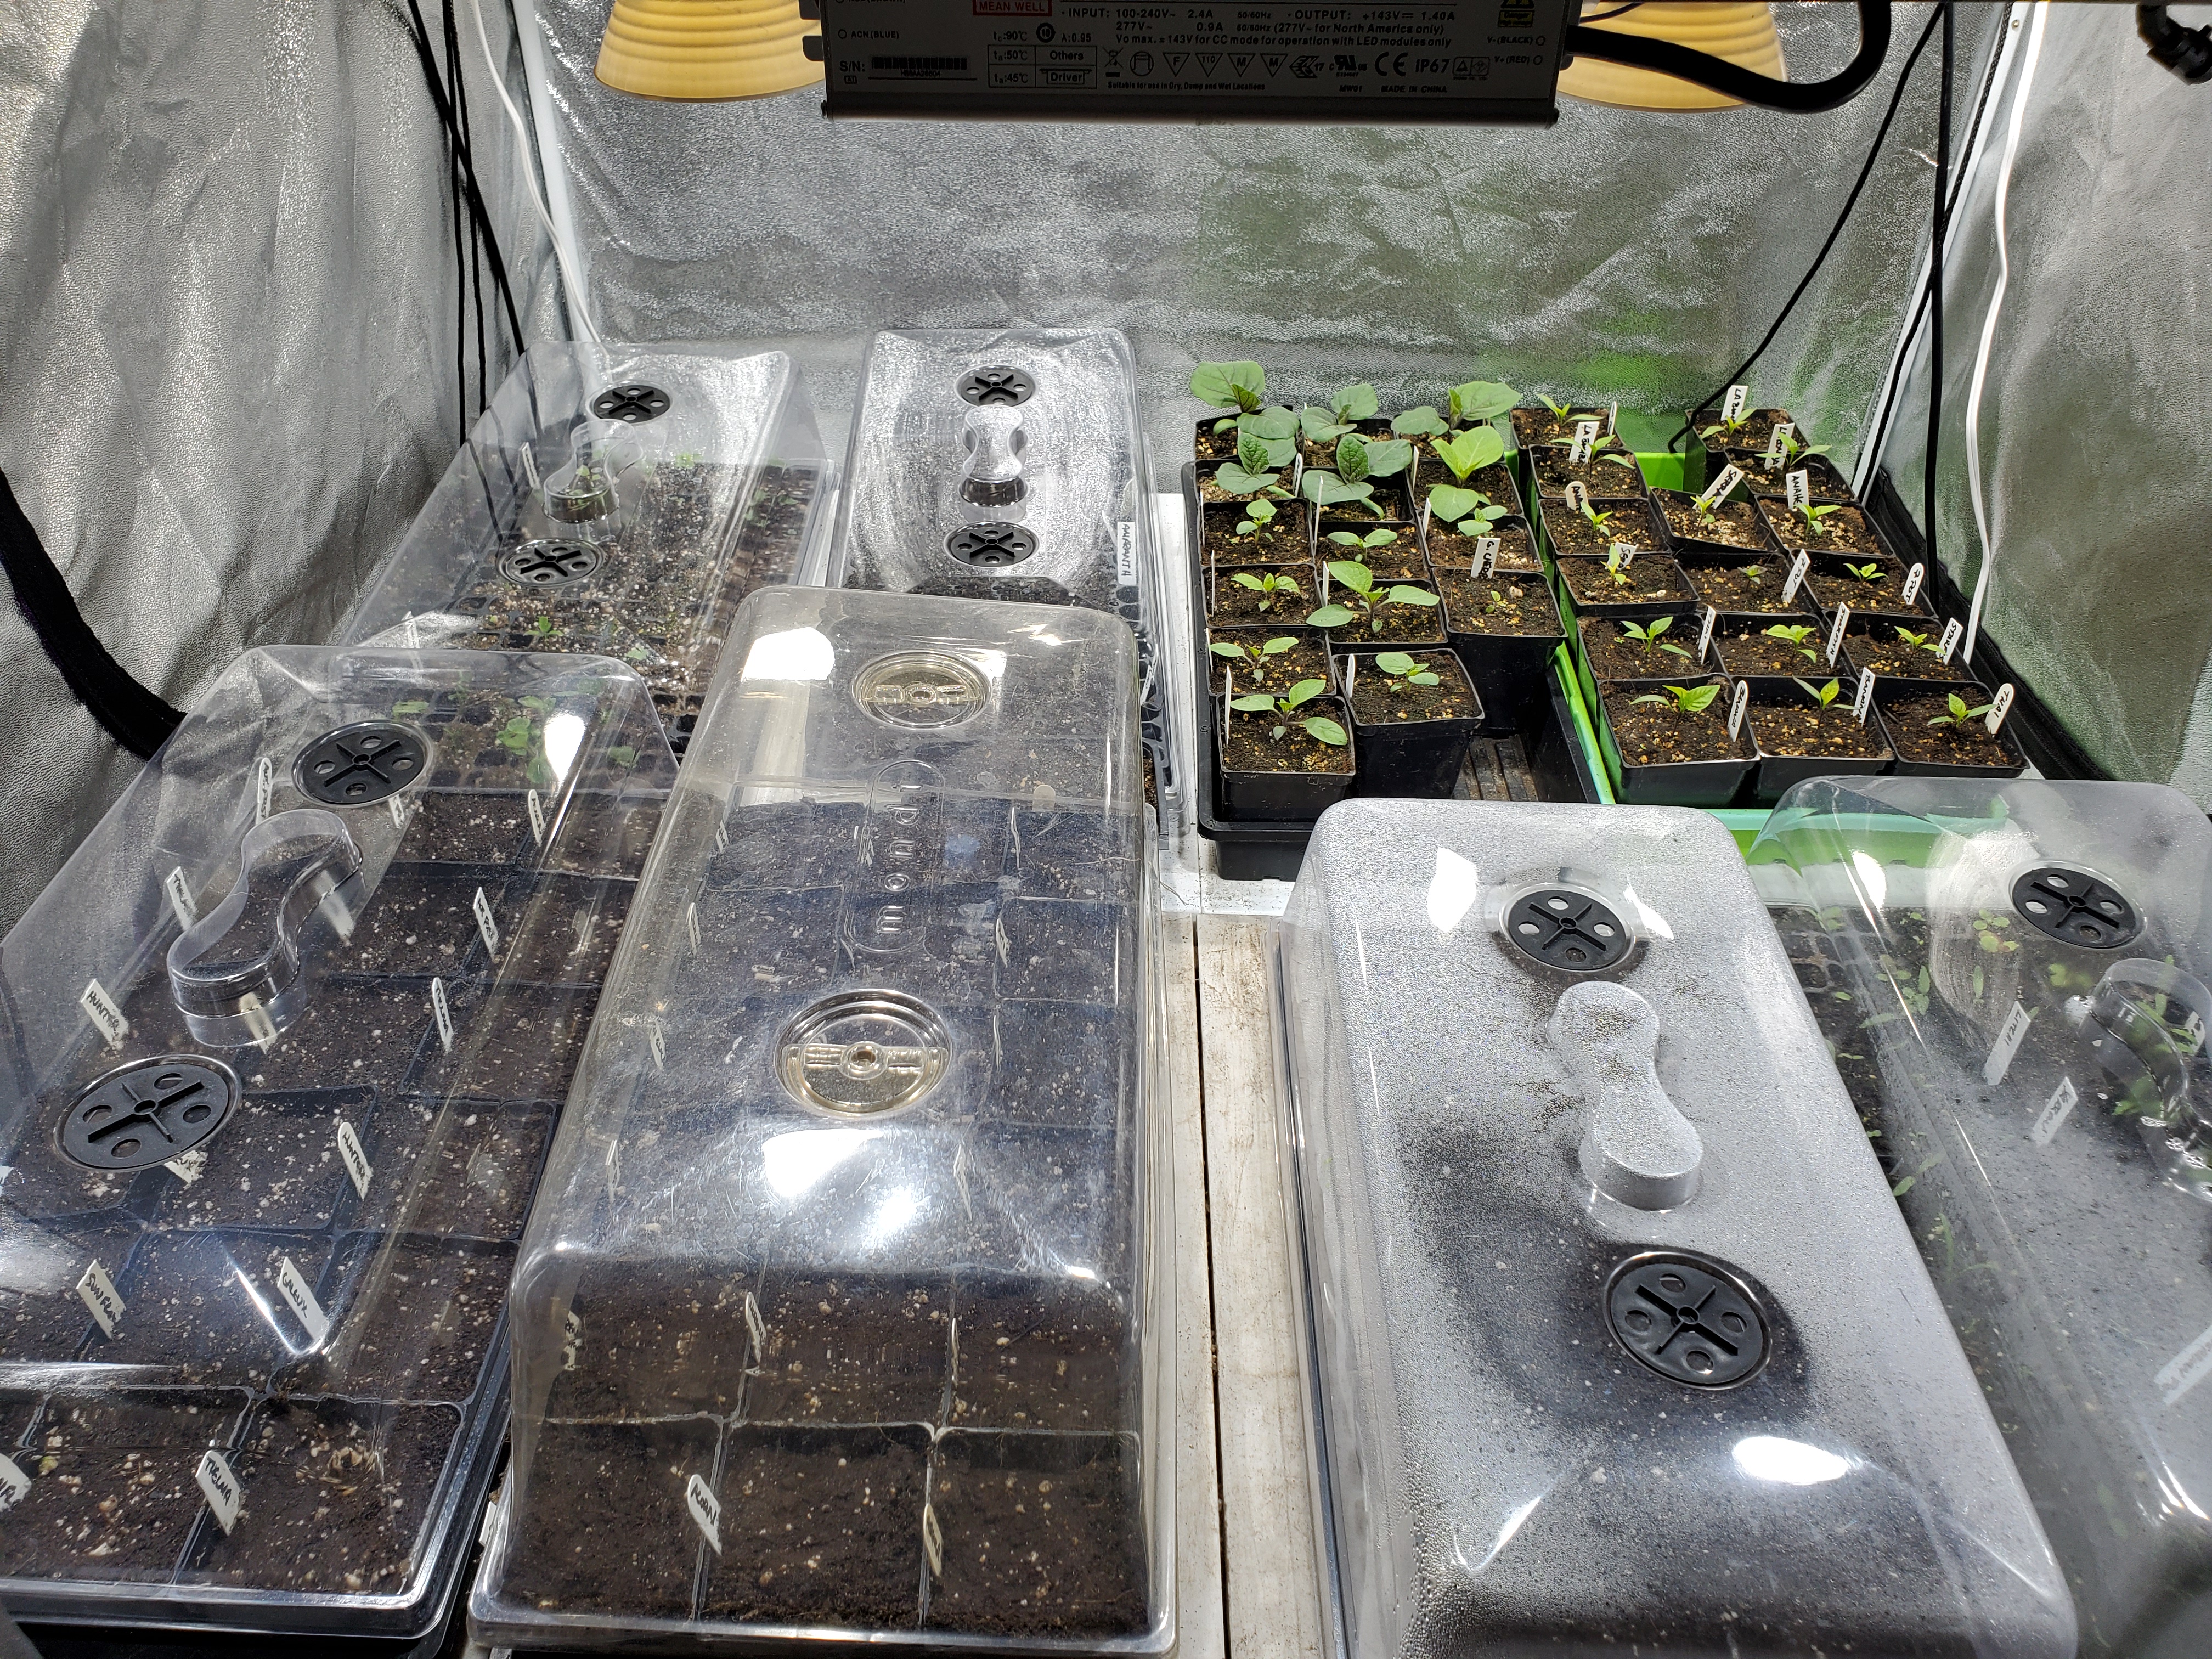
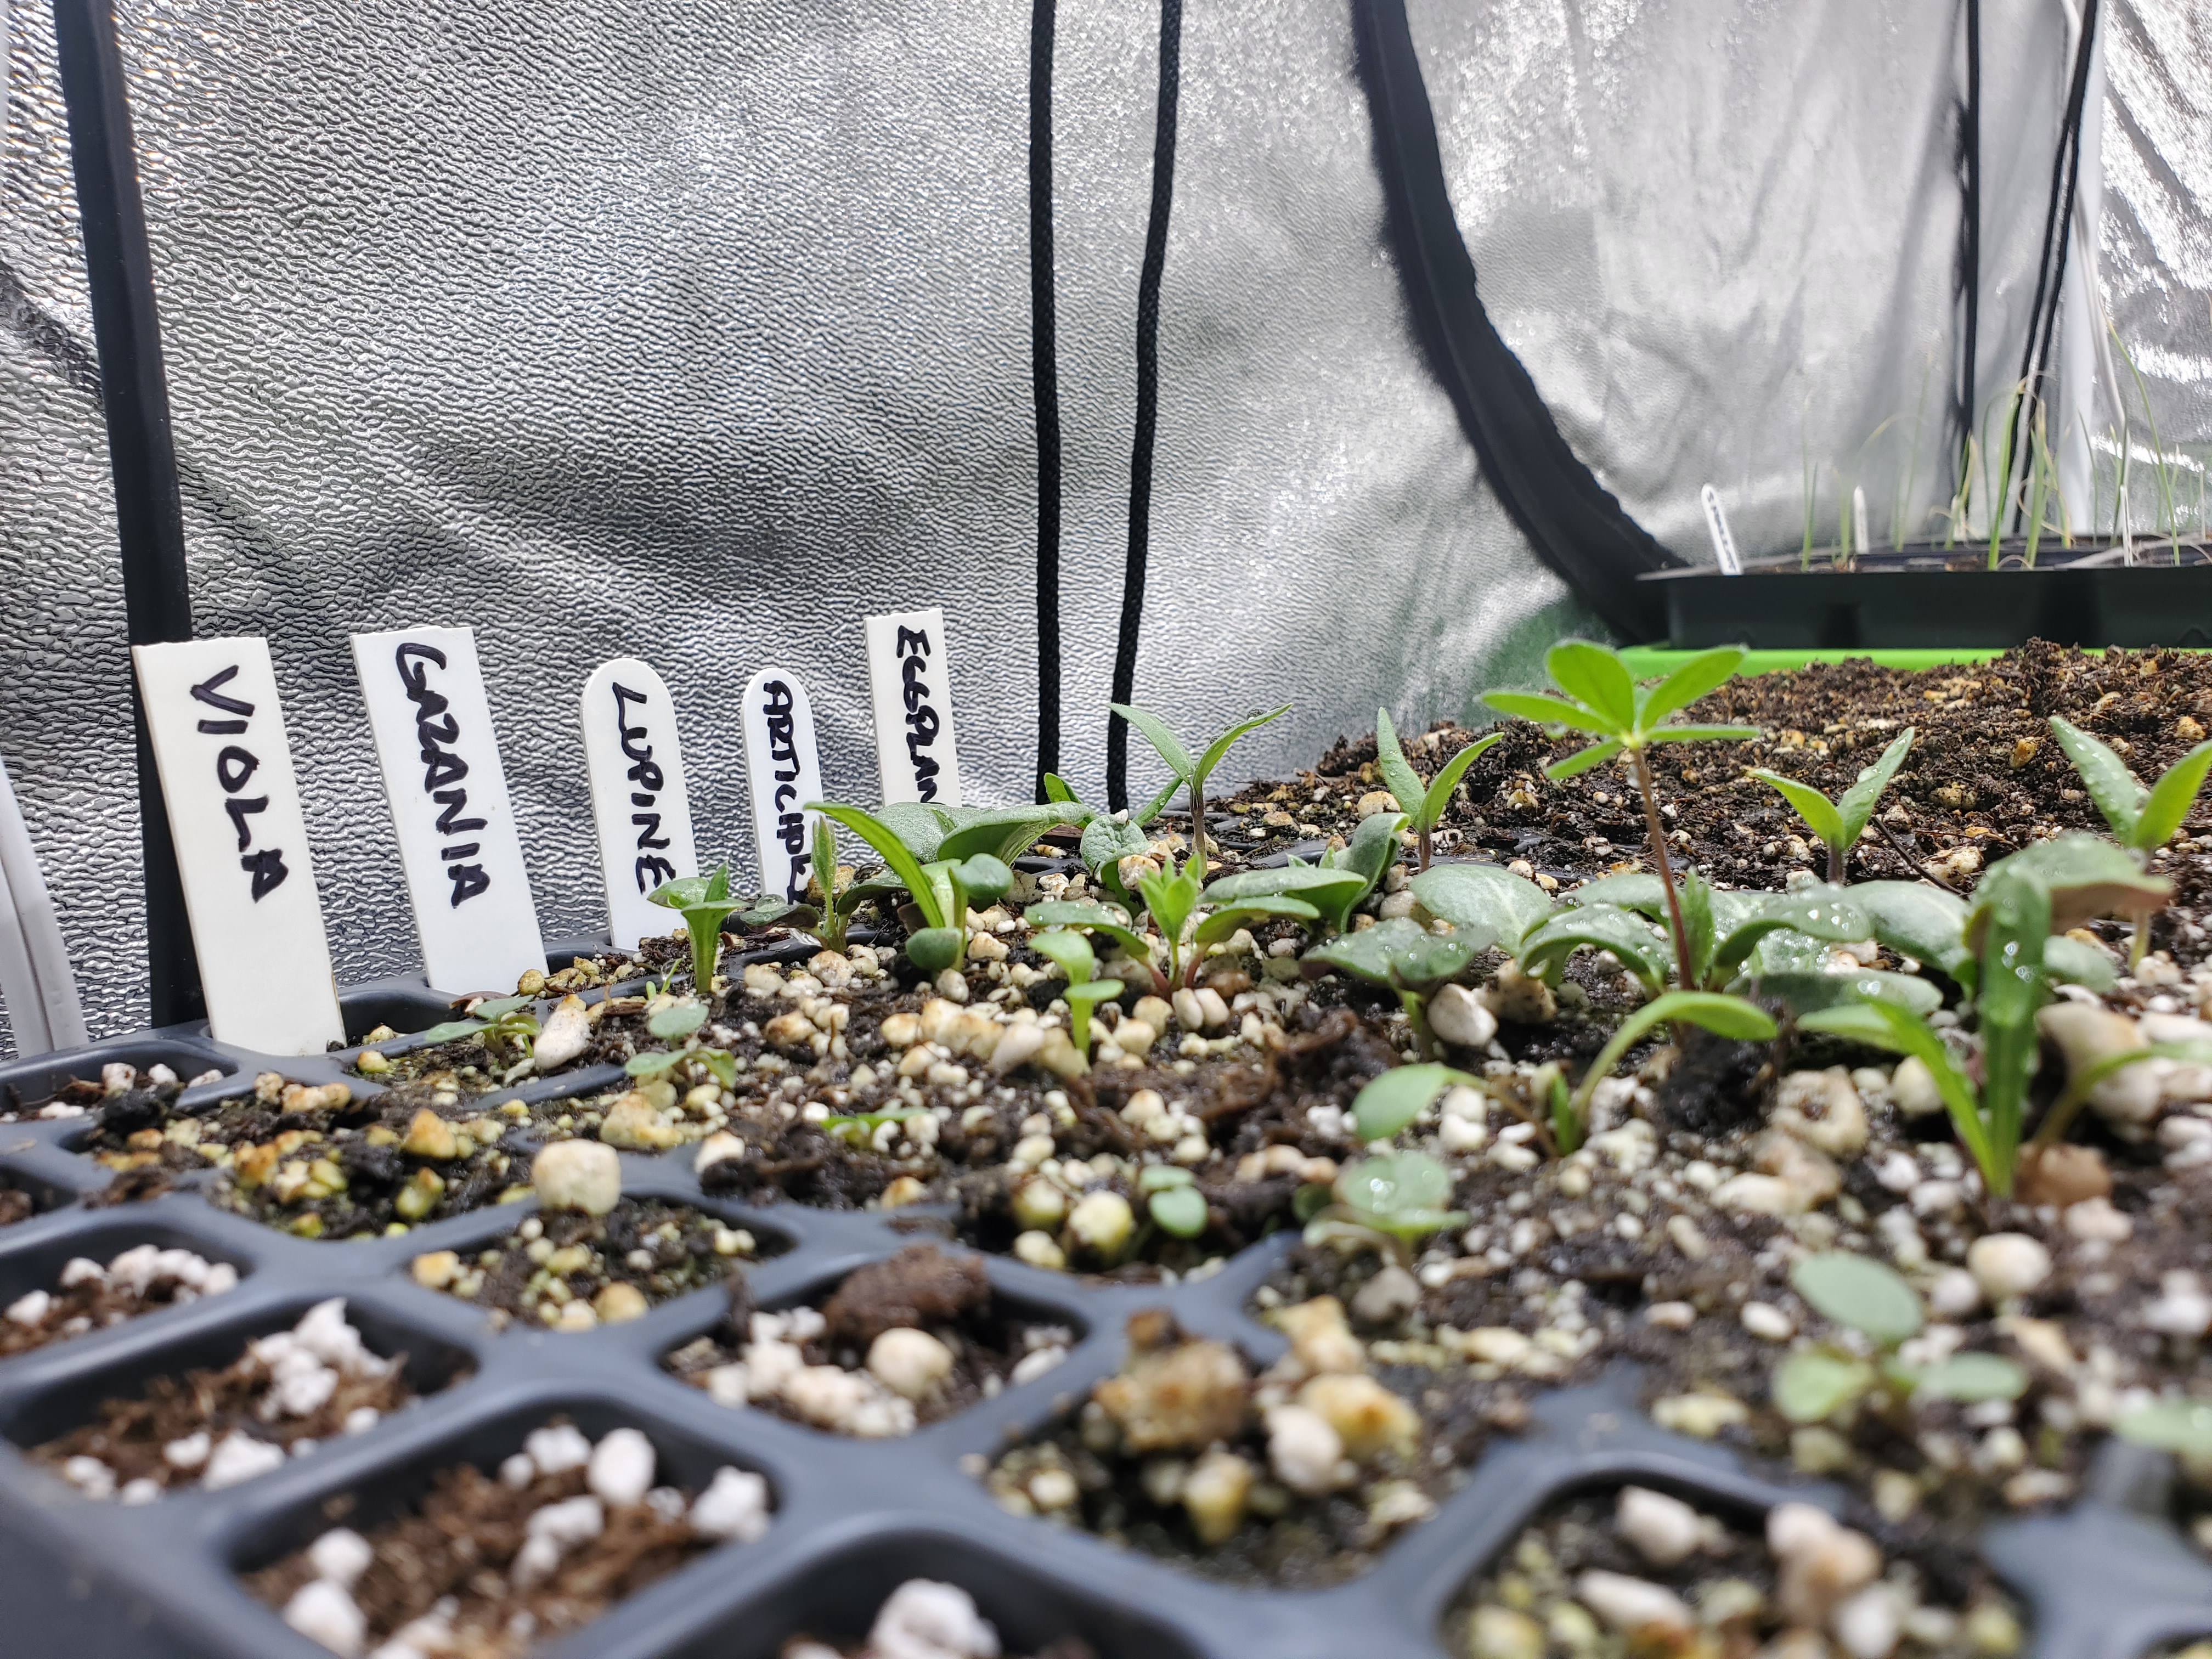
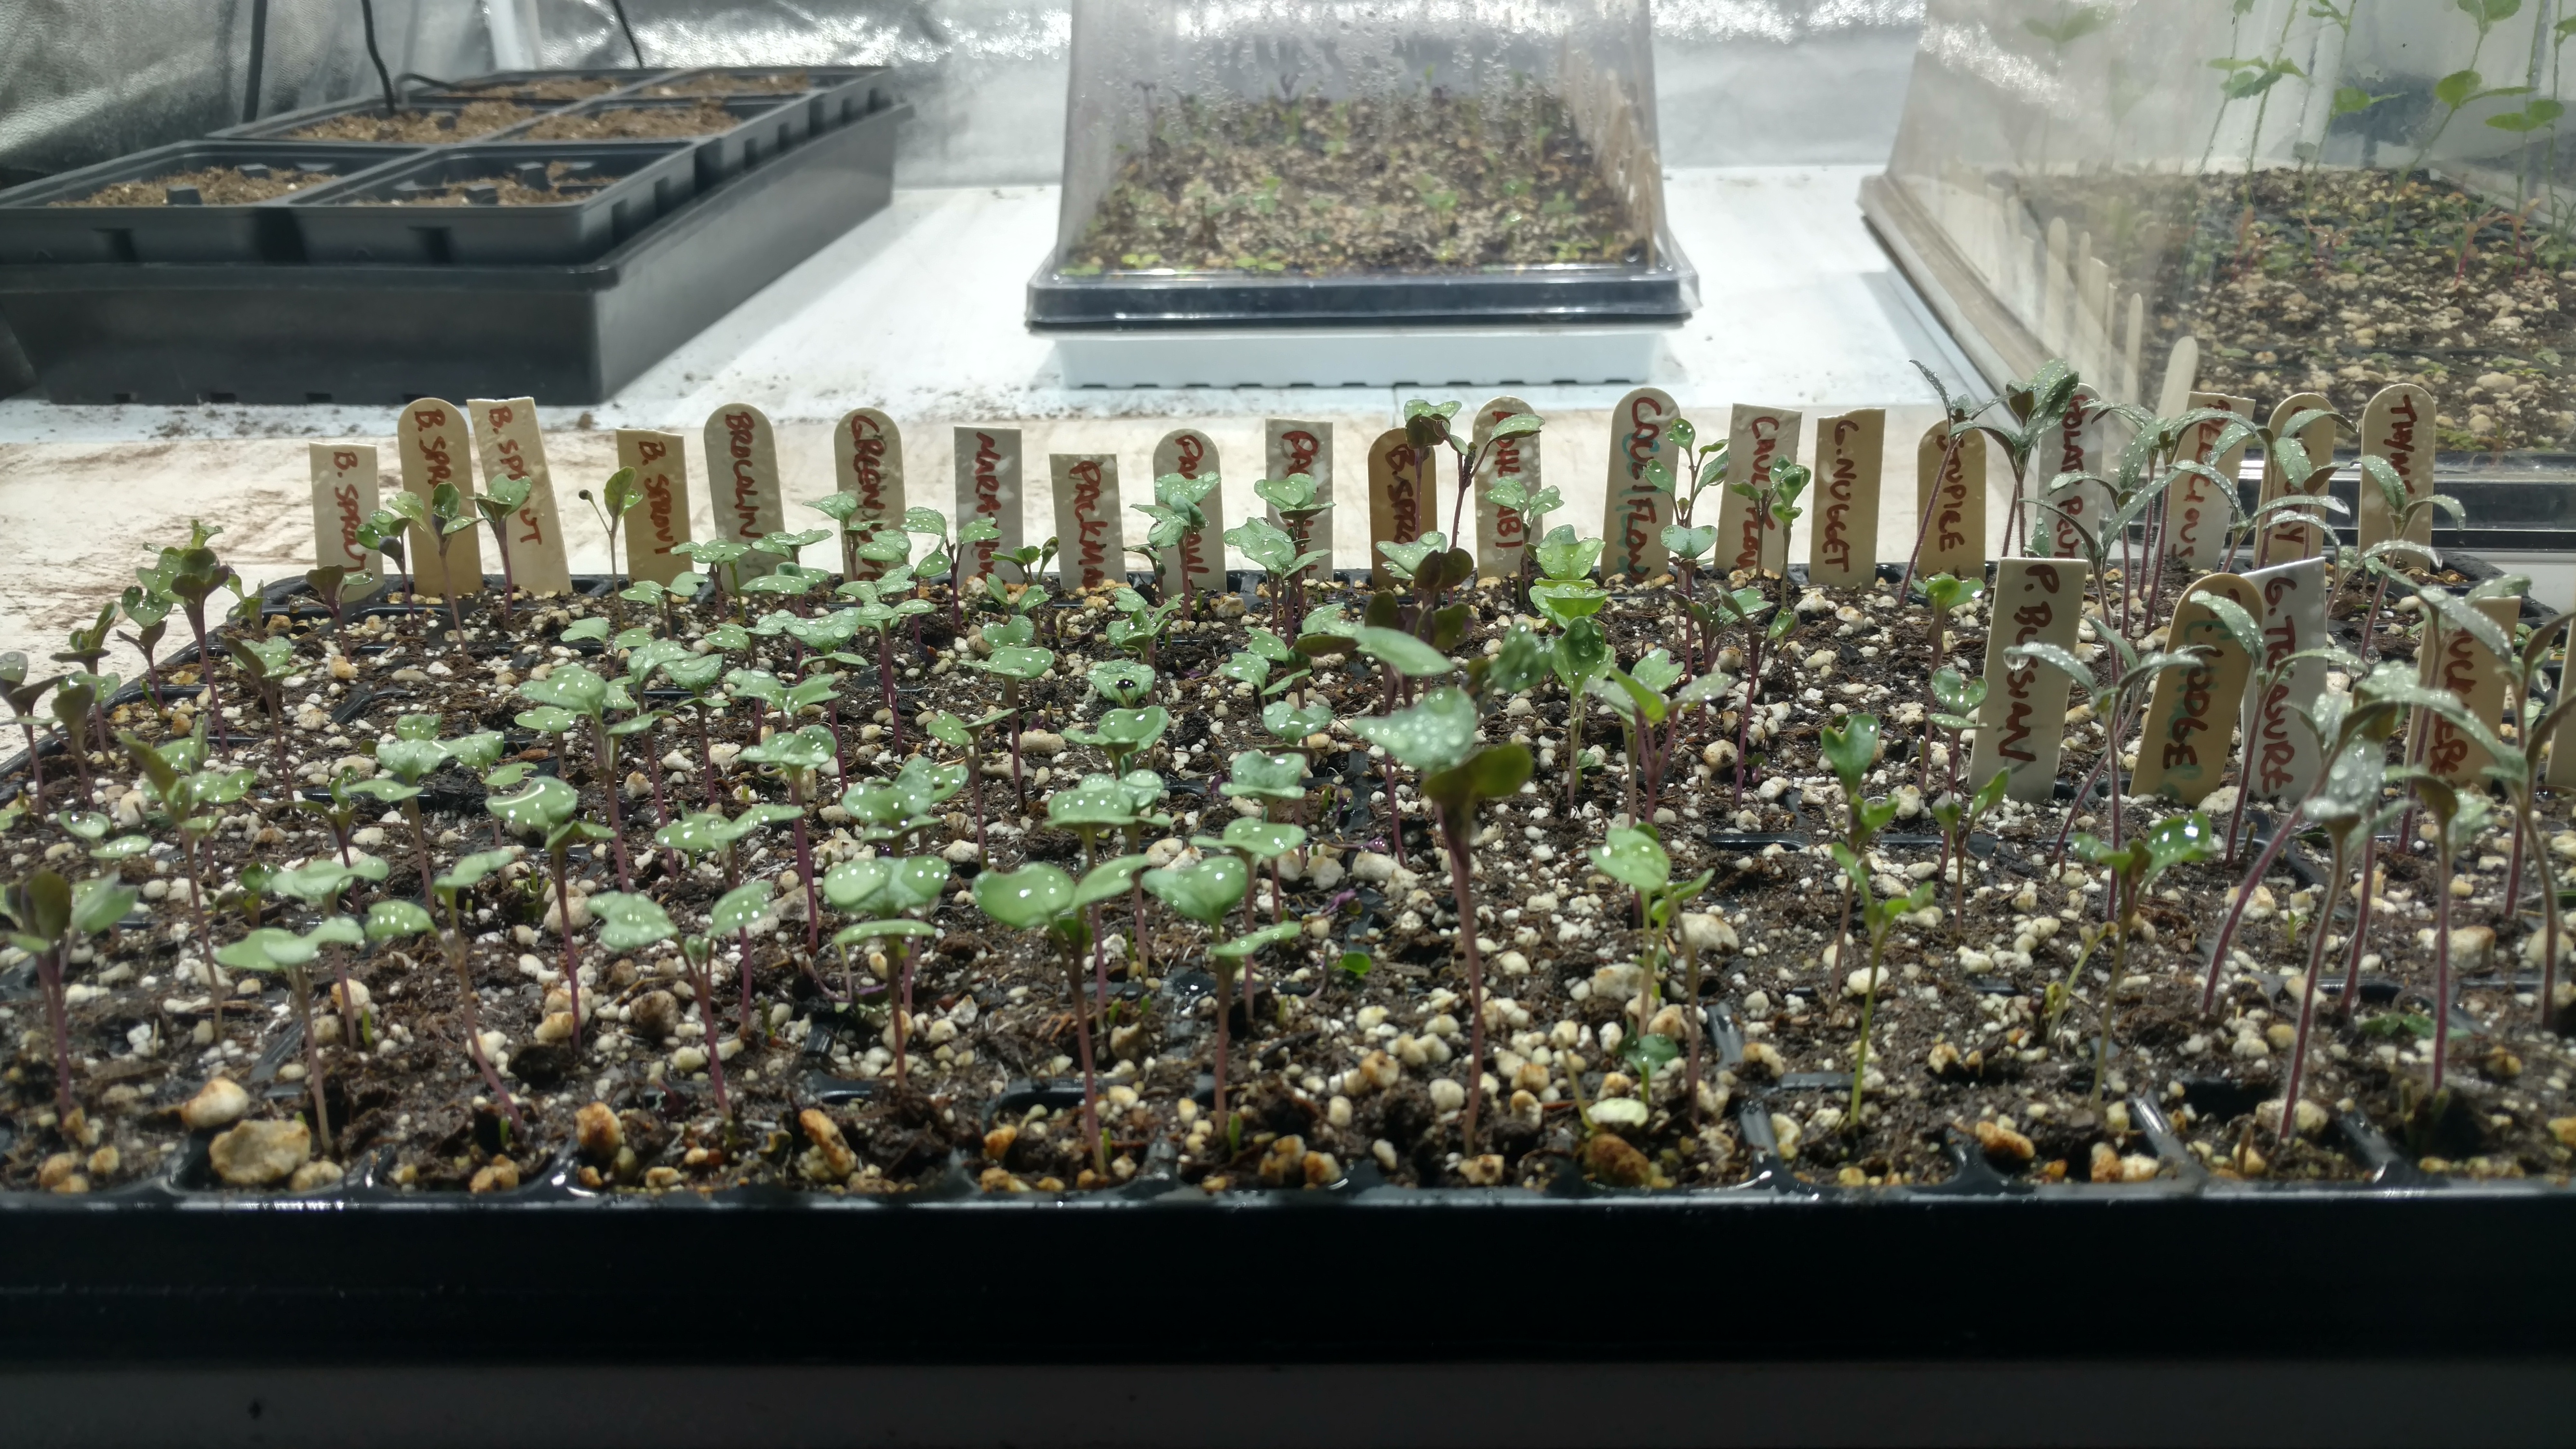
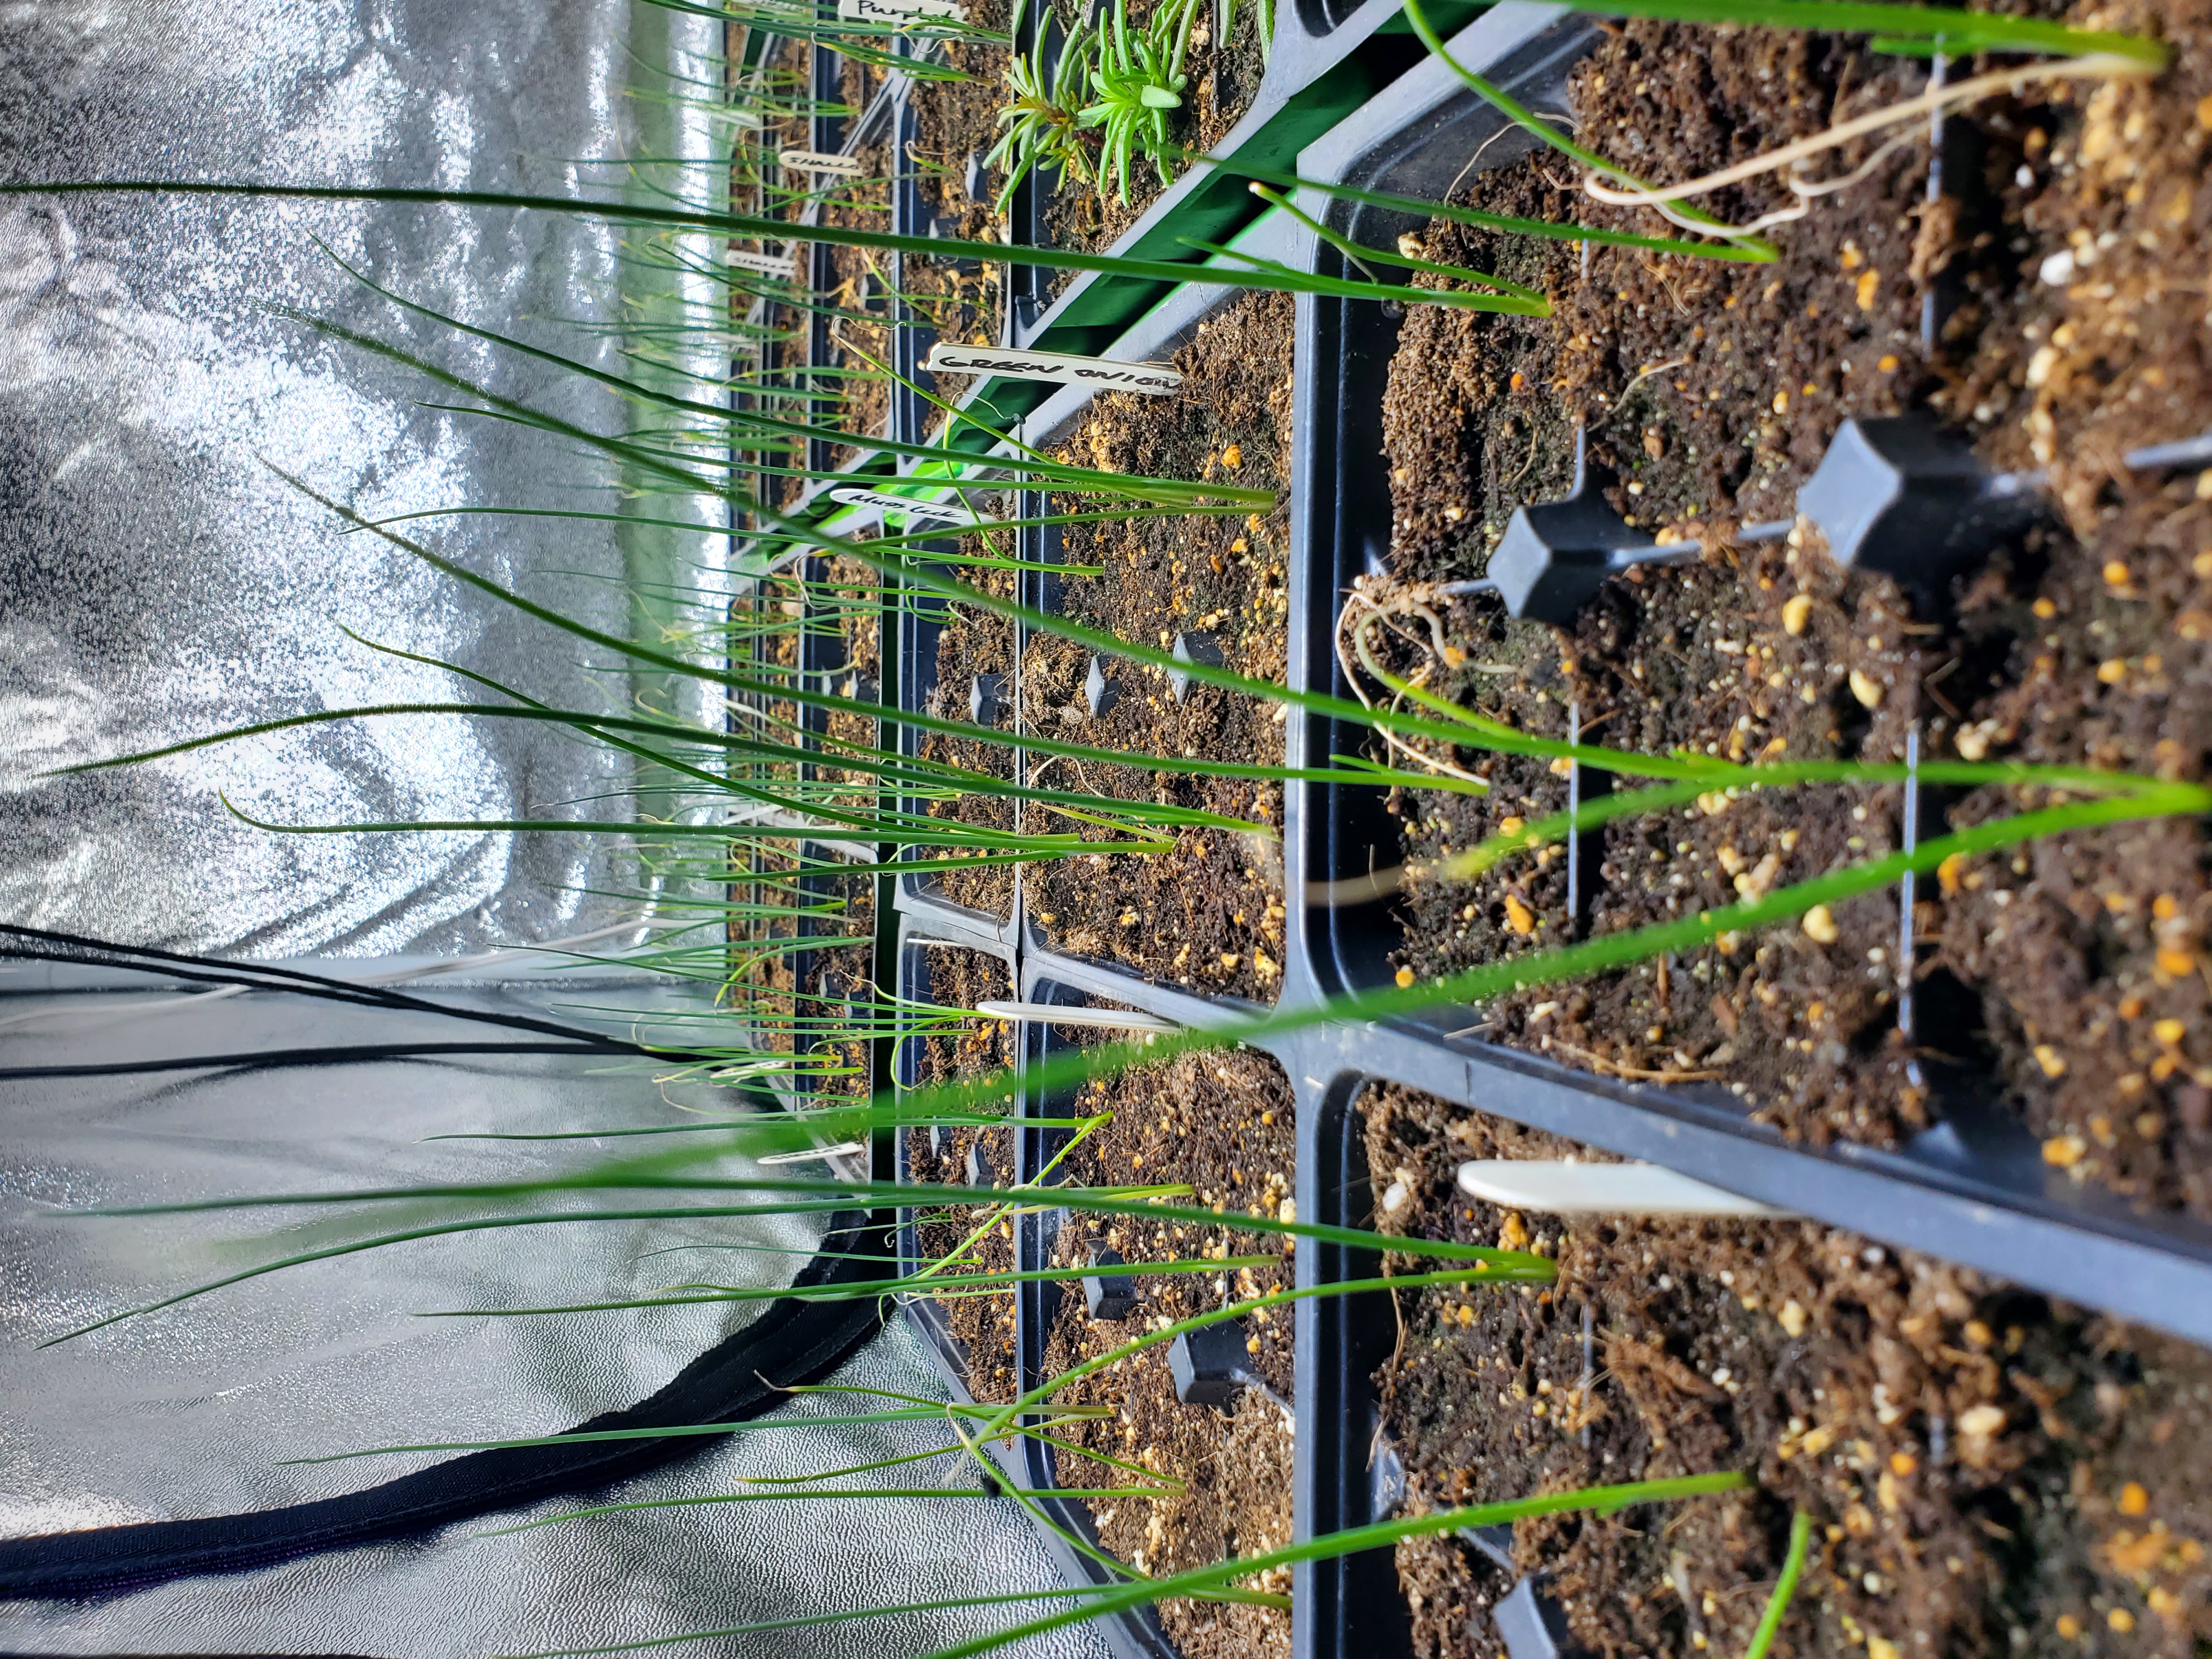
This picture shows one of our two indoor gardening spaces where we grow plants from seed. The humidity domes are especially good for initial seedlings as well as plants we have transplanted recently.
With few exceptions, the list of equipment below is everything that we use for raising plants from seed all the way up to putting them in our gardens.
- 1020 heavy duty trays
- Seedling trays (200 cell)
- 606 inserts for 1020 trays
- 3.5 inch pots
- 5.5 inch pots
- Humidity domes
- High quality indoor garden lighting
The links provided above sometimes are and sometimes aren’t the specific equipment we use. We often try to source things locally whenever possible and have also accumulated equipment over many years.
There are a handful of other accessories we use in our process, none of them terribly expensive or notable.
We like our plants to be at a decent working height, thus we have several tables we use to keep our plants off the ground. Putting your plants on tables definitely eases the physical effort of managing your grow room.
Other accessories we use include things like light hangers, pressure sprayers to water our seedlings, plant tags, watering cans, surge protectors, light timer and other minor conveniences.
The Basic Steps In Our Seed Germination System
We have two, sometimes three, major steps that we utilize in our seed germination process.
Our general goal is to go from seedling to a final transplant container, where the plant will be grown until it is ready for the garden. Transplanting is a time consuming process and also disruptive for the plant, so minimizing the steps is ideal.
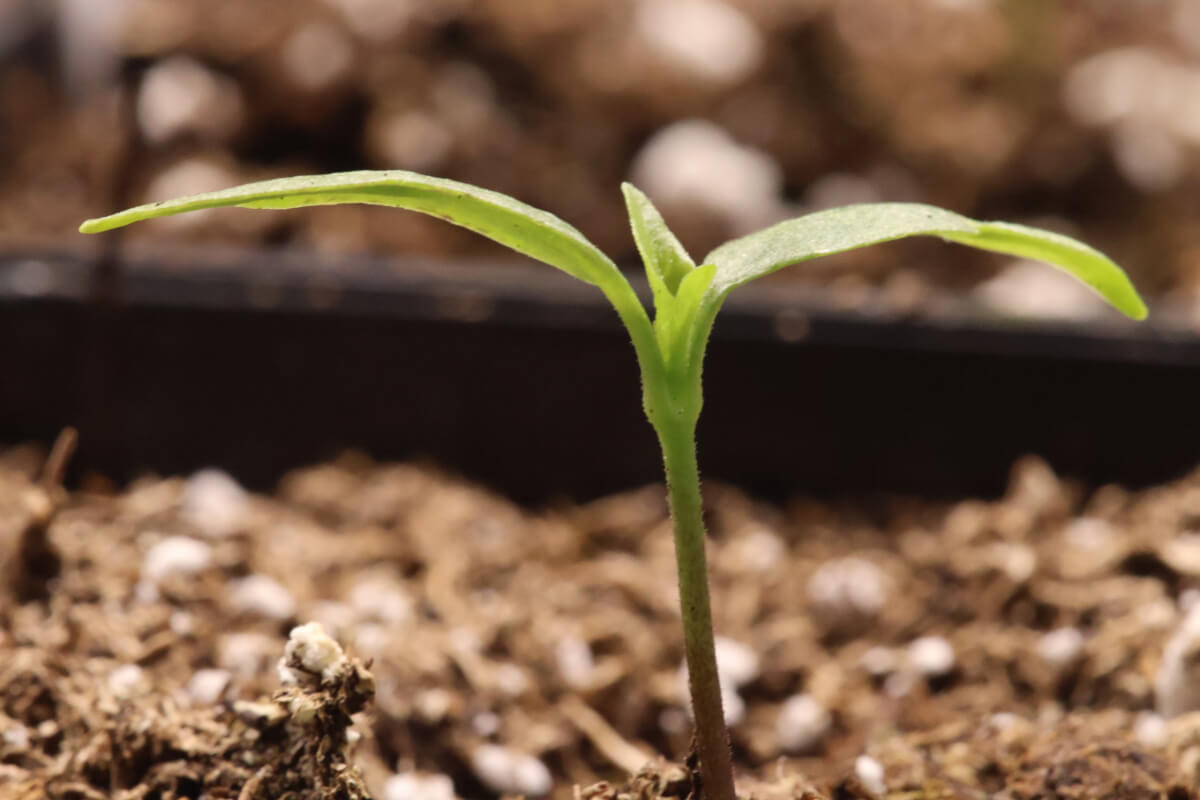
- Sprout the seed in a seedling tray & grow it to an initial transplant size (typically to 1st true leaf)
- Transplant to a final container where it will be grown to the size where it can be transplanted into the garden
- (Optional) For some of our largest plants, we will transplant to an even larger pot, typically a 5.5 inch pot. We discuss the specific plants we treat like this later in this post.
With the overwhelming majority of our plants we raise, we only need the two initial steps.
Through experience, we have found a few plants where the third step is ideal, especially for maintaining plant start quality. We discuss these exceptions a bit later.
We also did a presentation on our seed starting equipment and processes, which you can watch here:
This is a video that goes over the details of our seed germination equipment, processes and general thoughts when it comes to starting hundreds of garden starts!
The Basis Of Our Entire Seed Germination Systems
We decided to standardize on the 1020 tray system as the basis of our entire seed starting system.
A 1020 tray is just a gardening tray that is 10 inches wide by 20 inches long, thus a 1020 tray.
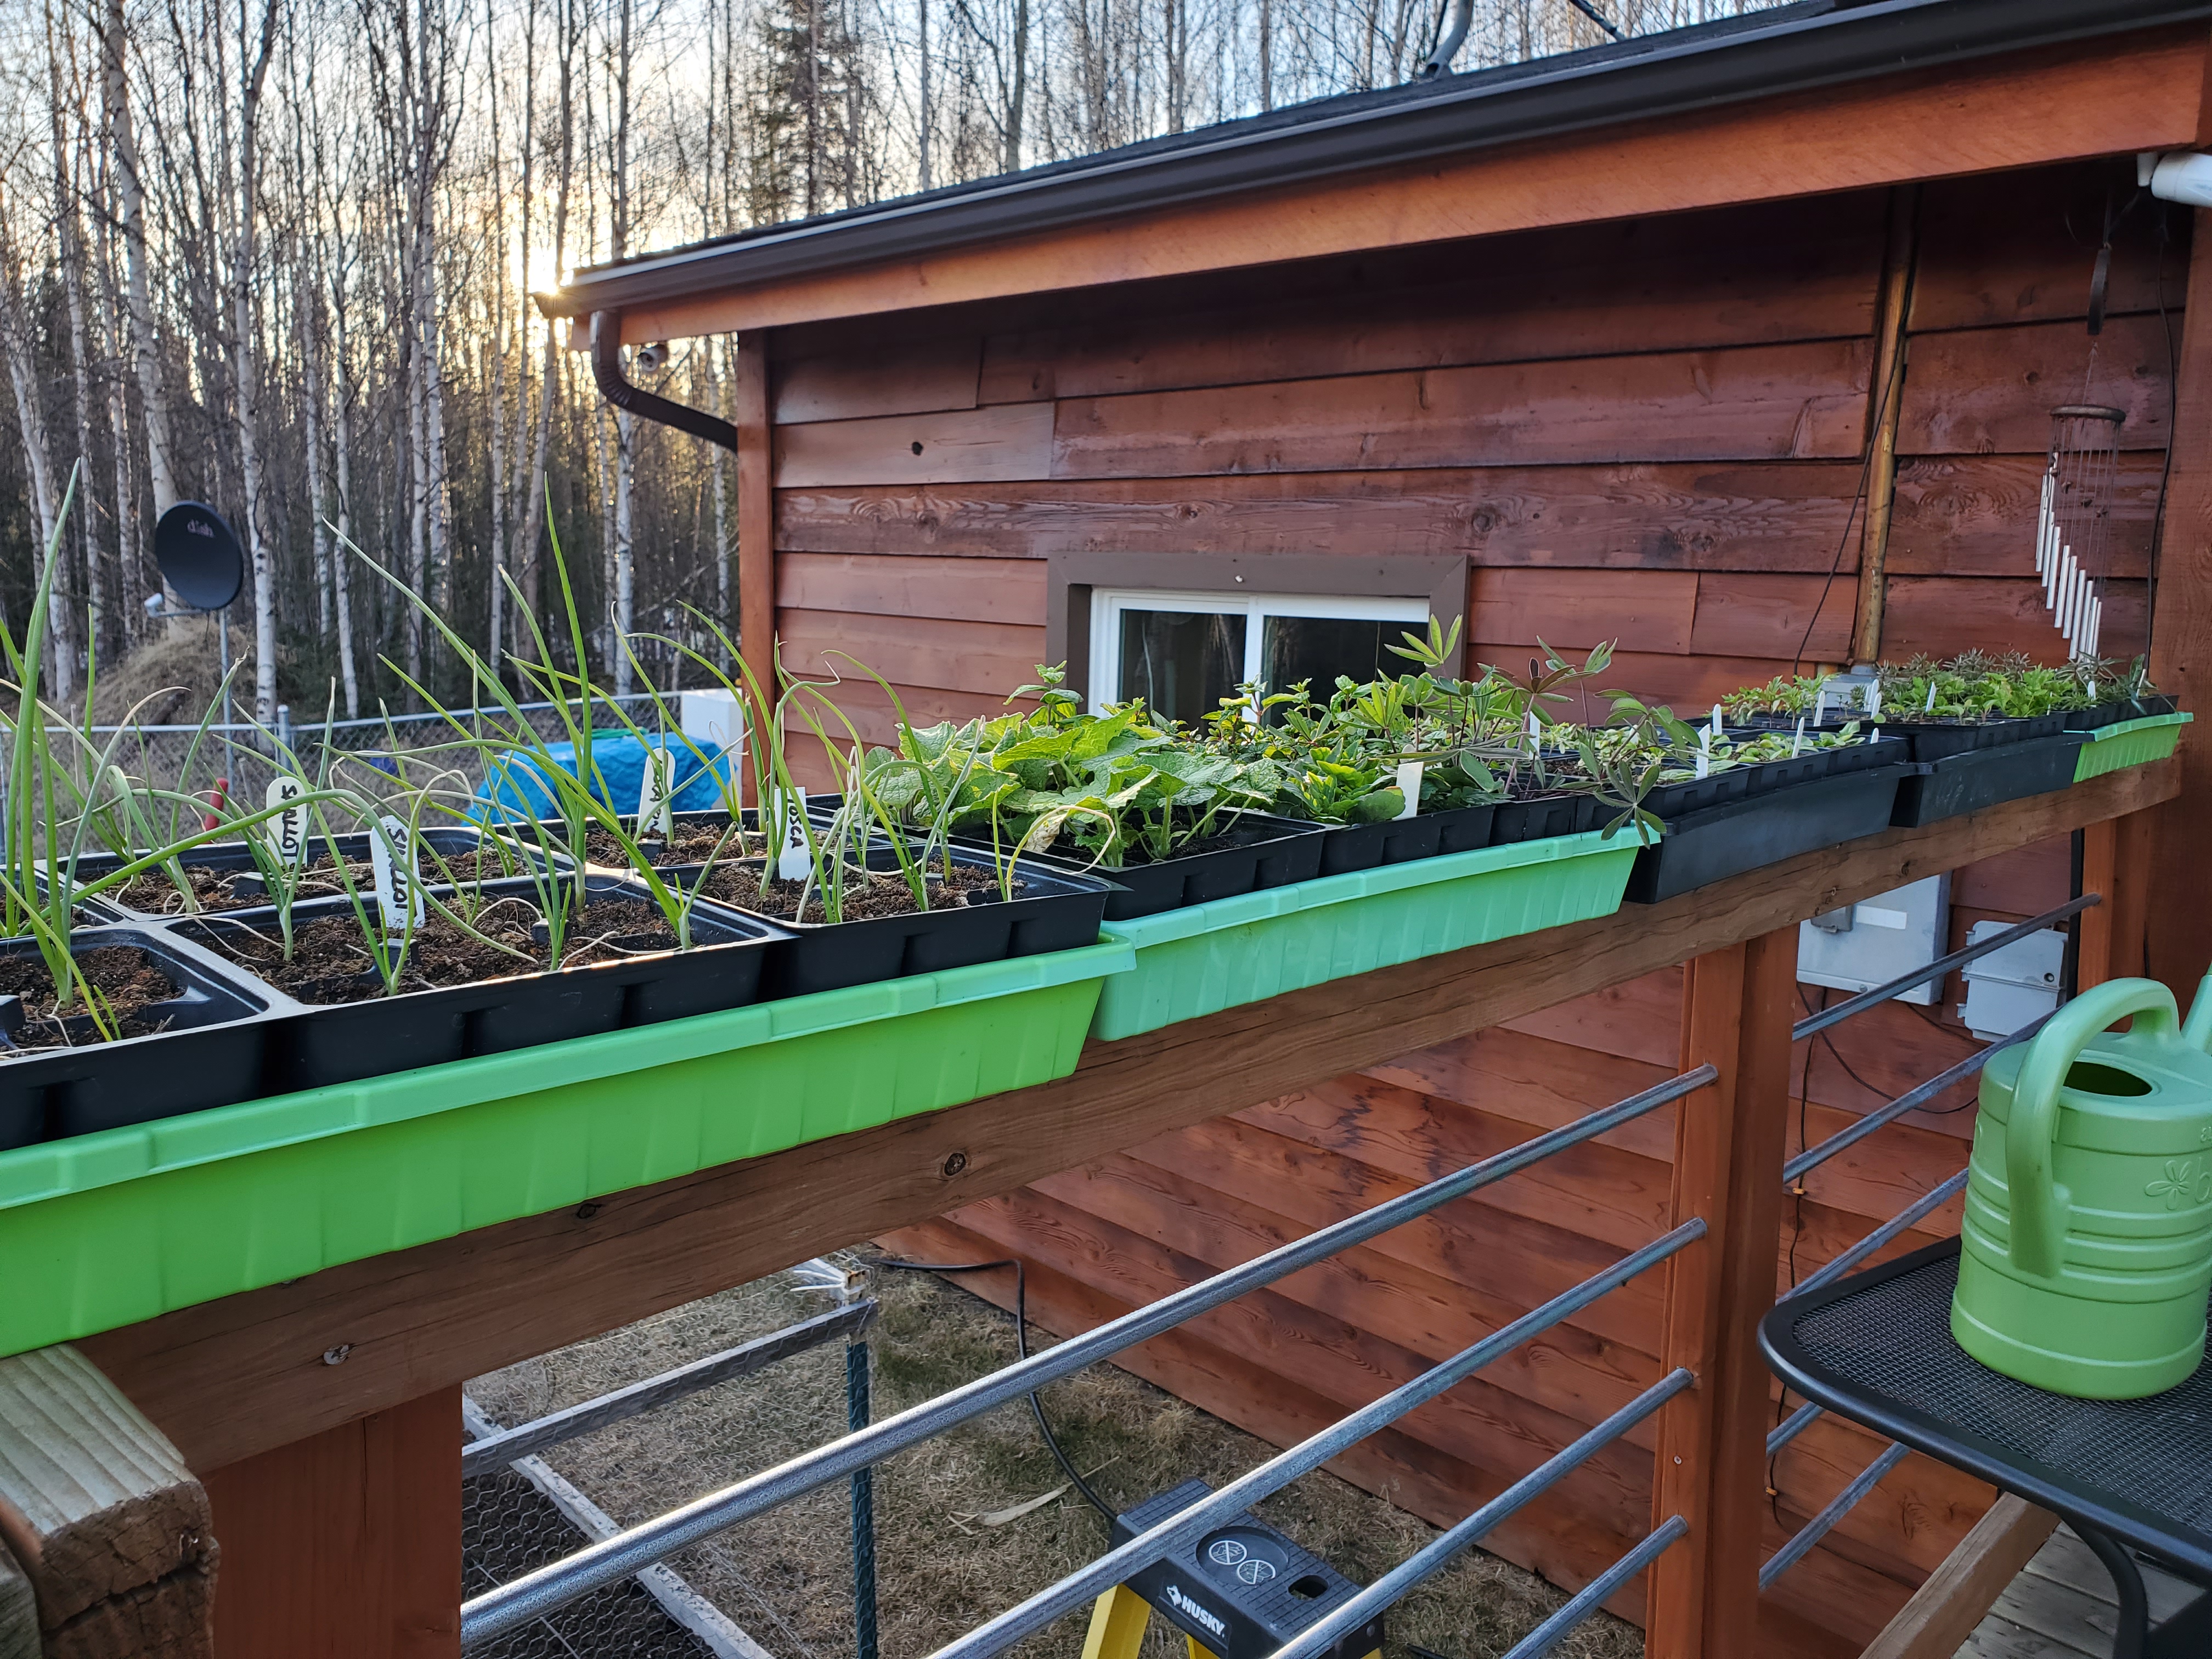
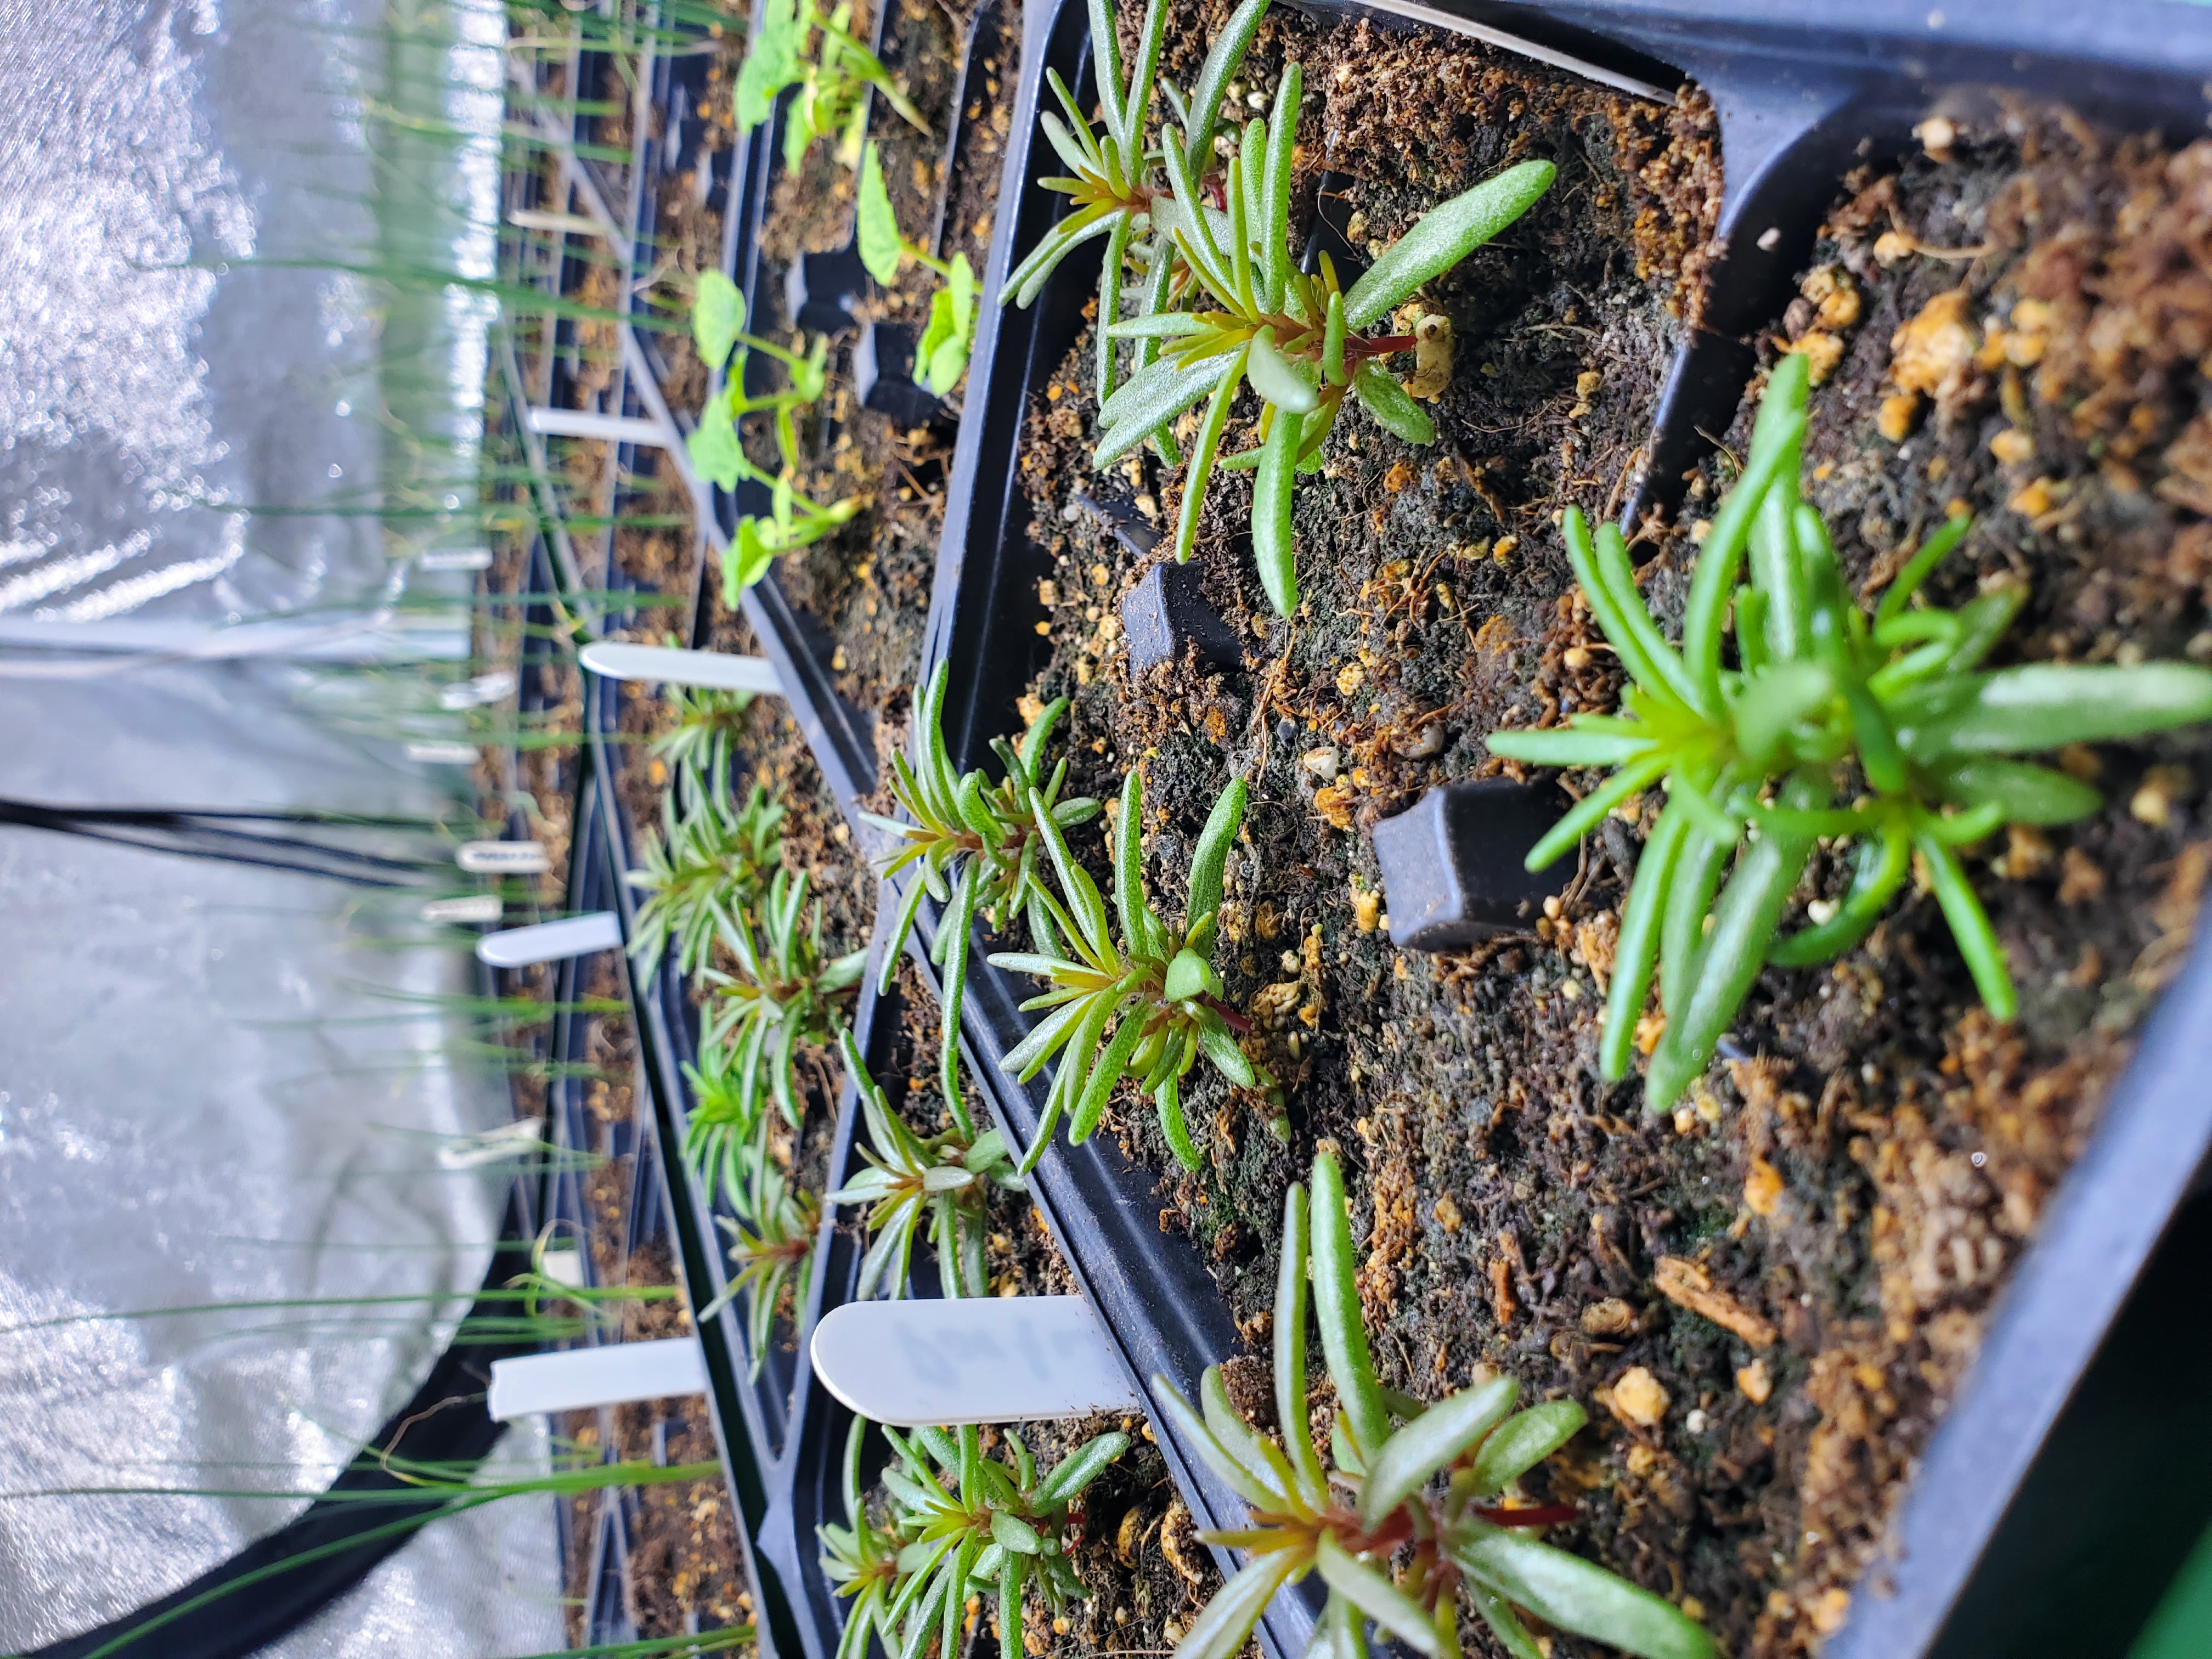
The green and black trays in this picture are high quality 1020 trays. We use them heavily across our entire plant germination processes.
The 1020 trays solve an issue that affects most seed growing operations. It offers a way of managing many plants, effectively.
1020 trays are easy to move around and with that, you’re able to effectively move hundreds of plants quite quickly.
We like this system because it accomplishes one of our primary goals of utilizing space very effectively.
A number of accessories are also built around the 1020 system:
- Many different sizes of inserts available for growing plants in
- The trays support 3 different sizes of pots for larger plants (2 inch, 3.5 inch and 5.5 inch)
- Can also support seed starting trays
- Humidity domes, typically for very young seedlings
We purchase what are called “heavy duty” 1020 trays. These are made from substantial plastic and they last many years. The common 1020 tray is very lightweight and typically can’t be used for more than one or two growing seasons. Heavy duty tray brands we use include PermaNest, Bootstrap Farmer and Sprouter Quad.
Humidity domes are a great accessory. They allow you to easily increase the humidity within the tray. Initial seedlings are prone to drying out too quickly and increased humidity increases survival rates.
Using the 1020 system meant we could also get rid of our “hodge podge” of various seed starting equipment we had previously.
We could say, “If it doesn’t fit in a tray, it doesn’t belong in our system.” This really helped with organization and storage space too, since we were no longer having to manage so much different equipment.
The Basics Of Seed Starting – A Seed Starting Tray!
Once we tried using a seed starting tray, we knew that we had found the optimal solution.
A seed starting tray is a 1020 tray accessory that is used for germinating seeds. It is designed to provide enough soil for initial seed growth, with the intention that the plant will be transplanted into a different container fairly quickly.
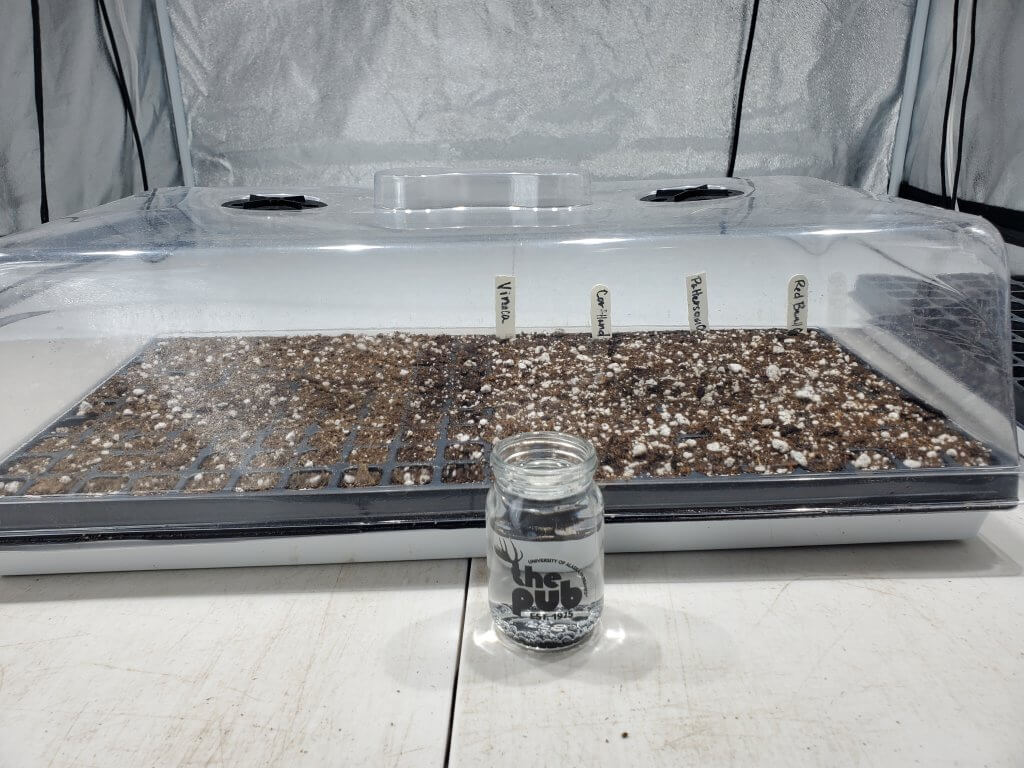
This is one of our 200 cell seed starting trays. We use it to initially germinate seeds and grow them to a point where they are then transplanted into their final home.
Seedling trays come in a variety of cell count sizes, or the number of plant sites available in the tray. Two sizes of seed starting trays commonly fit the 1020 tray system, a 200 cell and a 128 cell. (It’s always best to check dimensions, though!)
We use a 200 cell tray in our operation and find it ideal for our needs.
A 128 cell tray would allow less plant sites, but also offers the gardener more time before they have to transplant to the next container.
The 200 cell seed starting tray allows for great density of seedlings. We generally need to conserve our indoor growing space, so this density is ideal for our decent size seed germination system.
While the seed starting tray is primarily designed around nursery automation, we find them very beneficial in our “low tech, hands on” nursery as well. Transplanting a “plug” is much easier than other techniques out there, as well as generally being safer for the plant.
To be clear, you can directly sow into larger containers. There’s a few reasons we don’t do this:
- Transplanting plugs ensures every six pack or pot we grow to full size is complete, no failed germinations in our final growing trays
- We can pick the best genetics to bring forward
- We can easily grow extra plants and if we have failed germinations, it doesn’t affect our final, needed plant counts
We always plant either full rows or half rows (on the short side) of the seedling tray. We often over plant seedlings and select the best for further maturation.
Transplanting From Seedling Trays To The Pre-Transplant Home
Again, we’re aiming for single transplant step for most, if not all of our plants.
When using the 200 cell seeing tray, we have a limited amount of time where a plant can survive (well) before we have to transplant it into more soil.
The goal of the cell tray is to get the plant to initial transplant size, typically indicated by the emergence of the 1st set of true leaves. You can also look for roots coming out the bottom of the seedling tray, indicating the plant needs more rooting space.
From there, we transplant “the best of the best” into a larger container, which we’ll go into more detail below. We typically overgrow to our needs up to this step and select the best plants raise to full growth.
The actual transplant process with seed trays is actually quite nice. We use a small flathead (eyeglass style) screwdriver to go down the sides of the cell, which easily allows the extraction of the seedling plug.
This is then physically placed into a finger sized soil indent in the next size of container.
Very simple and fast, transplant done with minimal impact to the plant’s root.
Defining A Standard For 1020 Inserts
One of the main benefits of the 1020 trays is its ability to easily support various sizes of planting inserts.
Inserts are basically plastic plant containers that perfectly fit a 1020 tray. If you have ever purchased a “six pack” or a “four pack” from a nursery before, then you know what an insert is.
This picture shows 1020 inserts, specifically a 606 type. Each insert allows 6 plant sites and 6 inserts will fit in a 1020 tray. The 606 insert is our insert standard.
Inserts provide you with a certain number of growing spaces for plants to grow in your 1020 tray. They are commonly named by numbers such as 1804, 1204, 806, 606 and several other sizes.
This numbering mechanism means something. For example, an 806 insert allows 8 inserts in a 1020 tray, and each insert has 6 plant spaces. A 1204 has 12 inserts per tray with 4 plant spaces per insert.
Inserts optimally use the space of a 1020 tray, which is why they are attractive to us. That said, we wanted to come up with the minimum number of insert sizes so we didn’t have to support a lot of different kinds of gear.
Though there are many sizes available, we decided to standardize on a particular size. This standardization allows for easier storage and a generally “universal approach” when it comes to plants.
The 606 trays allow 36 plants to fit into a single 1020 tray. While we could get greater density with different inserts, it would mean supporting a number of different sizes of inserts. We generally want less complexity and less things to buy, whenever possible.
The 606 inserts allow a good balance between plant density and soil availability. We standardized on a single size to reduce complexity and to allow a universal approach.
The 606 insert is one of the largest insert sizes available, meaning it can support both large and small plants alike. This size reduces drought conditions for our plants, which also helps reduce our labor requirements when it comes to plant watering.
Commercial greenhouses can easily get away with smaller inserts. They have labor to regularly water their plants. For our purposes, we prefer a larger insert to reduce overall watering demands, so we can tend to our busy lifestyle.
Almost all of our plants are transplanted into the 606 tray as their “final” home, where they will be grown to proper transplant size.
There are a few exceptions, which we will cover next…
When The 606 Tray Isn’t The Right Choice
As we mention earlier in this post, ideally we want a single transplant step whenever possible.
For some plants, they get large enough where the 606 tray is not the ideal transplant step. In some cases, the plant grows so quickly that using a seedling tray is not ideal.
In general, we don’t want to transplant from a 606 tray into another pot.
These specific plants that we treat differently include:
- Nightshades (tomatoes, eggplant, huckleberry, peppers)
- Artichokes
- Squash & Cucumbers, Other Cucurbits
- Sunflowers
- Any large or very fast growing plant
- Perennial plants we grow from seed
For these exceptions, we transplant into a 3.5 inch pot. A 3.5 inch pot is important to our 1020 tray system, since exactly 18 pots will fit in a 1020 tray. This will be the most optimal use of space, while still providing more soil to the plants.
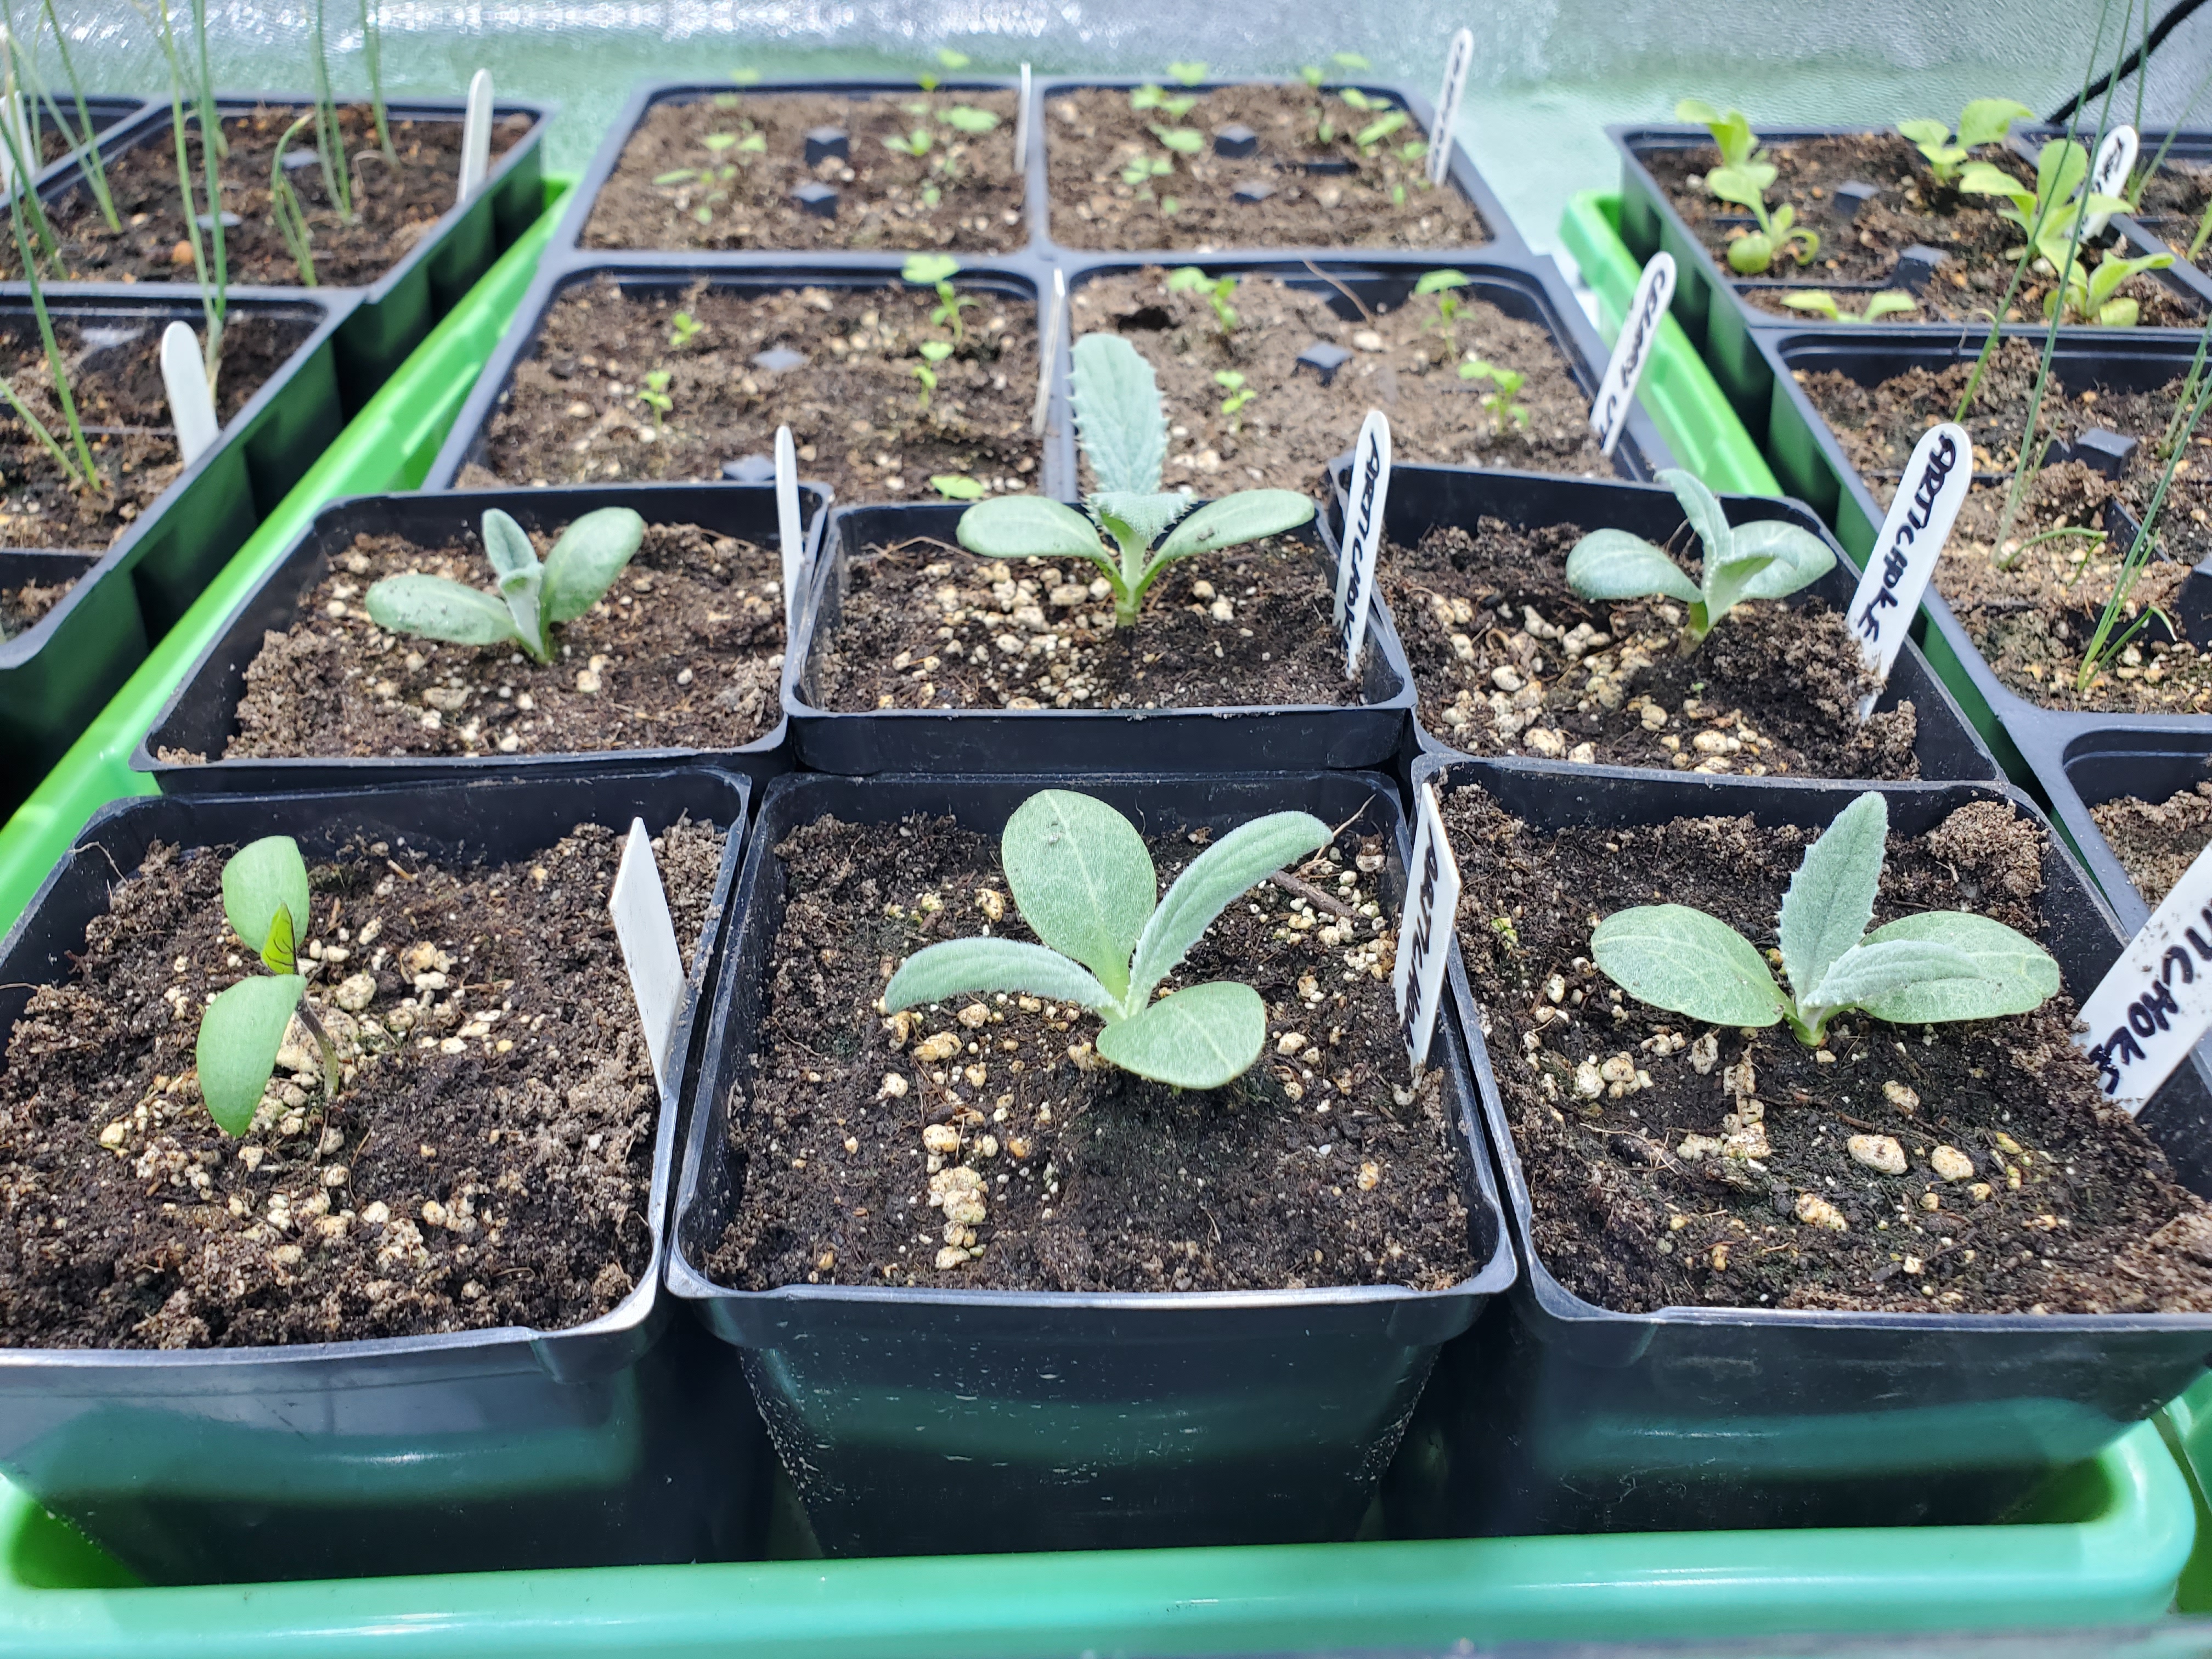
This picture shows how we use a slightly larger pot for our larger plants. We use this technique for all our larger plants, such as nightshades, artichokes and cucurbits.
The larger pot in this case is ideal since it gives these larger plants more space to grow big healthy roots.
If we were to use a smaller container, they would more frequently experience drought conditions and might be restricted from growing larger.
For our fastest growers, including all squash, cucumbers and cucurbits – we skip the seed tray entirely. For these plants, we sow them directly into a 3.5 inch pot. In almost all cases, these are never transplanted until they are ready for the garden!
The Exception To The Exception
As we mentioned, we try to aim for a single transplant step whenever possible. This almost always works out for us. Sometimes it doesn’t.
Some years, especially when we experiment with different plant sowing timing, our plants can get so big that even the larger 3.5 inch pots just aren’t quite sufficient.
In some cases, we’ve learned that a second transplant into an even larger pot (5.5 inch) is quite beneficial. The bigger pot gives more room for root growth and places less demand on watering needs.
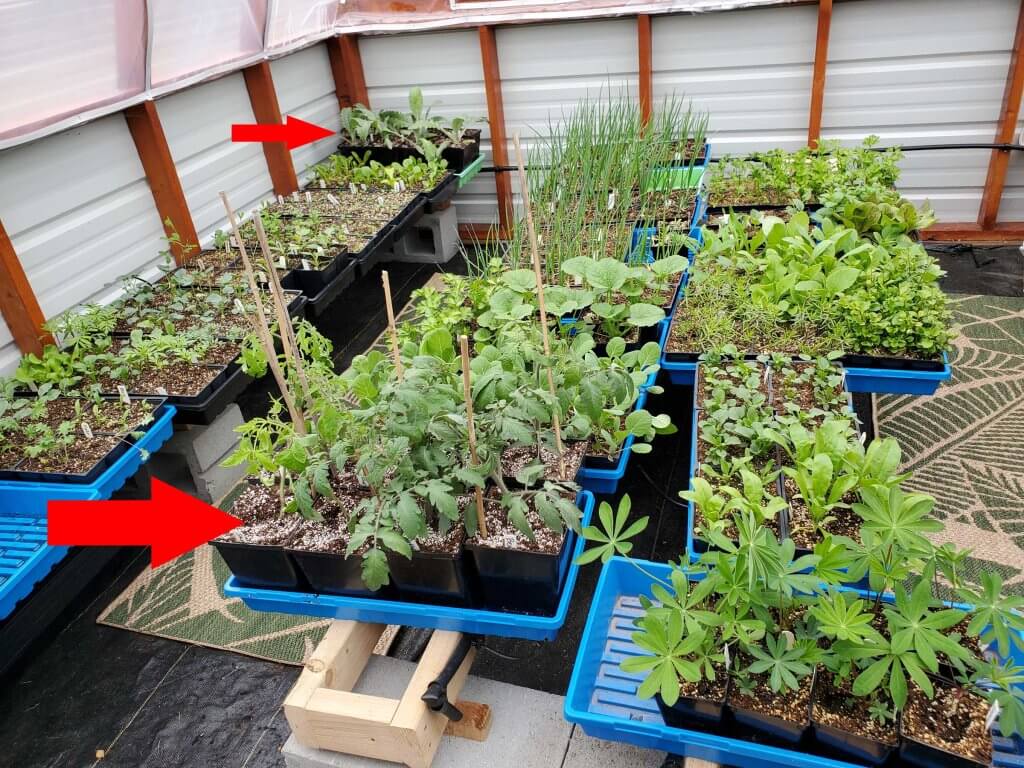
In the above image, you can see that we elected to pot up our tomatoes and artichokes into 5.5 inch pots. This offers more soil to these larger plants, allowing them to grow larger and experience less drought conditions.
In these cases, we will consider a second transplant. The way we identify this is needed is when the 3.5 inch pots are very quickly depleted of water and we’re having difficulty keeping these plants regularly hydrated.
This basically tells you the plant is rootbound and needs more soil!
When this occurs, we will often transplant these plants into an even larger pot, a 5.5 inch pot.
A 5.5 inch pot will also optimally fit into a 1020 tray, providing 8 total plant sites per tray. It is the largest size transplant pot we use and we use them sparingly, since they provide the least plant density.
The common plants we do this with are:
- Tomatoes
- Peppers
- Artichoke
An astute observer might ask, “Why not just pot up into 5.5 inch pots from day 1?” It’s all about the space in our indoor grow room.
With the larger pots, we only get 8 plant sites, whereas the smaller pots get 18 sites. Early in the growing process, we need to conserve our growing space.
The 5.5 inch pots always have enough root space for these larger plants.
Even in years where we have to keep our peppers indoors for weeks longer to deal with late frosts, this larger pot size is a great “emergency” step when it’s truly needed.
That’s Just How We’ve Learned To Do It!
There are many different ways to go about raising seeds in an indoor garden. This is how we do it.
We hope that it’s been helpful to see someone else’s indoor germination setup and processes for a family scale food garden.
Should you have any questions, comments, helpful tips or otherwise – be sure to slap a comment down below!
That’s All We Wrote!

Having a good time? We have an ever growing list of insightful and helpful subarctic & cold climate gardening articles, waiting out there for you!
- Cold Climate Gardening Basics 👉
- Growing Your Garden From Seed Indoors 👉
- Advanced Cold Climate Gardening Techniques 👉
- Plant Specific Cold Climate Growing Guides 👉
- Subarctic Perennial Food Forests & Foraging 👉
- Indoor Garden Lighting & Grow Rooms 👉
- Greenhouses & Temperature Control 👉
- Harvesting & Food Preservation 👉
- Solving Cold Climate Garden Problems 👉
- 1 Minute Reads On Tons Of Garden Topics 👉
FrostyGarden.com is 100% ad-free and we do not use affiliate links! This resource is voluntarily supported by our readers. (Like YOU!) If we provided you value, would you consider supporting us?