Let’s talk about greenhouse heating! This is a near and dear topic for us and its vital to using a greenhouse in the shoulder seasons for your plants in cold climates!
First, it’s important to know what makes this feasible for us. We talked about greenhouse insulation recently and that cannot be overstated as being the most important aspect of greenhouse heating. Heat, no matter how you get there, is expensive. If your greenhouse leaks like a sieve, you’ll be paying dearly to heat the outdoors. So, good insulation and ability to capture heat we put into the greenhouse is paramount.
There’s lots of different ways to add heat. We chose electricity for our greenhouse and there’s a lot of reasons for it. It’s infinite, easy to temperature control and was well within the BTU requirements we’d need to maintain minimum low temperatures for a relatively small (10×12) greenhouse. Using fuels like oil, natural gas, propane and diesel are all possible, but tend to increase difficulty by a lot. But, then again, if you need higher BTU’s, these other fuels may be your only practical option.
It’s good to understand your BTU heating requirement. We’re not going to teach you the math here, but you can reasonably predict the amount of BTU’s required to heat a given space. The typical variables include greenhouse size, insulation, materials, desired greenhouse temperature and outdoor temperatures you’re heating against. The “easy way” is to look up greenhouse BTU calculators, spend some time figuring your specific inputs and maybe looking at best case / worst case scenarios. This will tell you, essentially, how much heat (in BTU’s) you need to add to maintain specific temperatures.
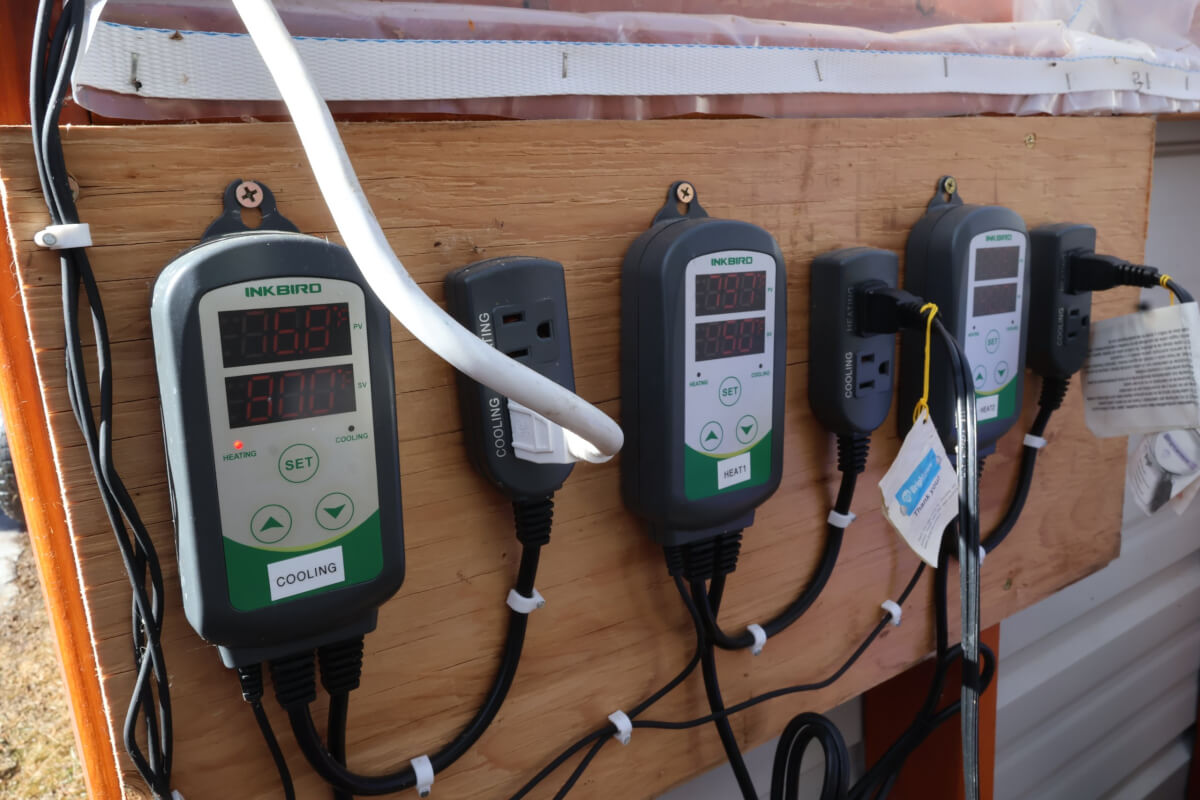
For us, we found we could get away with relatively inexpensive electric space heaters. We use Inkbird temperature controllers to program set points for heating and cooling. We separate cooling and heating into separate controllers, mostly because of the way these controllers work. They use “setpoints” and “differentials” as their control mechanisms. Separate controllers allow us to heat to 45F and cool to 80F, which is a rather wide temperature differential. All in, this heating setup cost about $250, including the greenhouse insulation, controllers and heaters.
You might notice that we have two heaters and two heating controllers. This is both out of necessity and it provides us a bit of redundancy, since our heating is critical to the survival of our greenhouse plants. Electrically, though, the Inkbird temperature controllers can only handle 10 amps. So, splitting our heating into two 750 watt heaters keeps us under that rating, but still gives us a full 1500 watts of BTU’s in the event we need it. Almost all of the time, we only need the one heater, though. But, it’s peace of mind to have a backup, just in case the one becomes overhwelmed by outdoor temperatures.
Let’s also talk electrical safety as it’s super important when dealing with high electrical loads like space heaters. We only temporarily power our greenhouse, since we really only need power for 4 months of the year. If you’re potentially pulling 1,500 watts of power, you absolutely need 12 gauge extension cables. If you skimp with cheap, higher gauge cable, that is a recipe for a house (or greenhouse) fire. You are the safety mechanism here, so be safe with power!
If you want to save your wallet, we recommend only heating to a very minimum temperature, just enough to prevent frosts. (We use 45F as our minimum.) Sure, you can heat to a balmy, tropical temperature overnight. But, you are going to pay dearly for that heat and you are not going to like your next power bill.
That’s the basics! We really do need to put together a full temperature control guide on our website, but we will link a video we did on this down below! Hope it helps!


