
As freezing temperatures appear to be soon descending upon us, it’s probably important for us to discuss winterizing irrigation lines and hoses!
We usually perform this task prior to the freezing temperatures rolling in. The reason we do it is that it helps our equipment last much longer and will prevent the damage that ice can do, since water will expand when it is frozen. We’ve found if we wait until after a freeze, the lines sometimes get slightly frozen and we often don’t get sufficient warming to clear them out later.
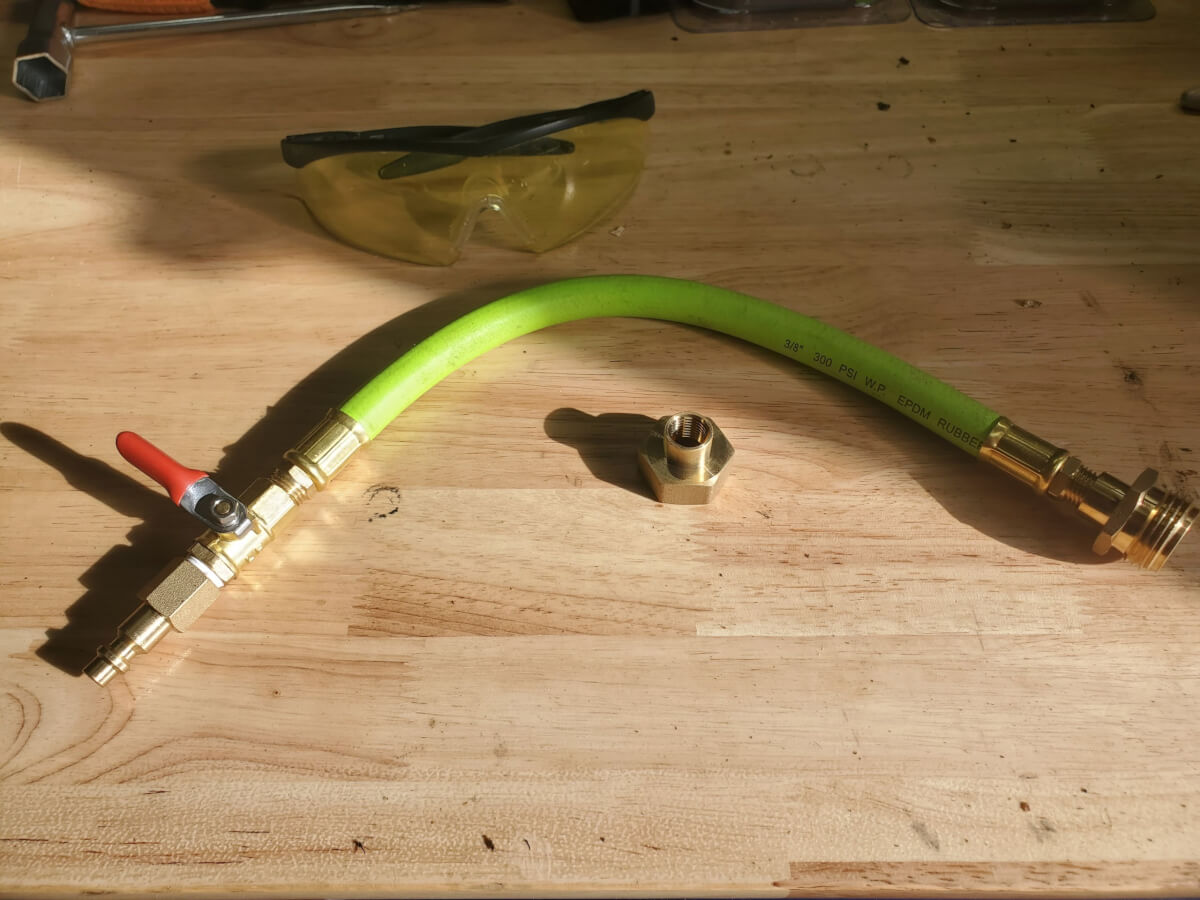
The primary tool of choice here are what’s called a blow-out valve, sometimes also called an RV winterizer. It’s designed to connect a standard air compressor to garden hose fittings. This allows you to push air through the line, removing any water that might be in your irrigation system or hoses. There’s a little valve on it that allows you to turn the airflow on and off.
Our preference is to load up our small air compressor into our garden cart, making it a totally mobile winterizing setup. The air compressor doesn’t have to be any particular kind or size, but we do recommend using quick connect fittings to make your connections a bit easier. Smaller compressors may require you to blow more tanks of air, whereas larger ones will often take less.
When we do this, we usually blow several tanks of air through each line, ensuring the lines are clear of water and residual moisture. It’s good to watch your emitters for any expelled water, which will help you ensure you get it all. Emitters are most vulnerable to ice damaging them, so we want to make sure all water vapor is clear as best as possible.
As for pro tips we can offer? It’s super helpful to design your irrigation system so it can be winterized from one location. We installed valves in strategic locations that allow us to turn off water/air flow in certain directions, which allows us to fully clear various tees and diversions that we have. We also installed capped drains on the “end of the line” in our distribution piping, which allows us to unscrew the cap to get every last bit of water. It’s also helpful to make sure you have all “male” or “female” garden hose fittings in your cleanout spot, so you don’t have to keep swapping adapters.
You can also do this to your garden hoses, which will also help them last a lot longer. Plus, it’s really satisfying to see a hose blow out water at high speed, causing it to whip around like a crazed snake!
Before we started doing this, we were always chasing leaks and various problems in the spring. It was taking us hours to repair things, and additional costs, to return to a properly working system. A little bit of prevention is definitely worth the effort and we no longer have major issues after properly winterizing our irrigation systems.
If you want more information, we have a full article on this process. You’ll find our winterization tips & tricks down in the comments below!
