
Listen To This Article!
When we moved into our homestead, one of our first missions was to accommodate our desire to grow our own food.
We needed to transform our “house” into the beginnings of an actual homestead.
While we intended to use various techniques to grow our own food, an appropriate raised bed garden was integral to our gardening needs.
Our initial objective was to build a capable raised bed garden that would allow dense planting and serious food production in a small space.
These are the thoughts, processes and specific build process we did to build a flexible, capable and long term raised bed garden in the subarctic!
Our General Raised Bed Build Objectives
We knew we wanted to build raised beds, this is a very effective gardening technique that can be used in colder climates.
When we built our raised beds, we were still fairly new to the subarctic. That said, we had done a lot of research that we could combine with older knowledge and experience we all ready had.
With that research and previous experience, we had a few objectives we wanted to accomplish with a “proper” raised bed system that would serve us for years to come:
- Use high quality soil, preferably DIY made, for long term benefits to plant health, weed removal and other issues.
- It needs to be built defensively. It should protect our garden from most common threats in the area, typically animals. (e.g. voles, rabbit, moose)
- Build it to accommodate crop rotation plans. We need the ability to fully rotate our crops to prevent nutrient depletion.
- It needs to allow for intensive planting, allowing high levels of food production in a small space. This involves soil building concepts and long term strategies for nutrient recovery.
- We want it to last long term, meaning we take active measures to reduce the natural deterioration that lumber can experience with soil contact.
There were a couple of other secondary objectives. Such as being somewhat attractive (curb appeal) and general accessibility/convenience factors. Meaning, we wanted “close and ready” access to our garden.
We decided not to directly put a cost limitation into our raised bed build. We didn’t aim to “waste” money, but rather spend what it cost to accomplish our gardening objectives and no more.
Integrating Defensive Strategy Into Food Production
It’s important to think about the threats any garden may face and integrate protection against those threats into your general plan.
We had enough “local” subarctic experience at this point to well understand the common threats our raised bed garden would face. They were real and needed to be integrated into our raised bed garden plan.

Voles are incredibly common in northern climates. They can come from everywhere, above and below. Incredibly clever animals, they are fully capable of destroying their favorite plants over time. Our raised beds would have to protect our plants from all possible points of entry.
Rabbits, while seemingly cute and cuddly, can be a serious garden threat. They will nibble, bite and rip your precious, hard earned produce from the ground. Fortunately, they are easy to protect against with inexpensive materials like chicken wire and other fencing materials.
At the top of the list, however, were moose. We didn’t have any practical plan to protect against these massive animals. Moose can jump 12 foot fences! Fence electrification is the most well accepted deterrent, but even this wasn’t a guarantee!

We investigated some “alternative” methods to protect against moose, which we’ll discuss later in this post. We decided this was the most reasonable approach to try, at least initially.
There were of course threats like aphids and other pests, but these are nearly impossible to provide any meaningful physical protection against. Strategies here must involve pesticide based approaches, like neem oil and other defenses.
How We Developed Our Raised Bed Garden Plan
We generally knew where we wanted our initial raised beds. This gave us some general constraints to work with. Fortunately, this space was relatively level, close to our home and would be an ideal space to have a small garden.
As we discuss in our garden bed planning article, we have found it highly beneficial to annually subscribe to a garden planning software. The time it saves us every year is well worth the cost to us.
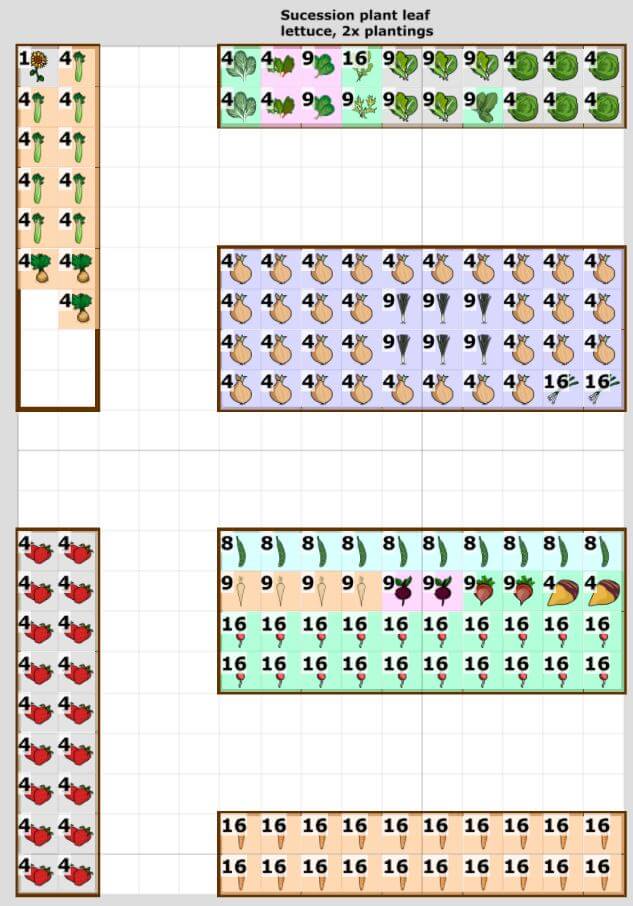
In this case, it can also be used for initial garden design. It allows general assessment and analysis of various garden plans, entirely done in a “virtual” way.
We use GrowVeg.com for our garden planning. There are several resellers of this service out there on the internet, however, this is the “original source” of the garden planning software.
We used this software to model quite a few different garden designs. Since the software is garden focused, we could “simulate” food production capabilities, based on garden and bed size.
While this software is a “crude” tool from a physical design perspective (i.e. physical construction with lumber, screws and other materials), raised beds are not particularly complicated. We knew we could easily translate crudely drawn rectangles into raised bed measurements and physical build processes.
We played around with several different sized raised beds, virtually, along with our general ideas of what we wanted to be able to do with our raised beds.
After several days of working through various ideas, we eventually settled on a design that we thought would work well for us. We were happy with the symmetry, access to plants and crop rotation strategies we could employ.
Once we settled on the final idea, it “felt” right. So, from here we go into the build!
Building Raised Beds & Using Them In The Same Season
Our goal, which we realize was crazy in hindsight, was to build and use the entire raised bed garden in the same season.
In the subarctic, this requires incredibly precise timing!
This meant we had to start the raised bed build during the snow melt and ground thaw, but prior to the general gardening season.

You can see that when we started our raised beds, there was still a considerable amount of snow on the ground! It was a bit crazy to try and build our beds and use them in the same season!
This timeframe isn’t long, maybe two weeks to a month. We had no idea if that was practical, this was our largest and most complicated garden build to date!
It turned out it was possible, but it required a significant amount of determination and hard work to make it happen. Also some luck, too, as the year we did it offered a somewhat early melt and thaw.
We did end up removing the snow in our raised bed area with a snow thrower. We did this fairly early in the snow melt, to maximize the amount of ground thaw that would occur.
There was merit to building in one season and growing in it another season. In our case, we wanted to try to seize the fruits of our labor as soon as possible.
Breaking Ground On Our Homestead Raised Beds
With a plan in place, we immediately seized our opportunity once the snow had melted and ground thawed.
The first step was to determine our initial layout, on the ground. Since this garden was near our home and deck, we wanted certain distances/clearance (6 feet) from our home and deck. This will allow for snow removal, mowing access and is generally a good practice.
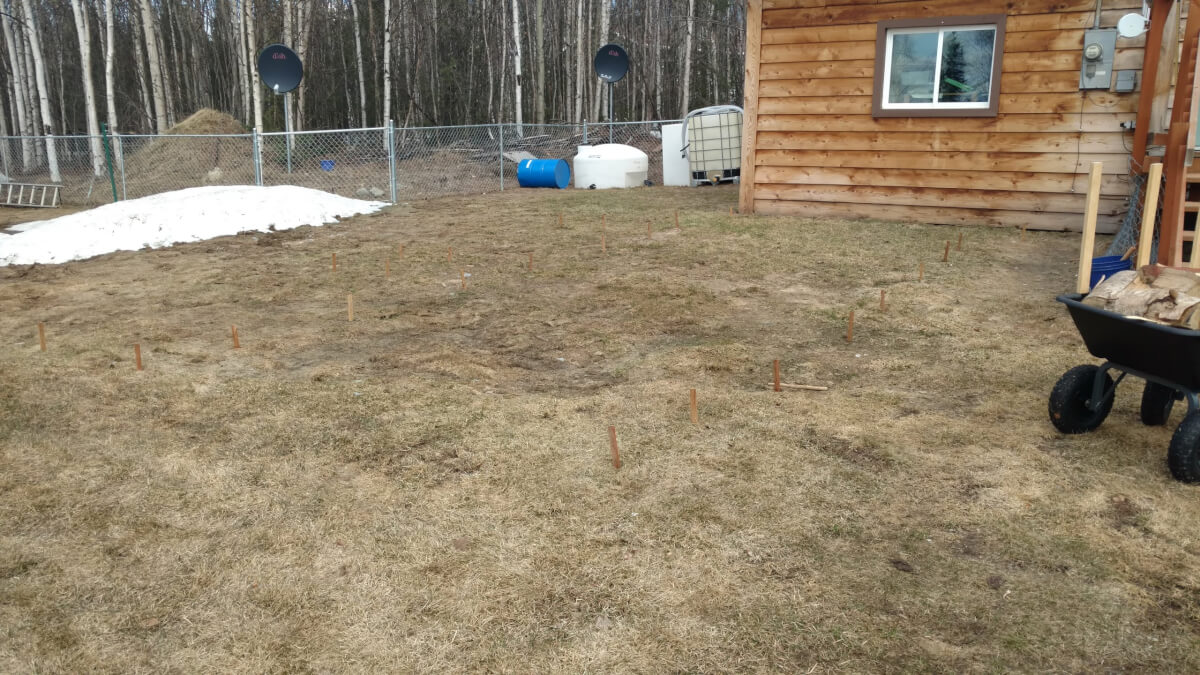
You can see the “survey markers” (cedar pegs) that we used to mark up our raised beds. This helps guide the actual building process, allowing you to “check and double check” before you do anything drastic!
We made and used “survey markers” (cedar stakes we cut up from fence posts on a table saw) to mark our major garden corners. Within this, we used the same markers to define the corners of our raised bed locations.
This effort guides the process of soil removal and general ground preparations that have to occur when building raised beds.
From here, that’s when the hard work begins! And let us tell you, this is some of the hardest garden related work we’ve done!
We generally want to establish level beds. Our grounds weren’t “perfectly” level. We sort of wanted to terrace the beds, but each bed should be relatively level.
We painstakingly carved out the dimensions of each of our beds, removing the sod that covered our formerly grass covered ground. This was serious exercise, quality time with pickaxes and shovels.
We carved out the space for each of our beds, based on our plan. This required hours and days behind our pickaxes and shovels!
We planned to handle our walkways a little differently, so fortunately we didn’t need to pickaxe and shovel these out. (As it turned out, it took us a few years to “get to this” but it was eventually accomplished.)
Building Our Raised Bed Frames
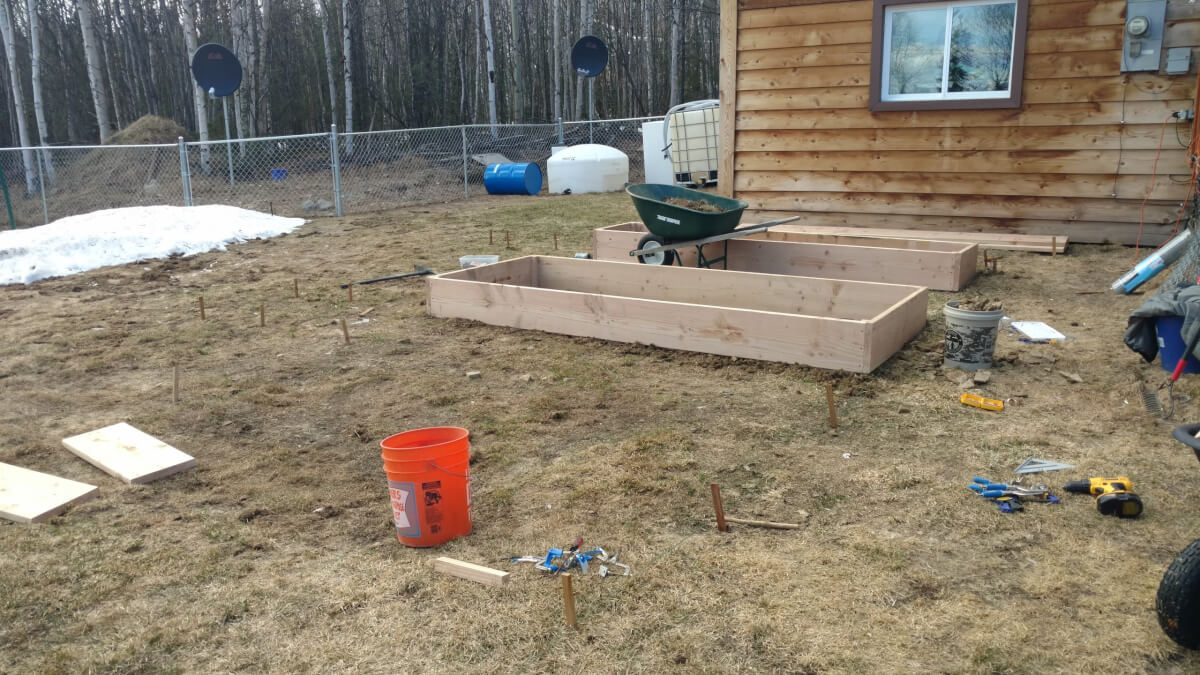
With our difficult ground work out of the way, it was time to start the construction of our actual raised beds.
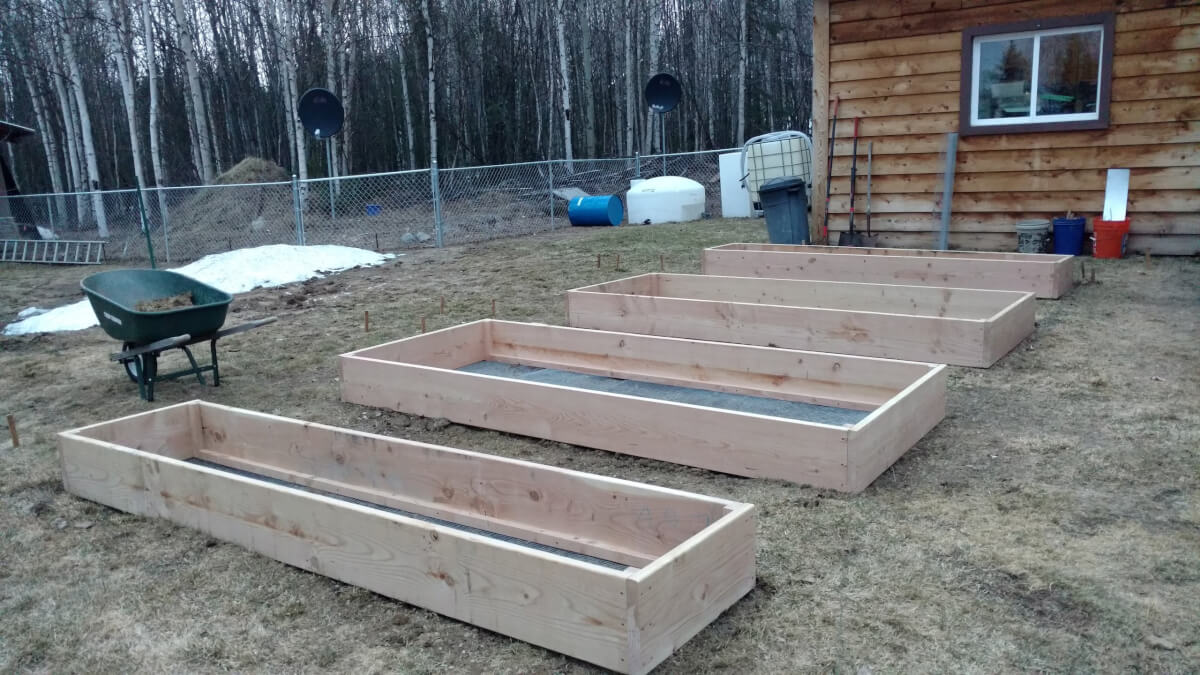
We knew how we wanted to do this. We used 2×12 dimensional lumber to create the beds, using 2×2’s at the corners.
The 2×12 lumber allows for one foot deep beds, which is in our opinion a good raised bed target. It allows for about 10 inches of soil depth, capable of growing longer vegetables like turnips and carrots. It also allows considerable depth to other plants for deep rooting, a huge benefit to many plants.

This photo shows the general construction of our raised beds. We used a 2×2 in each corner, which allows you to screw the lumber together in both directions, creating structural strength.
The 2×2 corners allow for multiple “screw points” where you can screw the lumber pieces both to each other as well as the 2×2. This allows the builder to screw their beds together in both directions, which creates structural strength.
This is an inexpensive way to enhance the structural integrity of “rectangle dimensional lumber” like a raised bed. It will increase the longevity of the build, while taking minimal amounts of internal growing bed space.
We built all of our beds, according to the dimensions of our original plan and subsequent ground preparations.
Next step? Integrate our defensive strategies!
Protecting Raised Beds From Voles & Burrowing Animals
Since garden protection from various threats were top of mind, our next step was to integrate one of our primary defenses.
Voles are capable of attacking the garden in every way. They can sneak through fences, jump over things and also can burrow in from underneath the ground.
We wanted to “armor” the bottom of our beds completely. We opted to line the bottom of our raised beds with 1/4 inch galvanized hardware cloth. This would ensure our voles could not attack our beds from an underground!

We lined every single raised bed with 1/4 inch hardware cloth. This protects the bed from voles burrowing underneath and into your precious garden!
To do this, we purchased 4×50 foot rolls of hardware cloth. This fit our 4 foot wide beds perfectly, but had to be trimmed for our 2 foot beds. A pain, but not terribly difficult with a pair of side cutters.
We used stainless steel staples to attach the hardware cloth to the bottom of the beds. This was a fortunate time for hubby to buy a new tool, an electric staple gun! There was no way that many staples were going to be laid in with a manual stapler! (And it was a good investment, in hindsight!)
A lot of staples were used. That hardware cloth is going nowhere, no matter how much tampering by voles!
Next Step? Bring Out Your Beds!
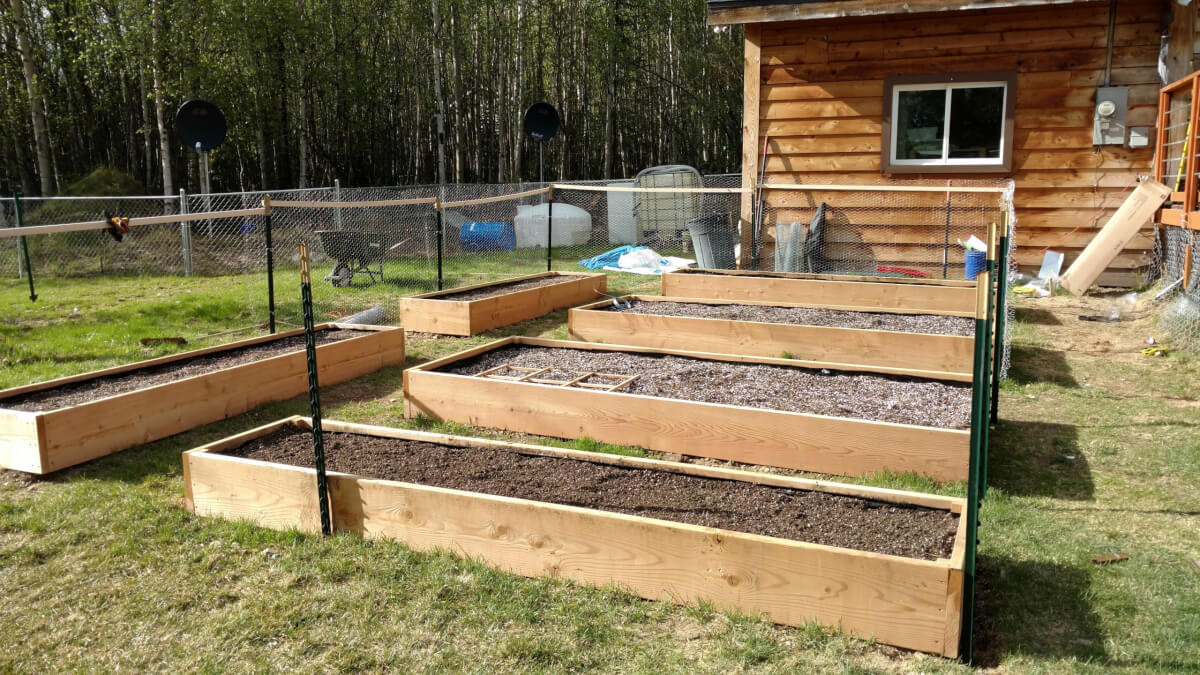
With our bed builds complete, the next step was to lay out our raised beds to their final locations.
We generally completed our levelling process at this time. This required a bit of back and forth between our pickaxe/shovels and general placement. We tried to level each bed, as best as possible.
This picture shows the general process we went through to lay out and level each of our raised beds.
Sometimes we moved soil from one location to another to level things out. Sometimes we found “pressure points” in our hardware cloth that had to be reduced, removed or added to.
We moved these beds a lot of times, prior to our “final” approval.
It’s important to deal with these kinds of issues prior to adding soil, these beds are going to be in place for years to come!
Building The Fence, Rabbits Beware!
With our general raised bed build completed, our next step was to start on the general protections from rabbits.
We intended to surround our raised beds with chicken wire or some other fencing material. The goal? Prevent access to our garden by rabbits.
We laid in 6 foot T-stakes into the ground at about 4 foot intervals. Again, an opportunity for hubby to buy a new tool, called a metal fence post driver.
This is when we realized we didn’t know jack about building and installing fences. That was a bit of a learning curve!
We quickly determined we needed a “top rail” to sort of keep the fence stable. We opted to use furring strips, mostly because it was lightweight and generally inexpensive. If they broke (foreshadowing, they have!), they could be easily and inexpensively replaced.
We used common galvanized bailing wire to secure the chicken wire to the T-stakes. Quick work twisting it up with a pair of linemen’s pliers.
In hindsight, we probably probably would have used a different fencing material instead of chicken wire. At the time, we had a false belief we could keep the voles out with chicken wire.
Today, we’d use standard welded wire fencing, which would be more attractive and sturdy. Adequate for rabbits, the voles will figure out how to get in anyway.
Even “fine” fencing material, like hardware cloth, is entirely inadequate to protect against voles. They are clever and will just go under whatever you build.
Bury it in the ground six inches, go ahead. Voles know how to gain access to food.
Next Step, The Best Soil Money Can Buy!
This is the part we didn’t hold back on. We wanted the highest quality soil we could produce in these beds.
The cost, ultimately, was relatively inconsequential with our long term goal with these raised beds. They would produce countless pounds of food into the future, potentially a decade or more.
For me, it was the ultimate opportunity to further my practice in soil building.
In hindsight, no mistakes were made.
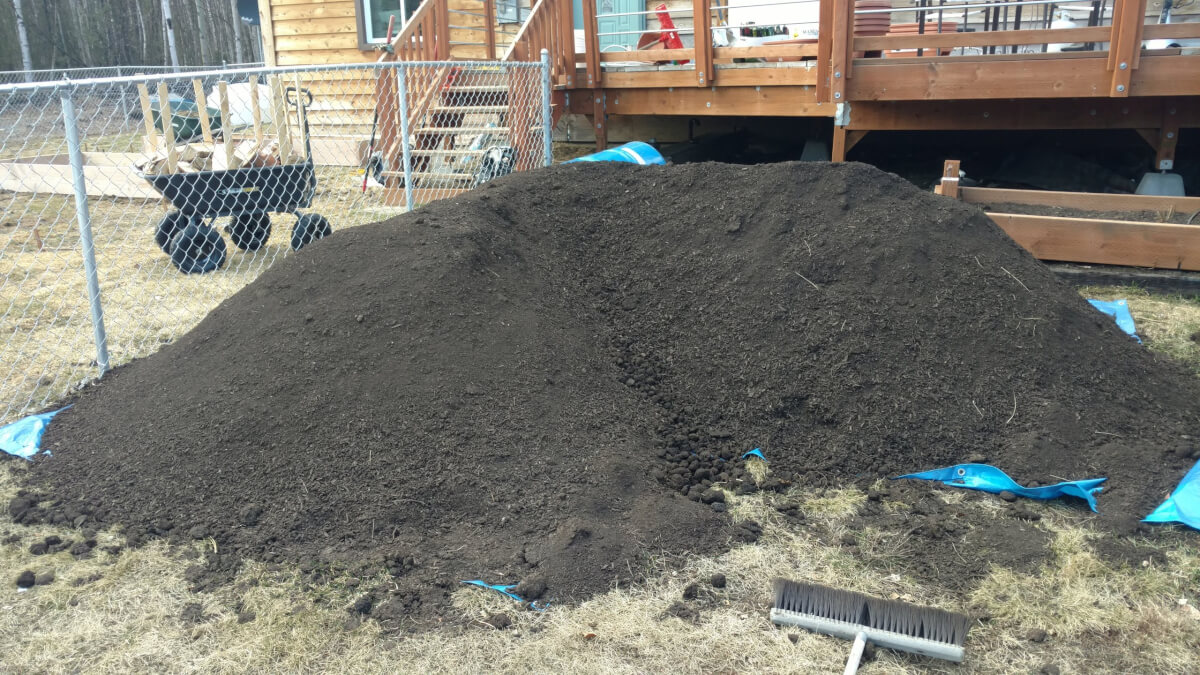
This was the load of compost that we brought in as the basis for building our raised bed soil. This was more than we needed and fortunately lasted us several years.
This is when we developed what we call the “Frosty Garden Secret Weapon” soil recipe. We detail it more extensively, including the exact recipe, on our soil building page.
Our general gardening goal with this raised bed garden was to plant as intensively as possible. We needed a soil that was incredibly capable of dense planting, deep nutritional value and a nutrient profile based on short and long term needs.
In a nutshell, it was the culmination of all my research and practice into soil building to that date. I incorporated all the elements, all the materials and all the nutritional understanding into a perfect, ready to go soil.

This is how we mix up large batches of DIY garden soil. We can make about 50 gallons at a time this way and just dump each load into the raised beds.
It cost a bit of money, sure. But, we’ll tell you, it was worth every penny. Soil is going to cost you, dirt is surprisingly not cheap. Lumber is surprisingly cheap compared to the “dirt” you’ll put in raised beds.
Sure, we spent a bit more than getting a truckload of “gardening soil” delivered, but we also never experienced the inevitable disappointment that brings.
Zero complaints here and still growing strong many years later!
Also, we should also mention that we laid in 5 ounce, heavy duty weed fabric inside the beds prior to putting in any soil. This prevents any grass, weeds or other stuff you don’t want growing in your beds coming up from underneath.
The Final Boss. Protecting Our Garden Against Moose!
As discussed above, we kind of had to give up on physical protection against our most formidable garden enemy.
The moose. Towering in at as much as seven feet tall and 1,300 pounds, these animals can go where they want, when they want.
Build a 12 foot fence? They can jump it, if the risk is worth the reward. Electric fence? They’ve been known to bust through them to get their desired meal.
We aren’t going to put our garden inside of a maximum security prison.
Instead, we did a bit of “alternative” research on moose behavior. We studied their behavior and general caution towards self-preservation, an inherent instinct in all mammals. Sometimes, the best offense is a good defense.
Some wise Alaskans that came well before us have observed that moose are cautious towards motion, especially unpredictable motion. They don’t poke their heads into places where things move, it triggers their self-preservation instinct.
We opted to use what’s called “flaggers tape” as a means of protecting our garden. This is brightly colored tape, very lightweight. It’s inclined to rustle, even in the slightest wind or disturbance.

Flaggers tape is a surprisingly effective deterrent against moose. The motion essentially scares them away! The moose don’t come anywhere near our garden.
Moose don’t like that, they are inclined to stay away. Even in desperate hunger, it triggers their self-preservation instincts enough that they choose to retreat.
Although not empirical evidence, we’ve had few problems when using this technique of protection.
Moose also create a “mental map” for their access to food. They often return to the same places, around the same times of year. Once you’re on that map, you’re on that map for the span of that moose’s life!
We are continually on guard and may escalate our strategy, but have thus far survived with the most basic protections.
Our Comments On Pressure Treated Lumber vs. Lumber Protection
The observant among you will notice we didn’t use pressure treated lumber in our raised beds.
In ancient history, there were concerns about using pressure treated lumber in food based gardens due to the possibility of seriously risky contamination from the ingredients used to protect the lumber.
To be blunt, those major concerns about contamination were resolved a long time ago. The materials used to pressure treat lumber were changed, largely due to this concern.
Pressure treated lumber was a valid option for us in a food focused garden.
Our decisions to use lumber that wasn’t pressure treated were largely based around cost. Pressure treated lumber is more expensive.
We opted for an alternative and more effective treatment, at least in our opinion.
This picture shows the 6 millimeter plastic that we stapled to the wood. This protection technique prevents any direct soil contact, which helps the raised beds last much longer.
If you notice, we used a plastic lining along our beds, both inside and out. This is a 6 millimeter “paint grade” plastic liner that we cut to specifically guard our lumber against direct soil contact.
We do admit, this is the first time we’ve practiced this particular lumber protection technique. For now, it has proven itself well over the six+ years we’ve used them.
Put simply, it makes more sense to me to prevent soil contact with lumber than to rely on chemical infusion of the lumber itself to protect against soil contact.
In the end, no matter what lumber or protection mechanisms you use, raised beds have a limited lifespan. Eventually, our beds will need to be rebuilt, that would be the case regardless of the lumber used.
Finishing Off Final Details For Our Raised Beds
It took us a few years to fully complete our raised beds. We finally “completed” our raised bed project in 2020.
Our first upgrade was to install an irrigation system. We irrigate our gardens with rain water catchment, collected in a central reservoir, which we can then pump around our property.
We created a separate “irrigation zone” for our raised beds, since they would likely take a fair bit of water. We leveraged pressure compensated drip tape, with emmitters at every 6 inches. The 2 foot beds have two lines, whereas the 4 foot beds have four lines.
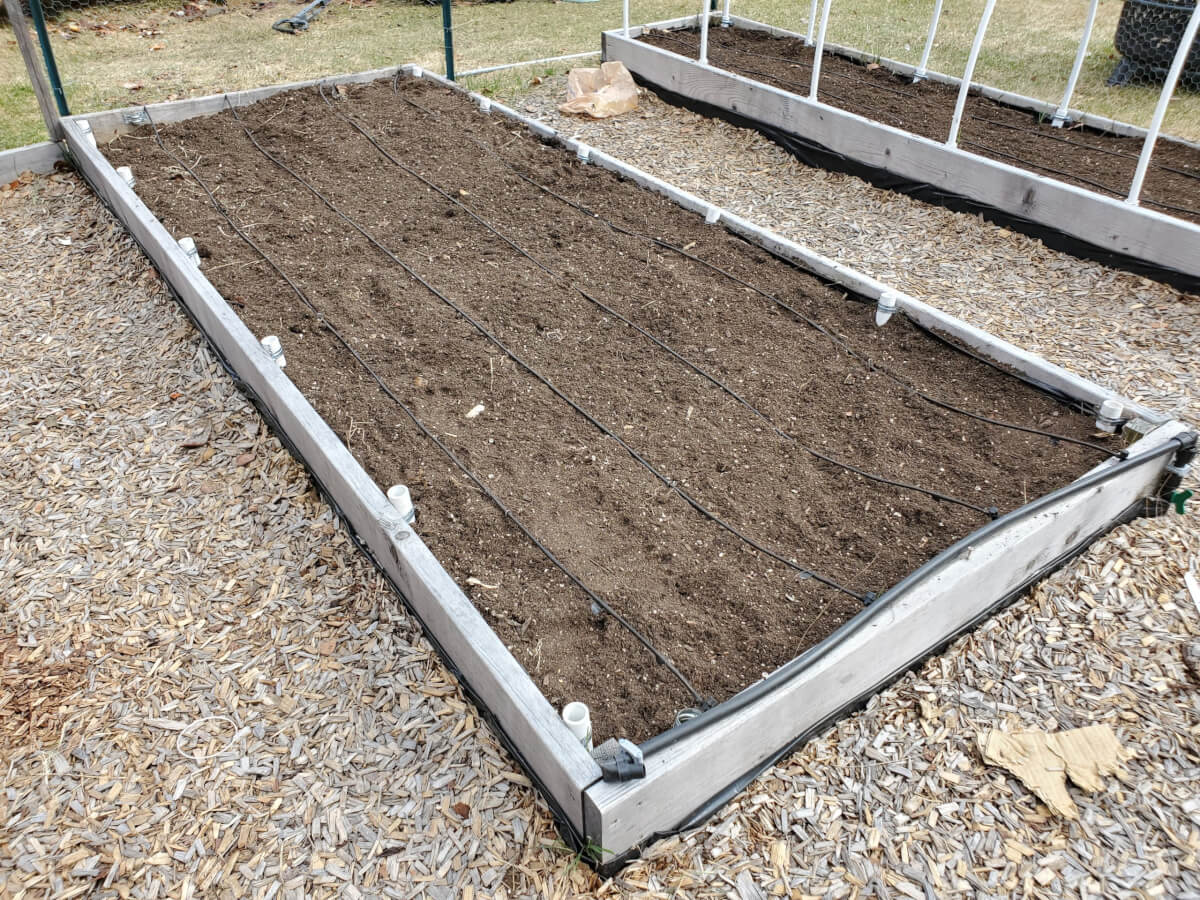
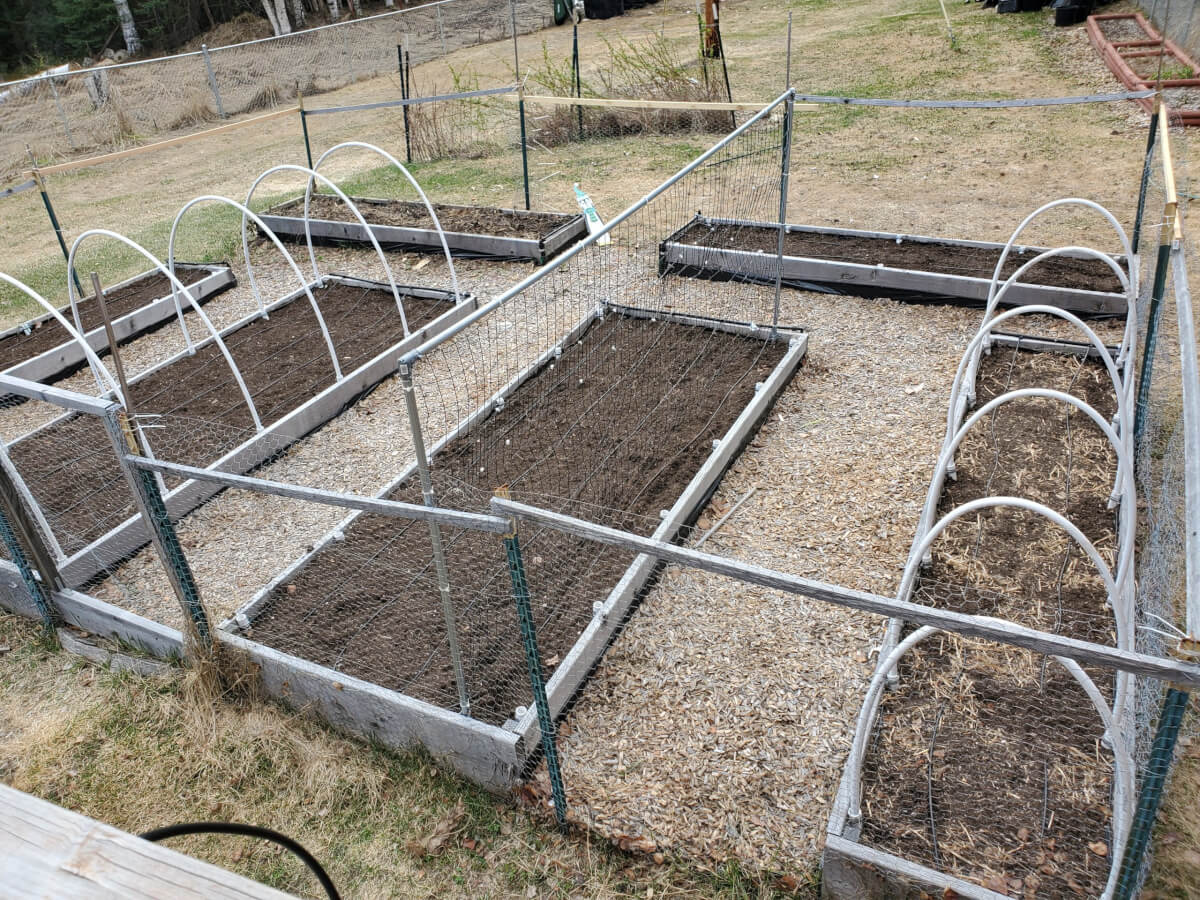
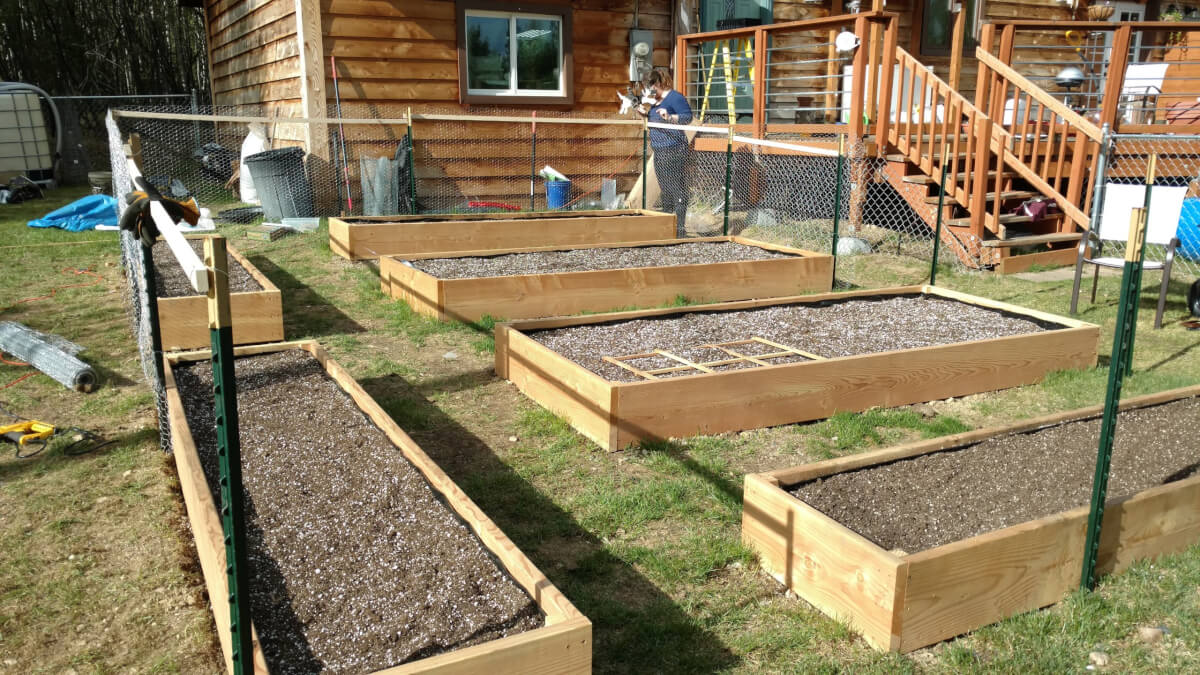
This picture shows our “fully completed” raised beds, with all the final upgrades. We installed irrigation, the ability to use hoops and also put mulch over the walkways.
For the walkways, we intended to lay in a mulch and wood chips to prevent the grass and weeds from growing.
In this case, we utilized cardboard as our mulch. We layered in 2-3 layers of common cardboard, then covered this with about 4 to 6 inches of wood chips. As mentioned above, we lined the outside of the beds with 6 millimeter plastic, to prevent direct contact of the lumber and wood chips.
This solution has held up quite well over the years. We do get an occasional weed or grass that grows on the very edges, but this is hardly an annoyance.
Another upgrade we installed was the ability to put hoops on every single bed. This was necessitated by an onion fly infestation that we experienced.
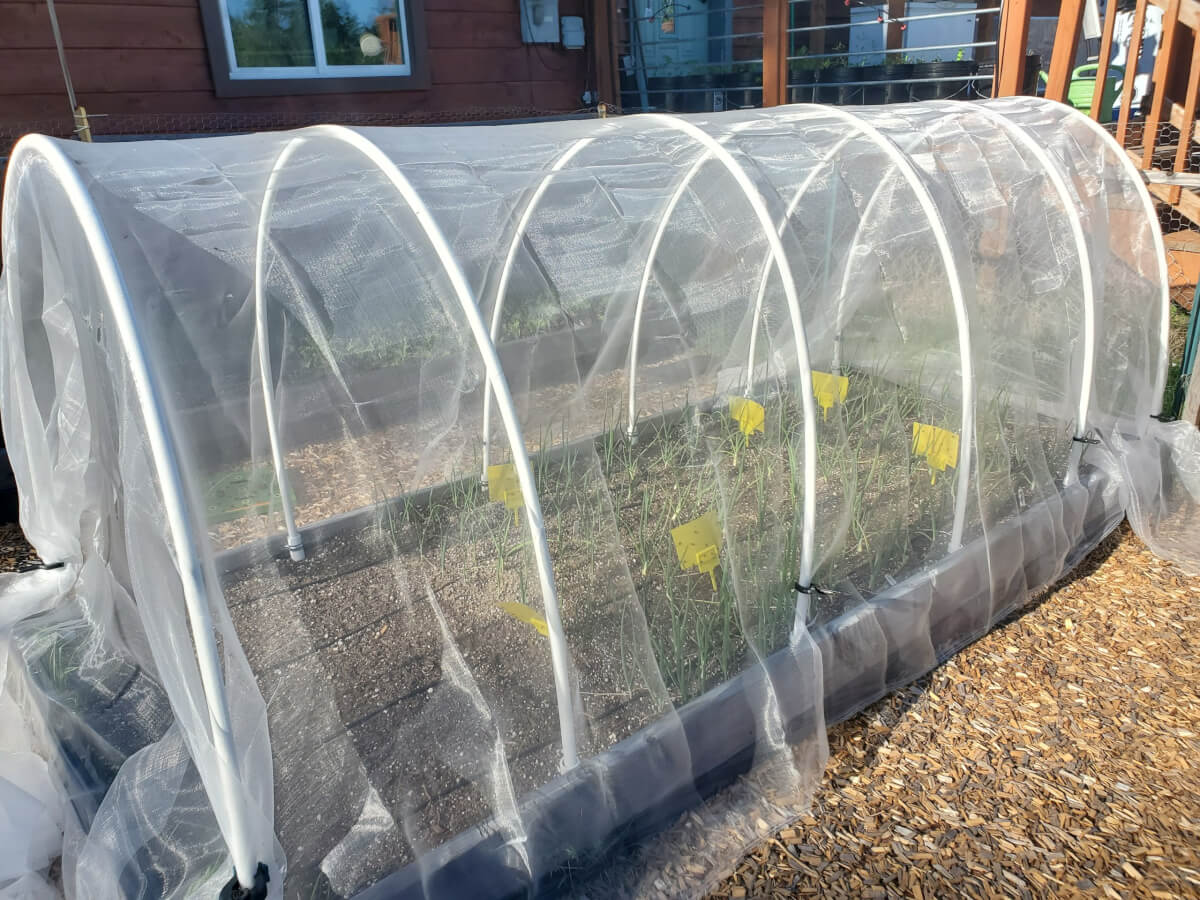
Our raised beds with the hoops installed. We use bug netting to prevent onion flies from laying their larvae, a serious threat to onion crops in the north!
To do this, we cut pieces of PVC and used galvanized electrical conduit clamps to secure the PVC to the inside of the bed. We could then use 1/2 inch PVC to create a hoop over the bed.
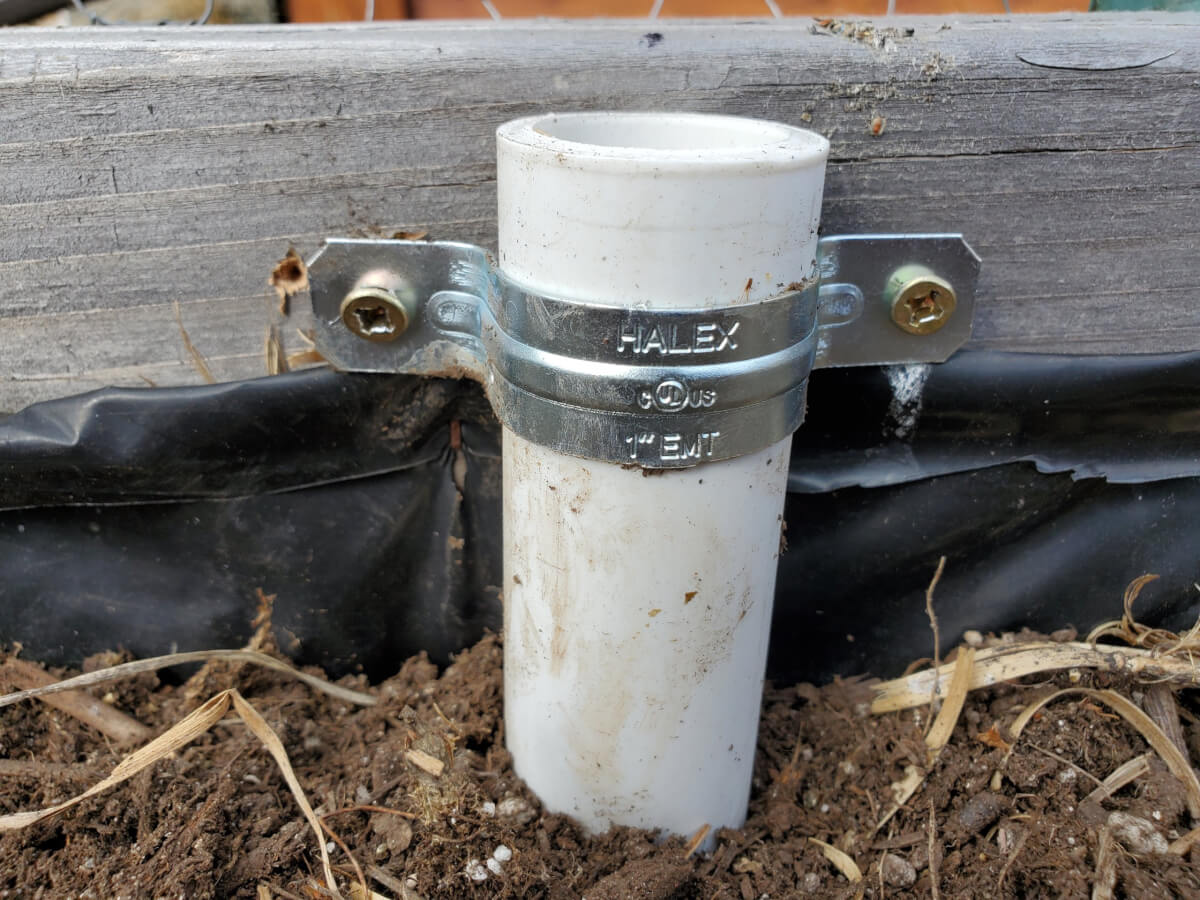
This shows how we secure the 1/2 PVC into the beds, the PVC just slides into these securing mechanisms. Doing things this way, we can swap the hoops from bed to bed, as needed, each season.
This upgrade was quite nice. It not only allowed us to put bug netting over our beds, but we could also install frost cloth if it was needed. In theory, we could also use greenhouse plastic, too, making a small hoop house.
We did this hoop upgrade on all the beds, which allows us to rotate our crops and protect them in whatever beds we choose.
That’s Our Raised Beds In A Nutshell!
That was pretty much our raised bed build. We hope that we provided you a little bit of insight and guidance for how you might also want to approach a raised bed build.
Our raised beds have held up for quite a few years and are showing no signs of degradation. The protection techniques we talked about have also continued to work.
As always, if you have any questions, thoughts or things to add, we’d love it if you put a comment down below!
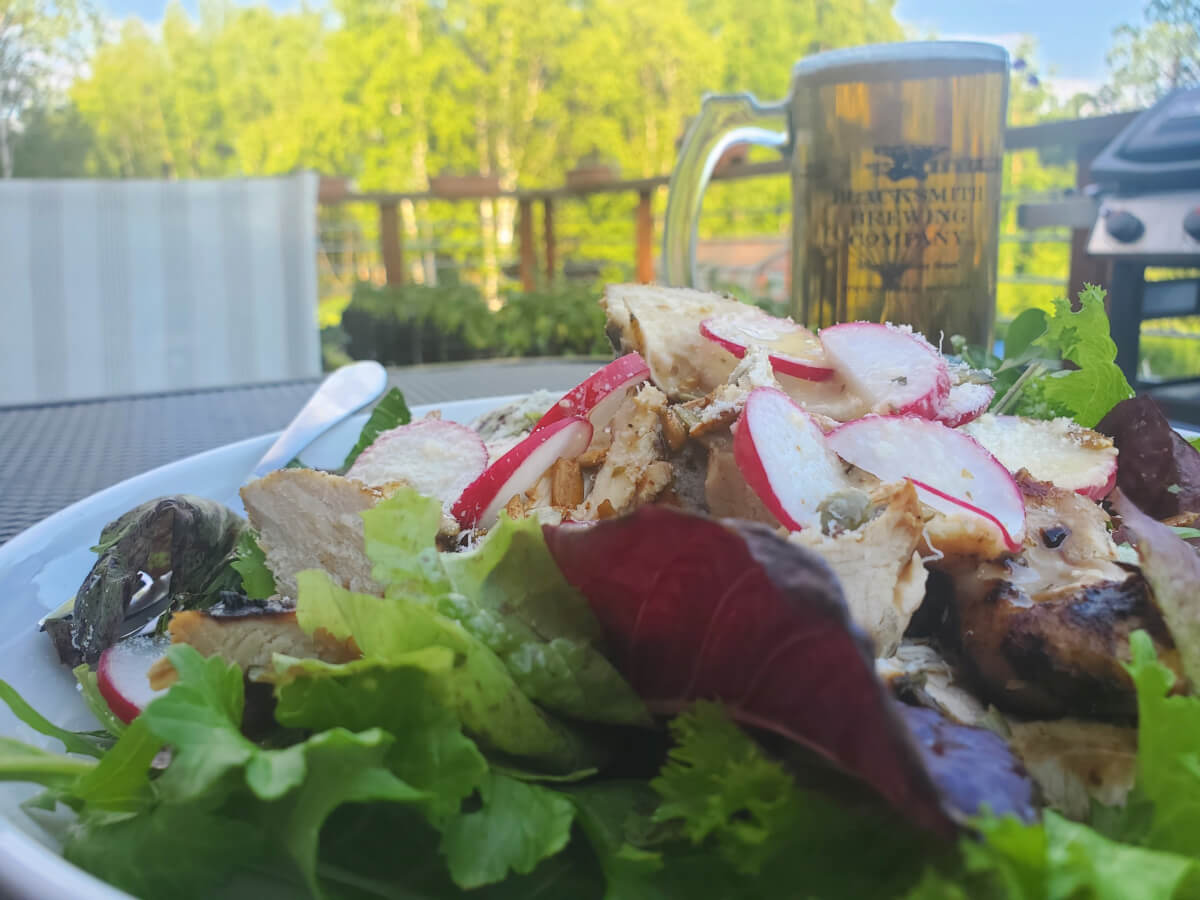
We’ll finish this article with a few pictures of our some of the produce we’ve been able to make in our raised beds.
Our first year with our newly built raised beds!
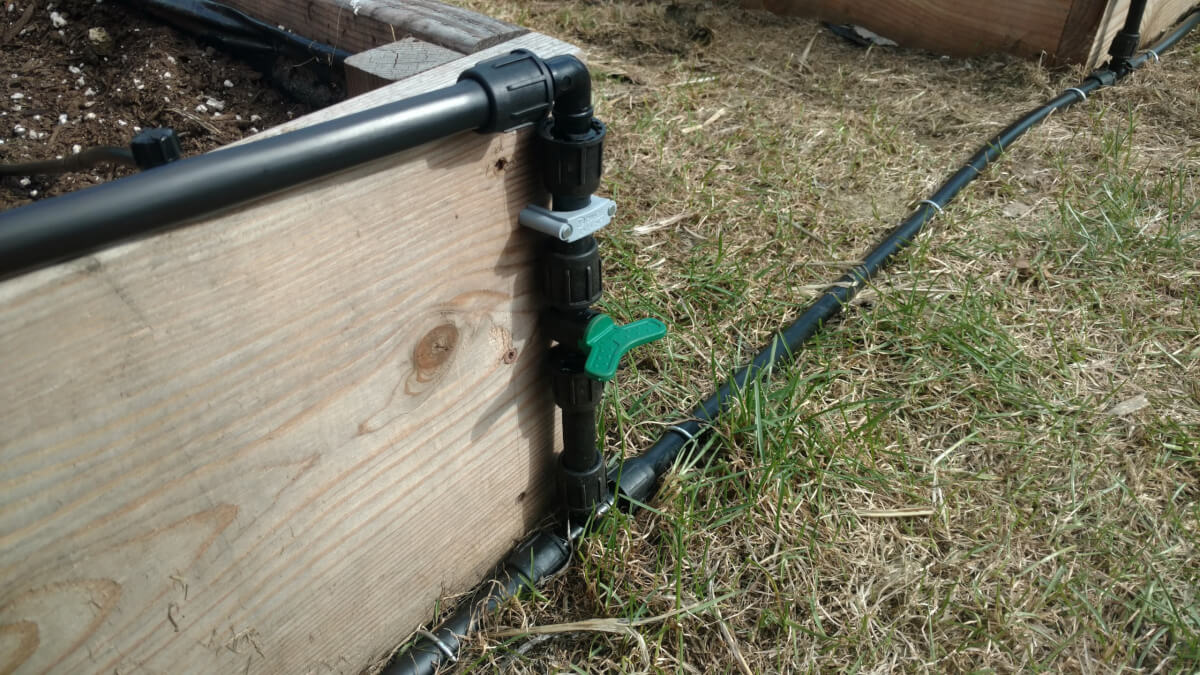
We installed shut off valves to each bed in our irrigation system. This allows us to turn off a bed from our watering systems, should we find the need. They have come in really handy!

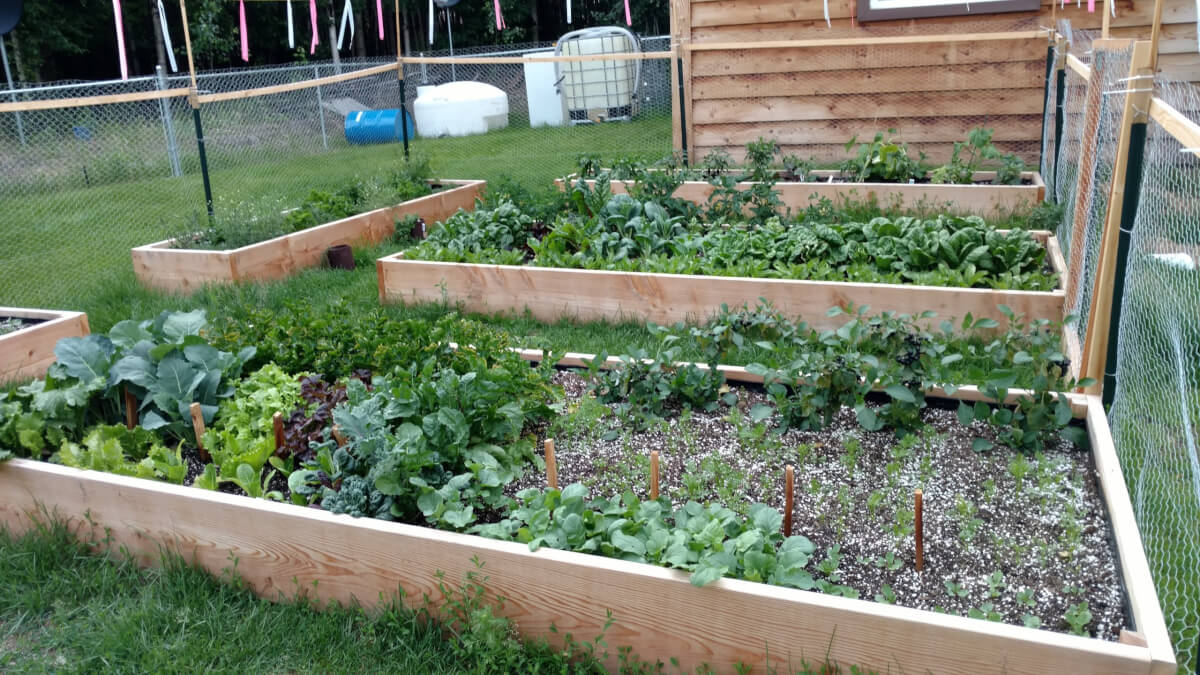
This was our second year with our raised beds, 2019! We had installed our irrigation system, but still hadn’t completed the rest of the upgrades we intended.
Our raised beds provide us immense value, every single season. We love having a close garden for a lot of vegetable production. Five years later, our raised beds are still producing like crazy!
That’s All We Wrote!

Having a good time? Learn something? We have an ever growing list of insightful and helpful subarctic & cold climate gardening articles, just like this one!
- Cold Climate Gardening Basics 👉
- Growing Your Garden From Seed Indoors 👉
- Advanced Cold Climate Gardening Techniques 👉
- Plant Specific Cold Climate Growing Guides 👉
- Subarctic Perennial Food Forests & Foraging 👉
- Indoor Garden Lighting & Grow Rooms 👉
- Greenhouses & Temperature Control 👉
- Harvesting & Food Preservation 👉
- Solving Cold Climate Garden Problems 👉
- 700+ 1 Minute Reads 👉
- 180+ Gardening Topics! 👉
FrostyGarden.com is 100% ad-free, junk free and we do not use affiliate links or sponsorships! This resource is voluntarily supported by our readers. (Like YOU!) If we provided you value, would you consider supporting our mission?