
Listen To This Article!
Most gardeners eventually become interested in starting their garden from seed. As it turns out, plants can be quite costly!
Seeds are considerably cheaper compared to garden starts from a nursery.
That said, raising your plants from seed isn’t quite as easy as it seems. It’s a little bit more complex than “just add soil, water and light.”
This post covers some of the basic introductory information about growing a garden from seed indoors!
Growing From Seed Cost Factors
We’ll start by saying that growing your own garden starts from seed is not the easiest way to go about gardening.
There is a reason that plants aren’t super cheap. It’s not just all profit.
Growing from seed is a bit more complicated that just tossing seeds in soil, adding water and getting plants.
To do it right, there is some investment involved with achieving an environment that is appropriate to grow quality seed starts.

Examples of tools you’ll likely need (or want) are grow lights, containers or pots, trays and perhaps seeding trays. There’s often auxiliary costs involved like light hangers, tables or racks and various tools.
Also, while individual seed packets might be considered somewhat inexpensive, there can be significant costs for just the seeds when you consider how many things you might want to grow.
There is also a significant time component when it comes to growing from seed.
You’ll be investing a considerable amount of time into seed starting. For our gardens, we usually spend 2 to 8 hours per week growing from seed.
Sometimes even more!
Why Not Just Use A Greenhouse?
When it’s time to start growing from seed in the north, the weather and outdoor conditions are not in our favor.
When we need to start seeds, our weather is often still flirting with below zero temperatures.
It is also not plausible to simply start the garden at the beginning of the growing season. Many plants simply require more time to fully grow than the season we have in the north.
In more favorable climates, it’s quite possible to utilize a greenhouse to start a garden entirely.

Sure, it is theoretically possible to use a greenhouse, even in the subarctic. Commercial growers do it all the time.
But, at the home gardening scale, the heating costs involved with heating a greenhouse are often not economical.
Growing our garden starts indoors is the only practical choice for us extreme northern gardeners.
Some gardeners do practice a technique called winter sowing. This is where seeds are sown in a milk jug with soil, which is then placed outside 6 to 8 weeks prior to last frost. This method only works for certain kinds of seeds, however. Indoor growing is universal, allowing all plants to be grown.
We do use our greenhouse in the shoulder seasons, when it is reasonable to heat it. These are times where we’re trying to shift 20 degrees, not 60 degrees.
At a fundamental level, growing from seed indoors is a practice of season extension.
Use Seed Planting Schedules!
When we first approached growing our own from seed, we were like most new gardeners. We just put seeds in the dirt without a care in the world.
As with most brand new gardeners, this resulted in a jungle of plant craziness! Lessons were learned!
One of the most important aspects of indoor plant germination is following a seed sowing schedule.
The sowing schedule you use is determined by your specific zone (or climate) that you live in. It relates to your expected last frost dates.
We have published ours here, specifically for zones 2a through 4b. (We also provide corrections for other parts of Alaska and other northern regions.)
The purpose of a seed schedule is to try and get all of your various plants at an appropriate size for transplanting.
Different plants grow at different rates. Some grow very quickly. Some grow rather slowly.
The seed sowing schedule will also help you avoid that “jungle of craziness” that is difficult to manage indoors.
Additionally, in colder climates like the far north, seed schedules can help you ensure you get full maturity during the growing season. Some plants need a lot of time to fully mature. Starting them indoors, at the right time, ensures you get the crop you desire within the growing season!
How Much Space Do You Really Need To Grow Seeds?
Obviously, this isn’t a one size fits all type of answer. What is almost certain, though, is it takes more space than you might think.
Specifically, the space you need does depend on a number of factors, such as what you want to grow, how big of a garden you have and how early you get started.
If you have a small hobby garden, your requirements are relatively low. When you start talking about serious home garden food production, it can be quite a bit more.
We would recommend 16 square feet as a starting point, at least for most gardeners that are putting together a fairly small size garden. This is about a 4 foot by 4 foot space, or a little more than a meter squared.
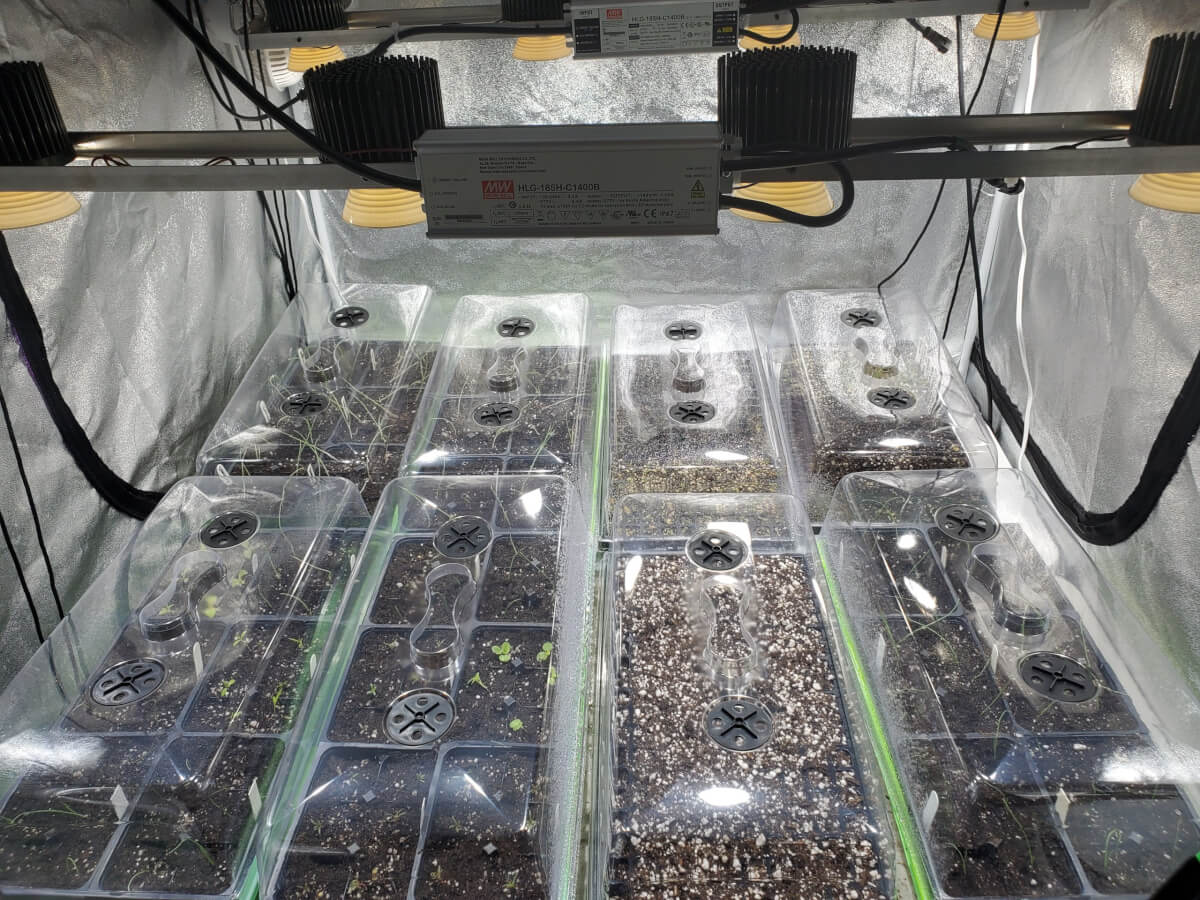
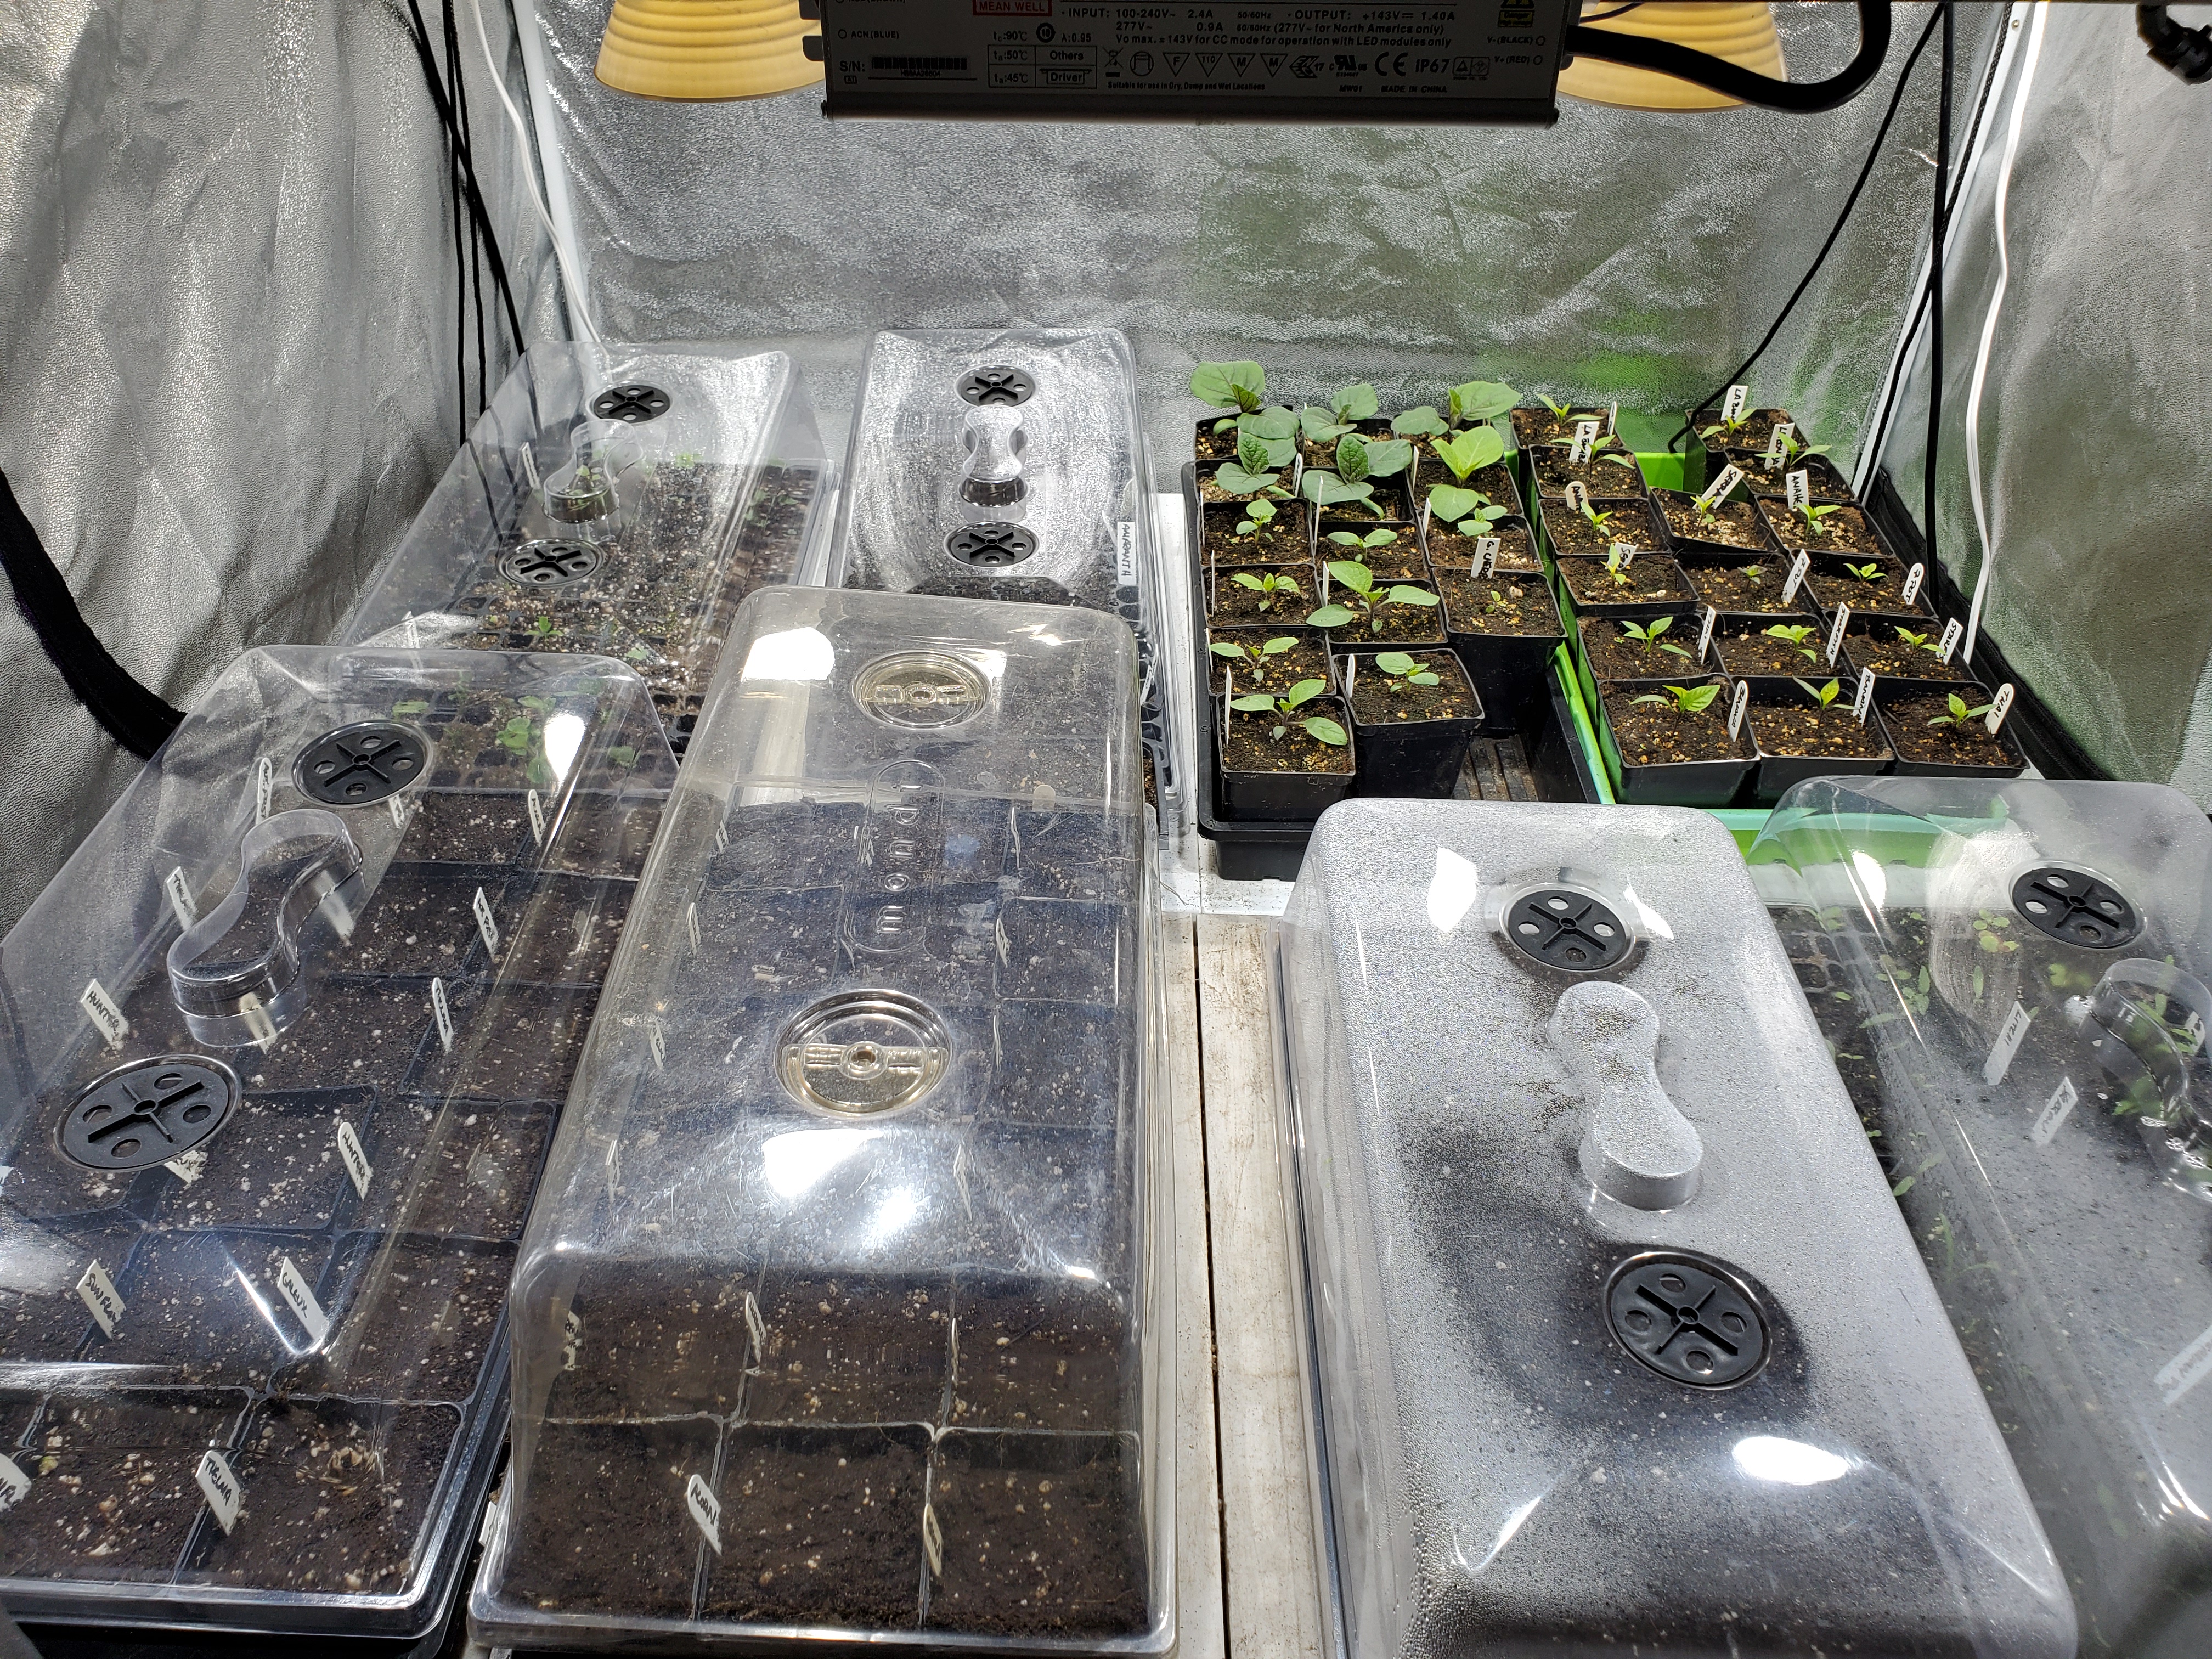
This grow tent is 4 foot by 4 foot, or about 1.2 meters squared. It comfortably holds eight 1020 trays. There is a little bit of room for plants along the sides, but not much.
If you are trying to grow a lot of plants, perhaps several hundred or more, you are going to need more indoor growing space.
Our setup, for indoor growing, is approximately 40 square feet. That allows us to grow around 800 seed starts for our garden.
We have that split among multiple areas. We have the 16 square foot grow tent, but also two temporary 2 foot by 6 foot tables that we use as an “overflow” space.

This is an example of our temporary growing tables. We use an inexpensive PVC light hanger, a 2×6 table and high quality LED lights. Cat for scale.
From there, we’ve also invested into temperature control in outdoor spaces that allow us to take advantage of weeks outdoors, while frost is still quite a problem.
The Basics Of Our Indoor Seed Germination Setup
We detail our germination setup in much more detail in another article, but this is the overview of what we use to grow our garden starts.
We’ve spent a fair bit of effort trying to optimize our indoor growing systems for space efficiency. We don’t have all the space in the world, so how we use that space is important to us.
We have essentially answered the question, “If you could go back to the beginning, what equipment would you buy?” This is what works well for us.
The major components of our indoor germination and plant raising set up are as follows:
- Indoor lighting (LED variants, both Quantum Board and Chip on Board)
- Seedling trays
- Pots (Typically 3.5 and 5.5 inch)
- 1020 Inserts (Typically 606 inserts)
- 1020 trays
- Humidity domes
- Tables (2×4 or 2×6)
- Grow tent or PVC light hanging fixture
- Fans (Both circulation and ventilation)
Let’s also be clear that there are many different types of equipment out there. The above is just a reflection of what we use in our space.
Our set up is very space efficient and allows for significant quantity of seed germinations and young plants in a restricted space.
Choosing The Right Indoor Lighting
Garden lighting has been something we’ve changed several times over the years, especially as technology has improved.
We’ve learned quite a few things that we’d like to share with those just starting out.
As of 2020 and beyond, the only lighting that makes sense for growing your own garden starts is LED lighting.
We’ve written extensively about the choices you can make, but the savings on electricity with LED make it the obvious choice these days.
We’ve played around with advanced DIY lights, such as building our own lights from chip-on-board LEDs. When LED lighting was still insanely expensive years ago, this gave us an inexpensive way to get into some very high end LED lighting.
These days, though, we really like what are called quantum board LED systems here at Frosty Garden. They are a relatively modern and simple, plug and play solution.
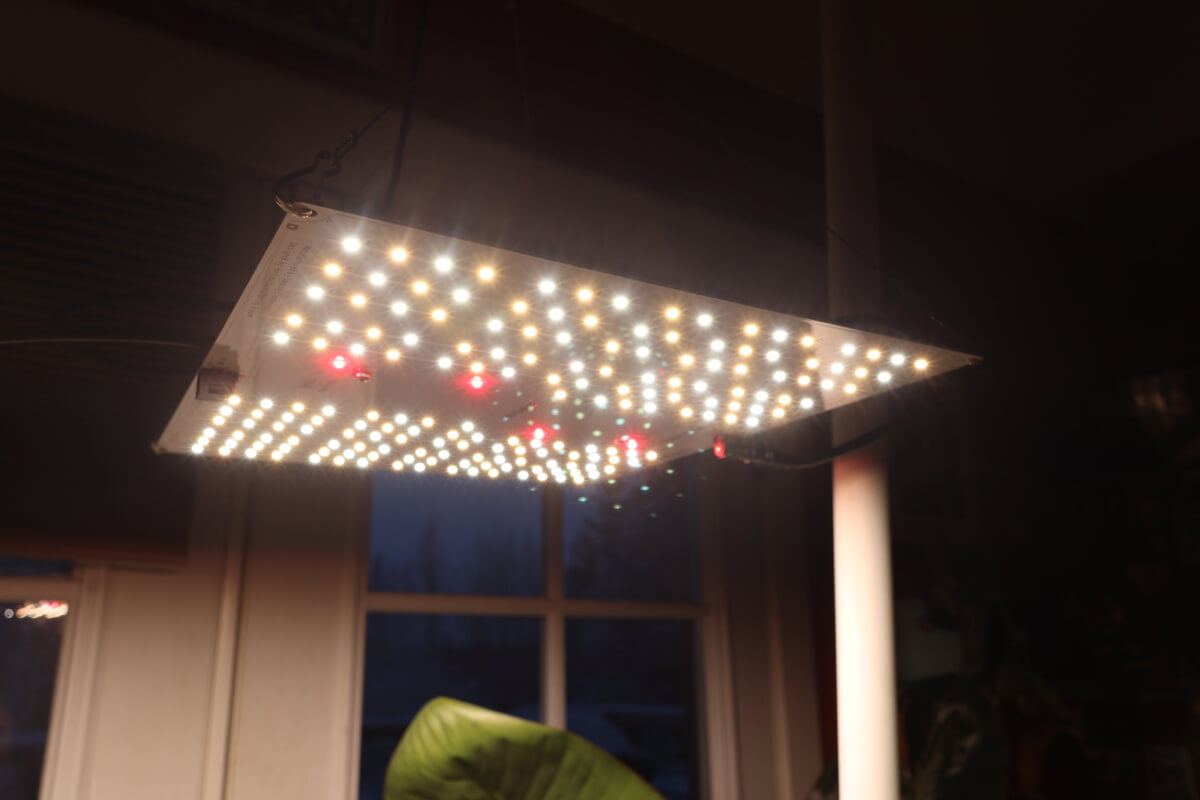
This is an HLG-100 from Horticultural Lighting Group. It covers a 3×3 area very well and is comparable in cost to CFL and other lighting systems.
Quantum board LED systems provide very powerful indoor grow lighting and very high levels of electrical efficiency. It is some of the best “bang per watt” you can get, while also being reasonably friendly on the wallet.
Quantum board LED lights also come in a variety of sizes, makes and models. We personally use the Horticultural Lighting Group HLG-100 series and highly recommend them.
Although these lights do draw some power, they are often more cost efficient to operate than many, smaller LED lights.
A Growing Space Can Be Very Flexible
Conceptually, there are a number of ways that an appropriate growing space can be put together. You have the choice of either temporary setups or something a little more permanent.
We do have a full guide on designing and building various types of growing spaces.
Setting up a couple of tables with a light above it is pretty easy to do. For many years, that’s basically how we started our gardens and we still use this technique today!
We made a very simple light hanger out of 1-1/4 inch PVC pipe. From there, we hung our light using light hangers, which allow vertical adjustment very easily.
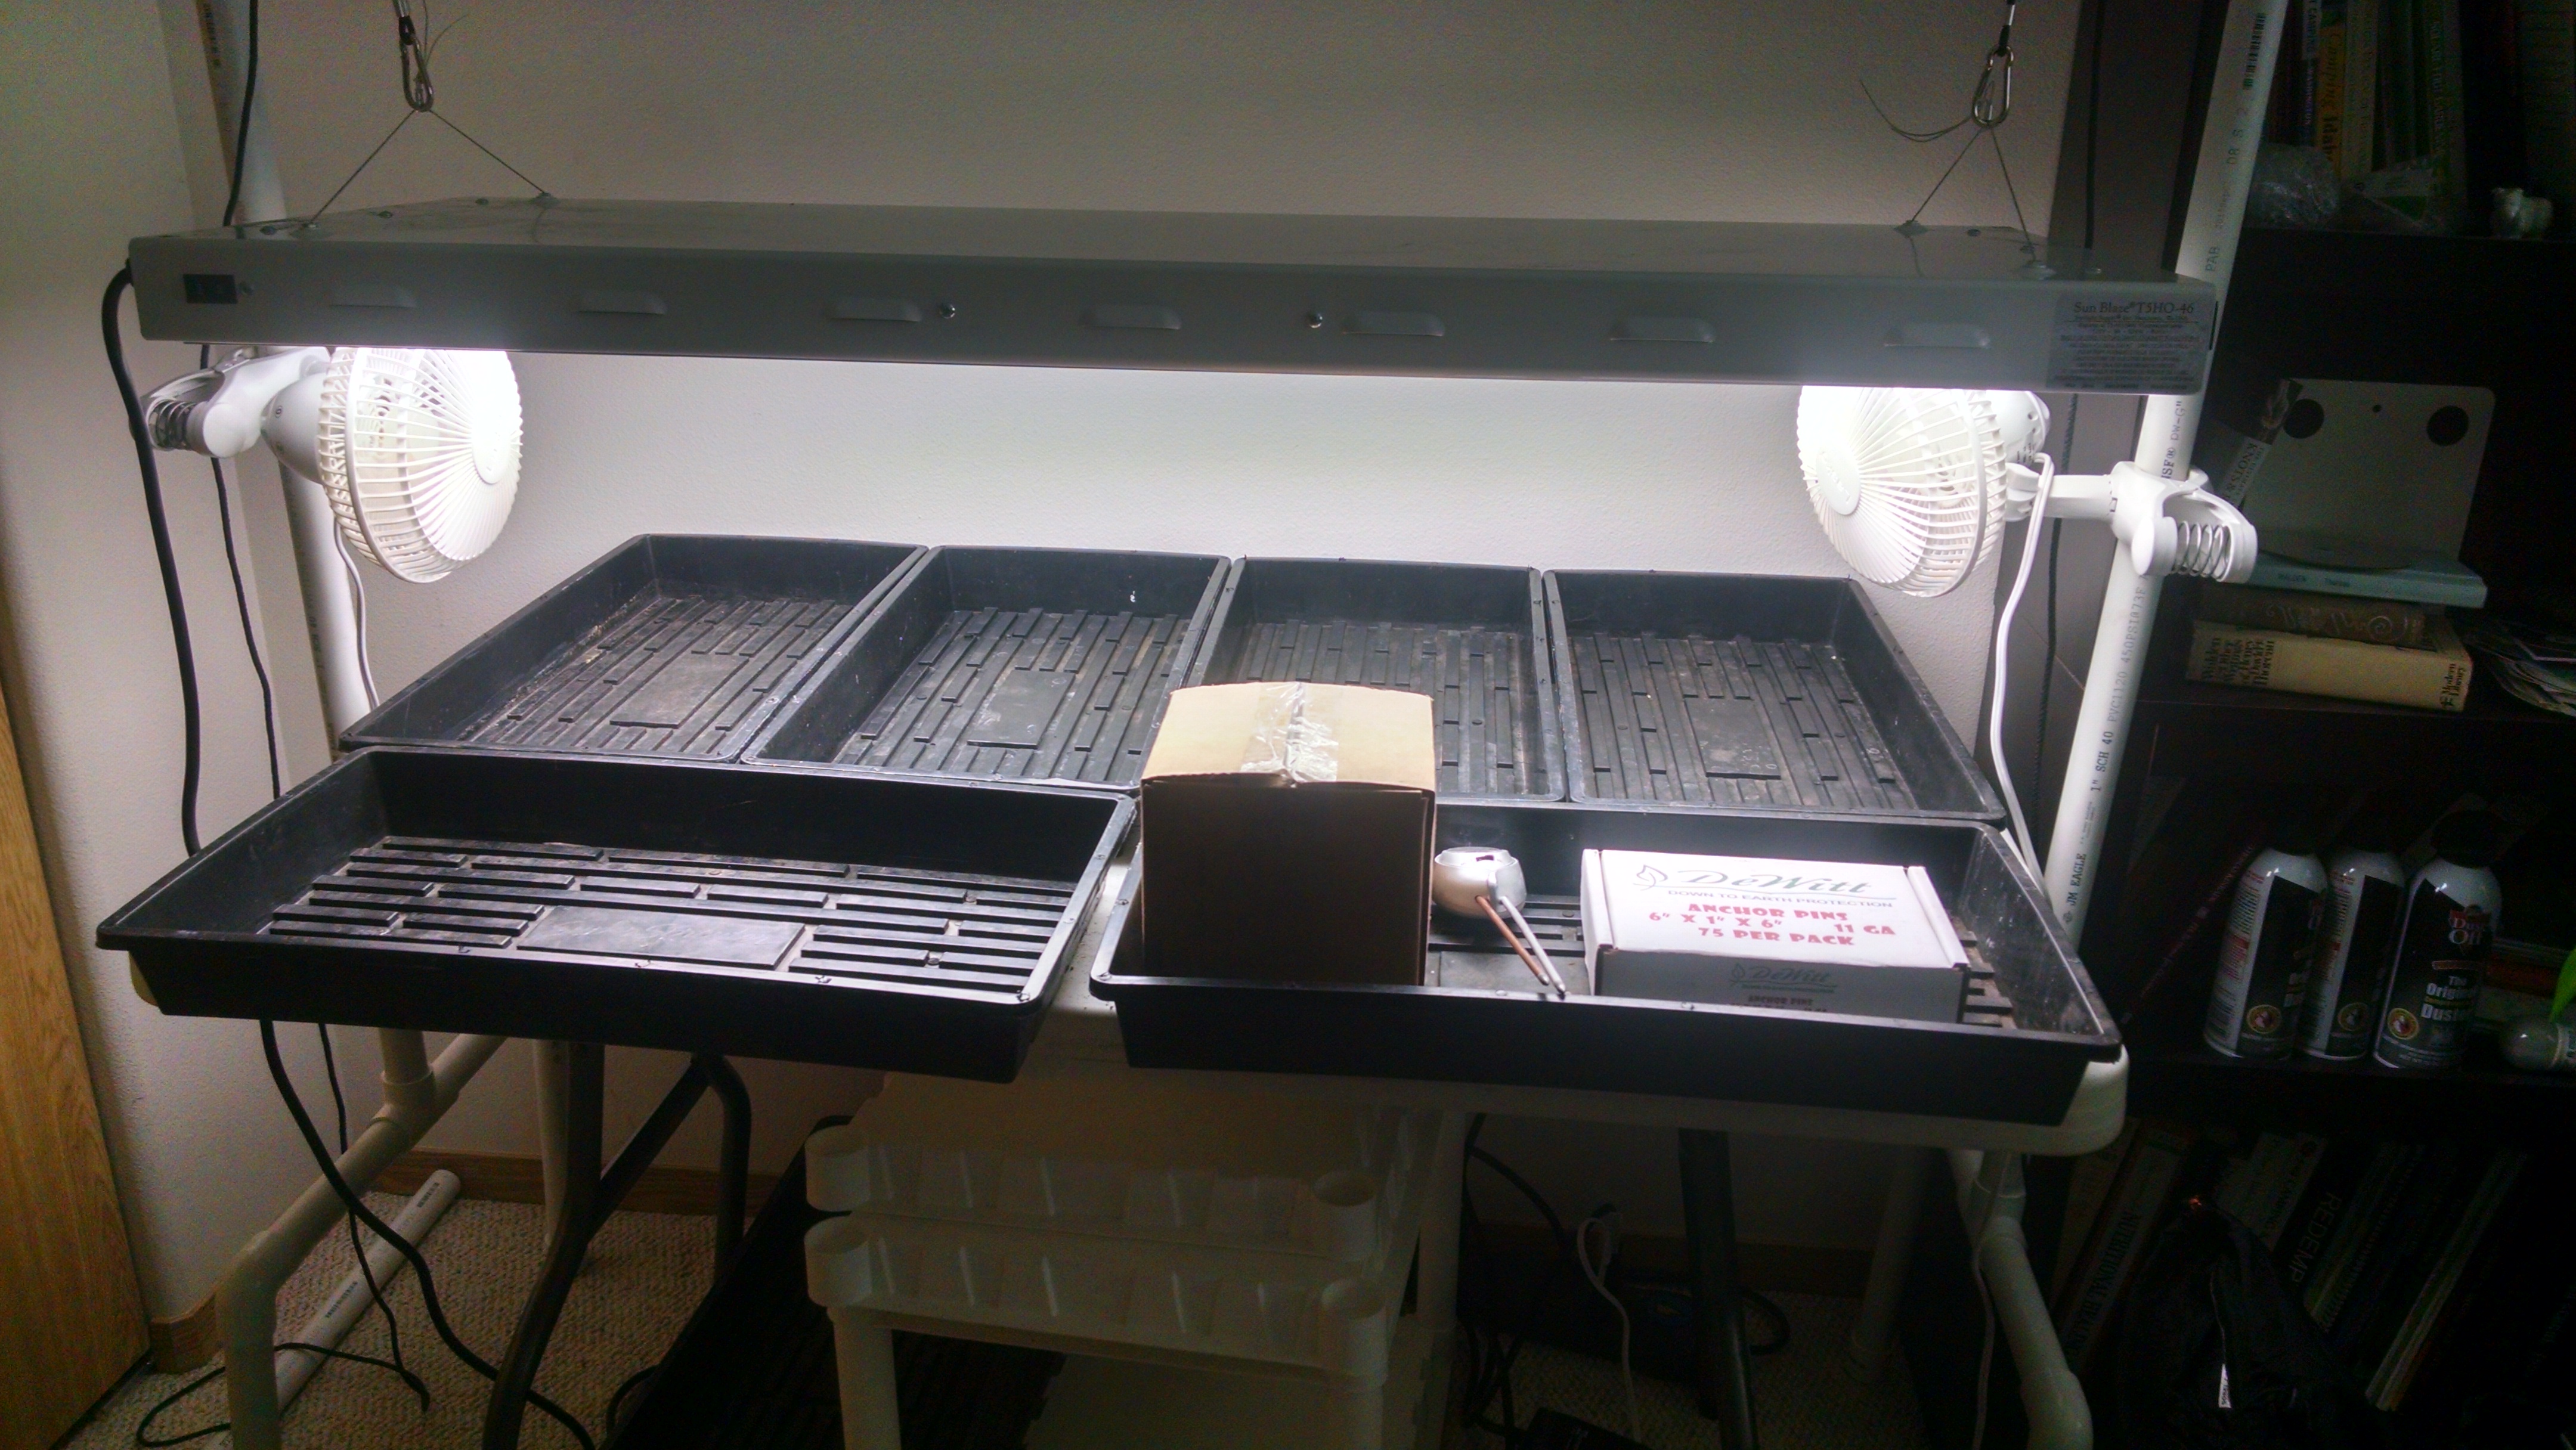
For many years, we set up a couple of temporary tables and used a DIY PVC light hanger, which is super cheap and easy to build. Growing food has become part of our way of life, so we ultimately invested into better growing spaces.
We found that we wanted a more “permanent” type of growing space. Not permanent, as in built into the house, rather a “dedicated” growing space.
So, we set up a 4 foot by 4 foot grow tent in our multi-purpose room.

Beyond a ready-to-go garden space, the largest advantage of a grow tent is increased light efficiency. The walls are made from a reflective material, increasing the “bang for the buck” you get out of your lighting.
It’s not very convenient to put up and take down a grow tent. While you could use a grow tent in a more temporary type of set up, it’s a lot more work.
There are many ways to throw together an indoor grow area. The point is that it can be really simple or a lot more involved. In every case, you can grow good plants.
Vertical Growing Systems Vs. Flat Growing Systems
It’s somewhat common for gardeners to utilize vertical growing systems to grow their garden starts.
This often involves using shelving to create multiple levels of growing space. Lighting is strung across each growing shelf, creating an extremely tight footprint of growing space.

We’ll admit, this is well worth considering. We have used these methods in the past. Currently, however, we don’t practice it.
We prefer a single plane growing method for our garden starts. Here’s our argument:
- A single plane offers better visibility of all your plants. This helps you detect problems sooner.
- Higher power lighting can be used, which results in denser, compact garden starts.
- There are zero issues with plants growing larger. You can simply raise your lighting, as needed. In shelf based systems, if your plants get tall, you’ll need to figure out something else.
- It’s much easier to manipulate growing trays on a single growing plane compared to multiple growing planes.
- You often have to spend more for multiple lights to cover smaller areas, plus you end up using far more electricity.
For us, those benefits are worth the sacrifice in general space utilization. We do have to use more square feet to produce a similar number of plants than you could with a vertical growing system.

When you compare a densely packed, single plane growing space against a multi-level 2×4 space, the efficiency difference of vertical systems isn’t as extreme as you might think.
Ultimately, you can choose what’s right for you. There is merit to both multi-level growing methods and single-plane growing methods.
Having done both methods, we currently prefer the single plane method.
Avoid The New Gardener’s Folly!
Most new gardeners are really excited to get started growing their own seeds. They go out and buy stuff and slap everything together. Within a few days, they are elated to see their seedlings sprout!
Pretty soon, their plants grow larger and their list of seeds they want to grow continues to expand.
Many of them, at some point, realize their initial setup was insufficient.
That new gardener then goes and spends more on lights, tables and so forth. This cycle continues at least a couple more times as the plants get larger and larger.
Pretty soon, they’ve spent several hundred dollars on stuff and it’s difficult to maintain it all.
If you take a step back early on, you’re going to realize there’s a couple key points you can learn from:
- You are going to need more space than you originally needed for just seedlings
- Your initial budget for a system probably should have been higher than what it was
If you think about your system initially, and have a better idea of how much space you’ll actually need to cover with lighting, you can make better equipment choices.
I think the biggest thing we’ve learned is that it’s better to buy lighting (and possibly other accessories) based on your total needs, as opposed to your initial needs.
What we mean by that is you need very little space to get seeds to pop. You need considerably more space to transplant them and grow them until they’re ready to put in the garden.
It’s better to buy things around that final need, as opposed to piecemealing things together haphazardly.
Have A Plan For Your Garden
We are big advocates of planning out your garden space. It’s a bit of work up front, but it helps you at every other step of the way.
While we have an entire article on the planning aspects of gardening, we call it out again here because it’s so important.
Every gardener gets excited when they start putting seeds into soil. We still experience “the rush” when we do it. It’s very easy to get carried away.
Our plan is the primary means of defense against getting too carried away.
Having a plan helps us to stick to exactly what we need, with maybe a little extra. This helps us avoid significant excess, as well as insufficiencies where we’d have to purchase starts to get what we need.
Overall, having the plan reduces mistakes. Mistakes tend to cost money, or create waste, and we like to minimize those things as much as possible.
Use The Buy Once, Cry Once Mentality
If we could learn anything from our past selves, it’s to invest in good equipment as much as possible.
When you are just dabbling your toes in the water of gardening, it’s probably fine to get away with the cheapest equipment.
If you’re extremely financially burdened, you might have fewer choices.
If, however, you’re at all serious about growing, you will strongly benefit from better gear.
We call this the buy once, cry once mentality. It applies to more than just gardening.

Basically, if there is a serious value add proposition or better equipment available that will last considerably longer, that’s a perfectly valid reason to spend more money.
For example, if you buy a cheap 1020 tray, they will likely only last a season or two before it needs replacing. Compare that to a heavy duty tray, though, which will last for a decade or more.
Sure, those heavy duty trays are three times the price, initially. But, after a few years, you’re basically saving money at that point.
The same is true for indoor garden lighting. You can buy inexpensive systems, but when you want more light or a bigger footprint, you’re stuck.
You can think in terms of a bunch of cheap lights, or in terms of fewer but more expensive (and higher quality) lights.
With gardening, sometimes it’s better to spend a little more up front so you can get the dividends in the long run.
Go Forth And Grow Many Seeds
Hopefully this introductory article for growing from seed has given you some quality food for thought.
Growing from seed is not the easiest way to go about gardening, but it’s very rewarding. We are very proud to say that our gardens are 100% grown from seed!
If you have any comments or questions, we invite you to put them down in the comment box below.
Thanks for reading and good luck with raising those seeds!
That’s All We Wrote!

Having a good time? Learn something? We have an ever growing list of insightful and helpful subarctic & cold climate gardening articles, just like this one!
- Cold Climate Gardening Basics 👉
- Growing Your Garden From Seed Indoors 👉
- Advanced Cold Climate Gardening Techniques 👉
- Plant Specific Cold Climate Growing Guides 👉
- Subarctic Perennial Food Forests & Foraging 👉
- Indoor Garden Lighting & Grow Rooms 👉
- Greenhouses & Temperature Control 👉
- Harvesting & Food Preservation 👉
- Solving Cold Climate Garden Problems 👉
- 700+ 1 Minute Reads 👉
- 180+ Gardening Topics! 👉
FrostyGarden.com is 100% ad-free, junk free and we do not use affiliate links or sponsorships! This resource is voluntarily supported by our readers. (Like YOU!) If we provided you value, would you consider supporting our mission?
I would like to what fertilizer you use indoors.? How much like the ratio and how often because at this point I’m pulling my hair trying to find Whst works so far I have not found anything.. I live in Wasilla Alaska
Greetings Shelia! For raising seeds, we strongly recommend an all purpose water soluble fertilizer as it’ll be immediately available to the plants. If there is a seedling dose specified, use that. But, if not, the typical seedling dose is about 1/8 to 1/4 of a normal dose depending on whether the seedlings are very young (1/8) or a little more established (1/4). The brand of fertilizer doesn’t matter a lot. It can be non-organic or organic, but the most important thing is water soluble. Hope that helps! We should have this info in at least one of our from seed articles, so I’ll also hunt for a good place to put it.