
Listen To This Article!
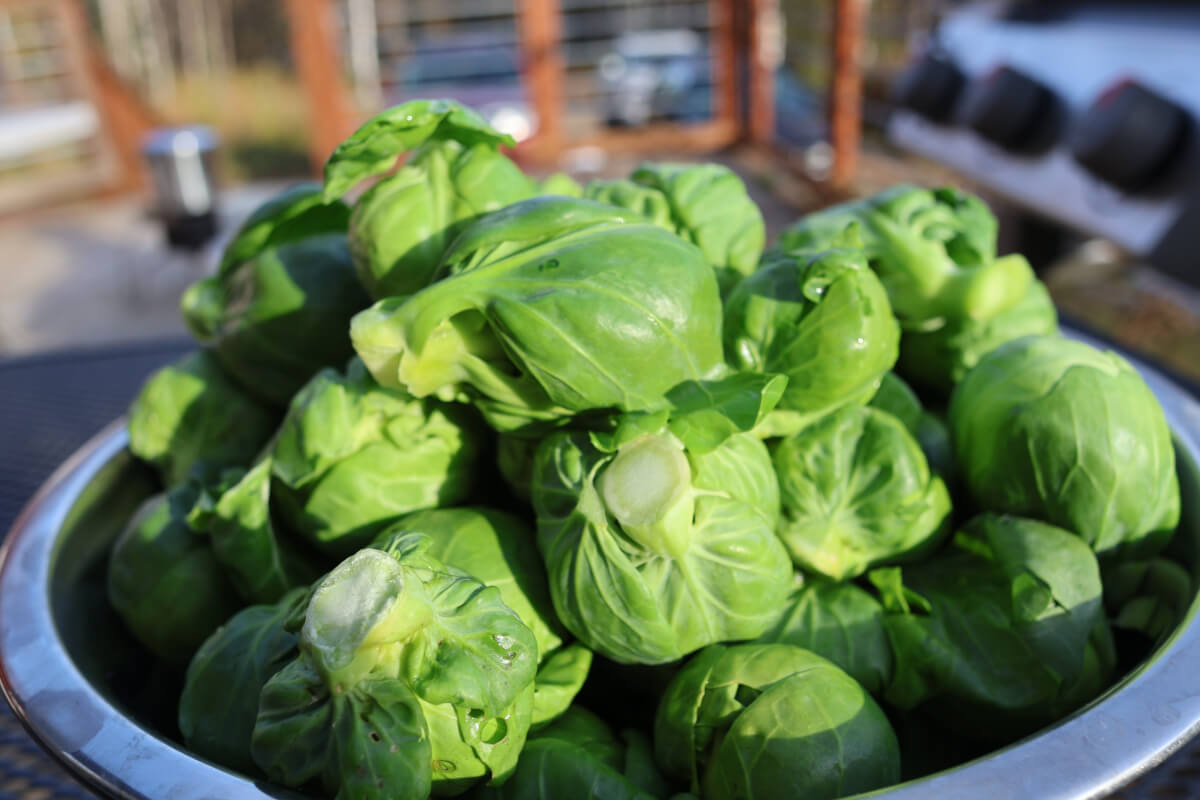
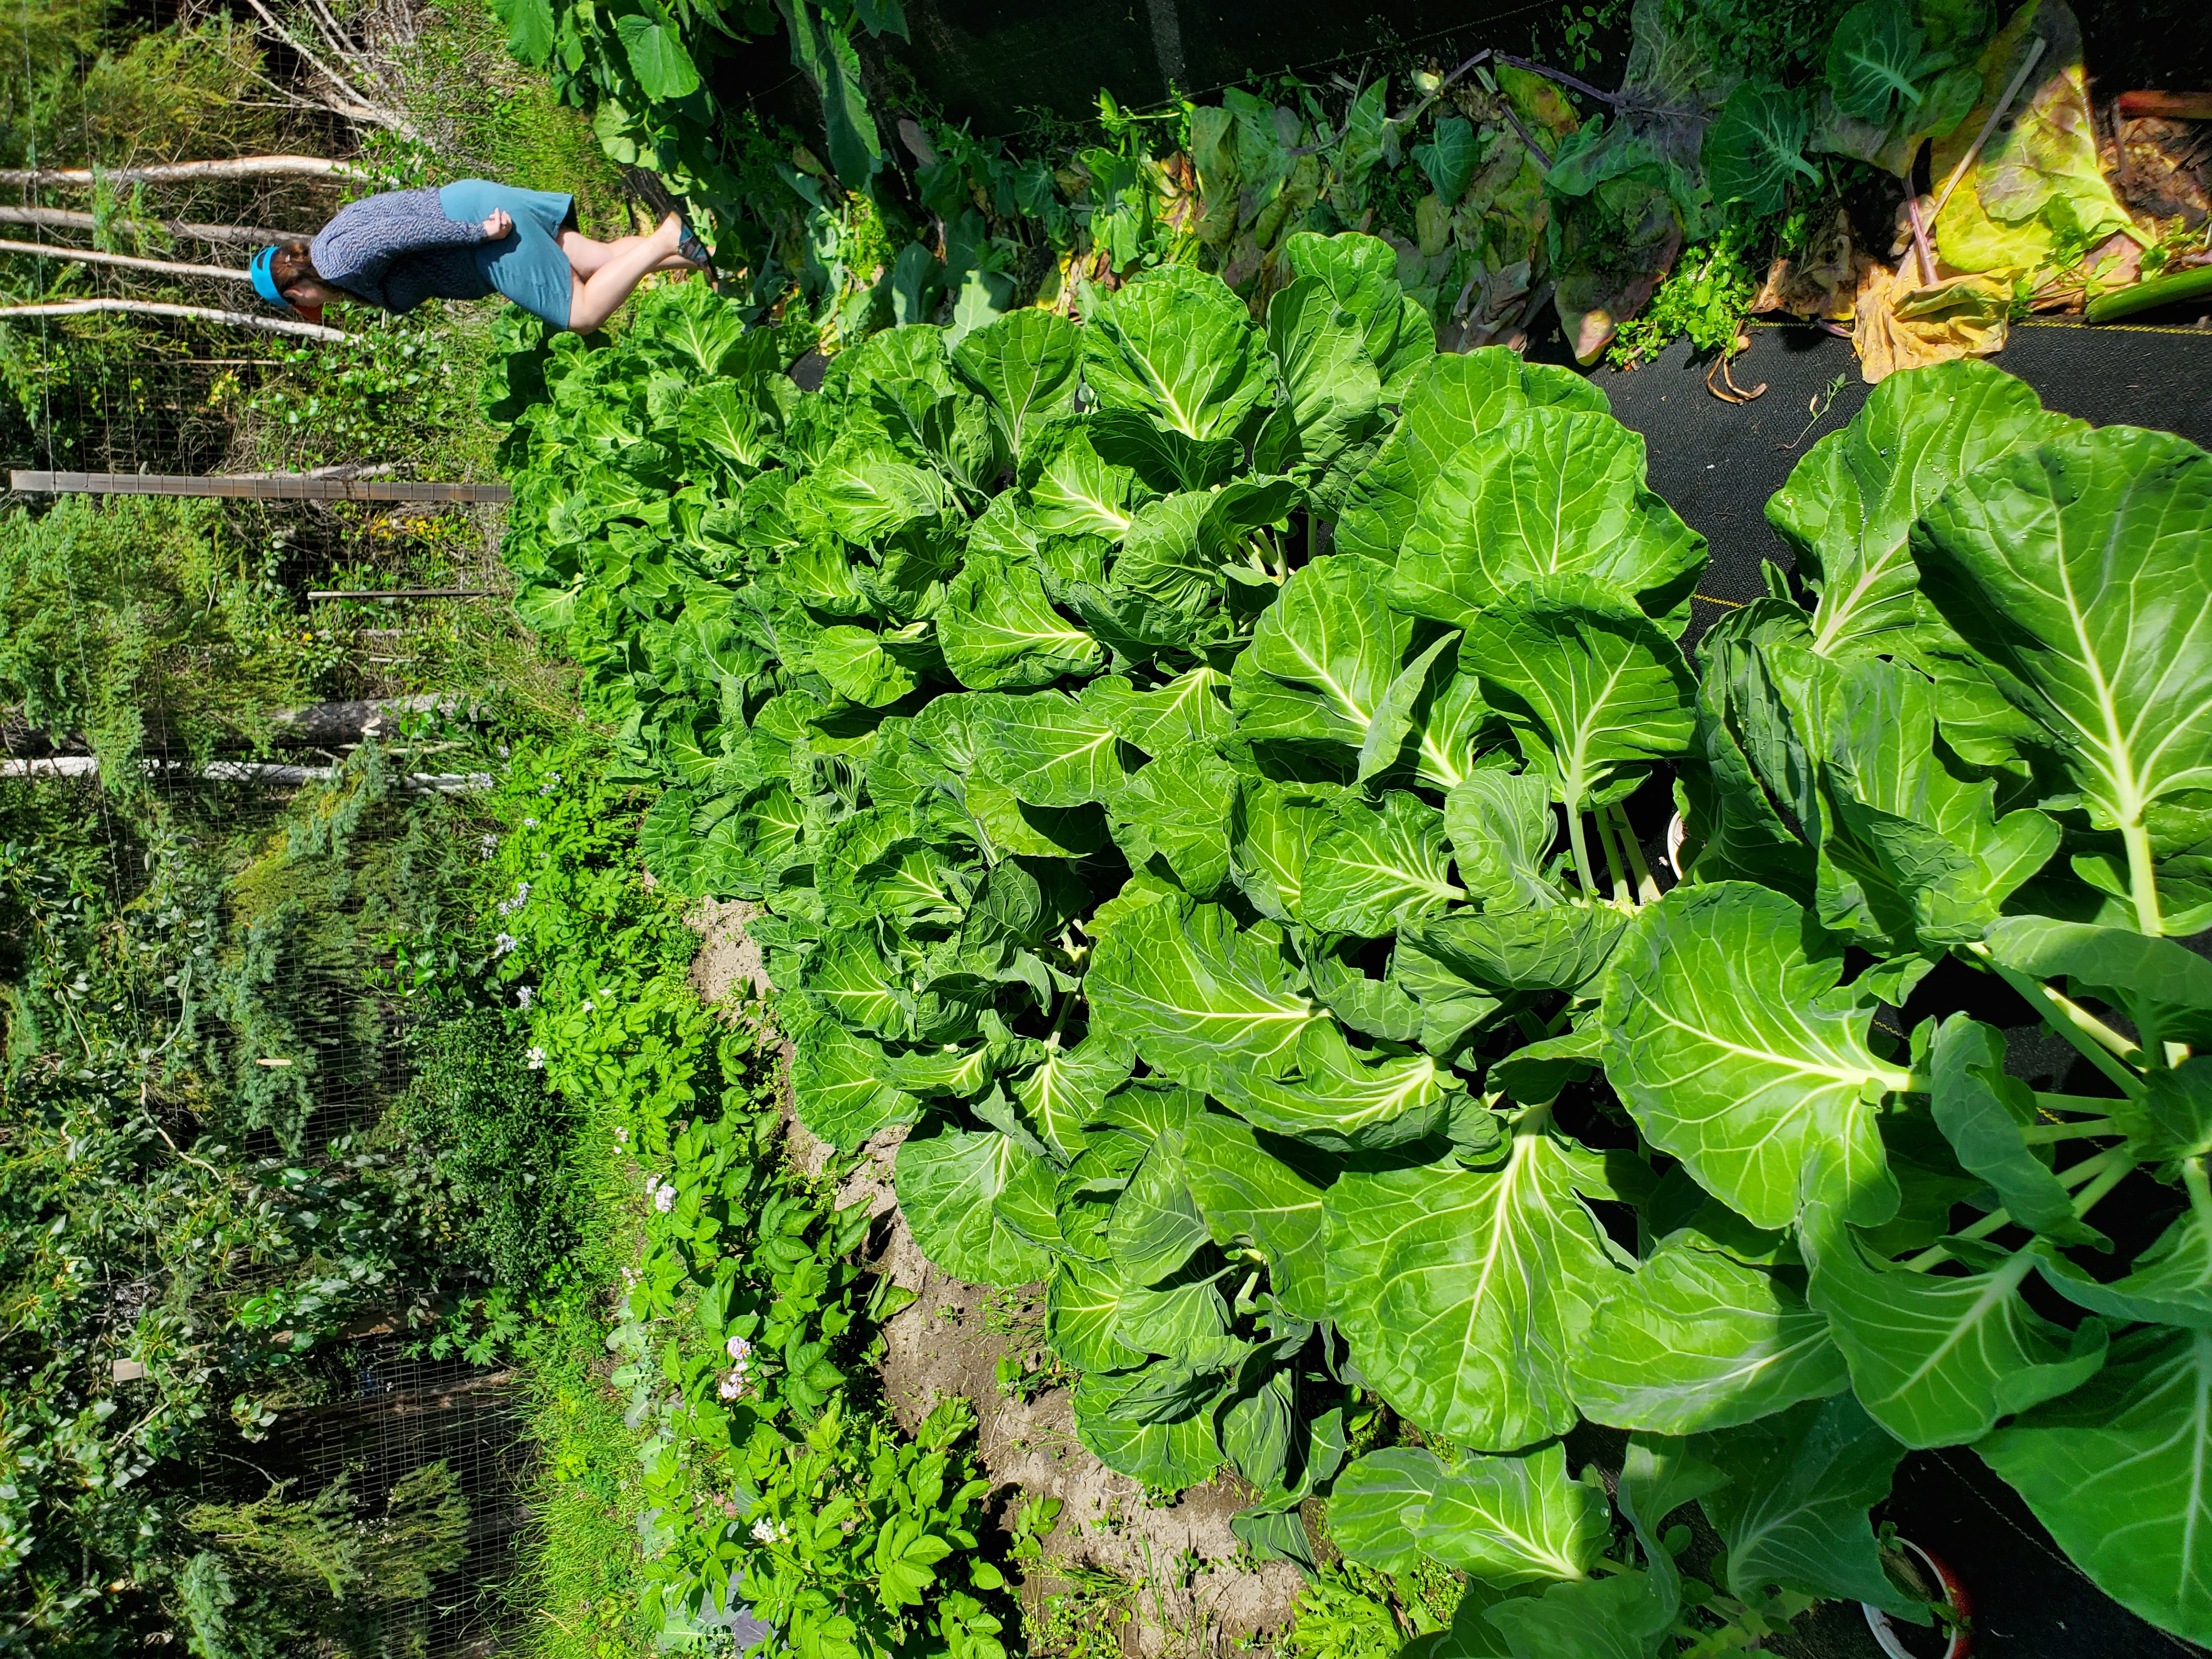
Here at Frosty Garden, we love growing Brussels Sprouts. They can be a divisive plant, with people either loving them or hating them.
Love them or hate them, Brussels Sprouts are a fascinating plant to grow in your garden. If you’ve never seen how a Brussels Sprout grows, they are almost alien like compared to other garden plants.
Despite this “strangeness,” Brussels sprouts are a member of the brassica family. This is the same family as things like cabbage, broccoli and kohlrabi.
In southern latitudes, many growers choose to overwinter their Brussels Sprouts. They are incredibly cold hardy and handle mild winters with ease. They are also quite heat sensitive, which makes them difficult to grow over the summer in these locations.
In more northern latitudes, such as the Interior of Alaska, our summers are cool enough to grow them over the summer.
That said, they are one of the more challenging garden plants to grow, despite the cool weather advantages.
This article discusses those challenges and offers the northern grower insight on how to get sprouts before the super cold winter sets in.
Start With Varieties That Mature In Under 125 Days
One of the most important aspects of subarctic Brussels Sprouts starts with the genetics.
Brussies, as they are affectionately called, can range from 100 days to over 200 days in their growth time.
Perhaps obviously, one can’t grow a 200 day plant within a 100 day growing season.
Some of the varieties that fit this requirement include:
- Franklin (125 days)
- Roodnerf (100 days)
- Long Island Improved (100 days)
- Jade Cross (90 days)
- Churchill (90 days)
- Divino (100 days)
- Gladius (100 days)
- Dagan (100 days)
- Hestia (95 days)
- Diablo (100 days)
Our “trusted” variety of Brussels Sprouts are the Franklin variety. It features great flavor and has been a reliable producer for us in the subarctic.
We have tried several of the other varieties mentioned above. But, we keep coming back to Franklin on account of taste, tightness of the sprout and overall production.
The above list is not exclusive. There are certainly other varieties that fit the 100 to 125 day maturity requirement that would be worth trying.
Use The Earliest Sowing Date Available For Your Region
Most brassicas share similar planting dates, typically seeded indoors six to eight weeks prior to the last frost.
We always sow our Brussels indoors eight weeks before last frost. They are the first brassica that we sow. Since they require so much time in the garden, it’s best to give them a head start, if possible.
In the Interior of Alaska, this means we are sowing our Brussies at the very beginning of April. Typically the first week of April.
Two weeks of maturity might not sound like much. But, considering we can usually grow Brussels for at least 2-3 weeks after first frost, that’s over a month of extra growing time combined.
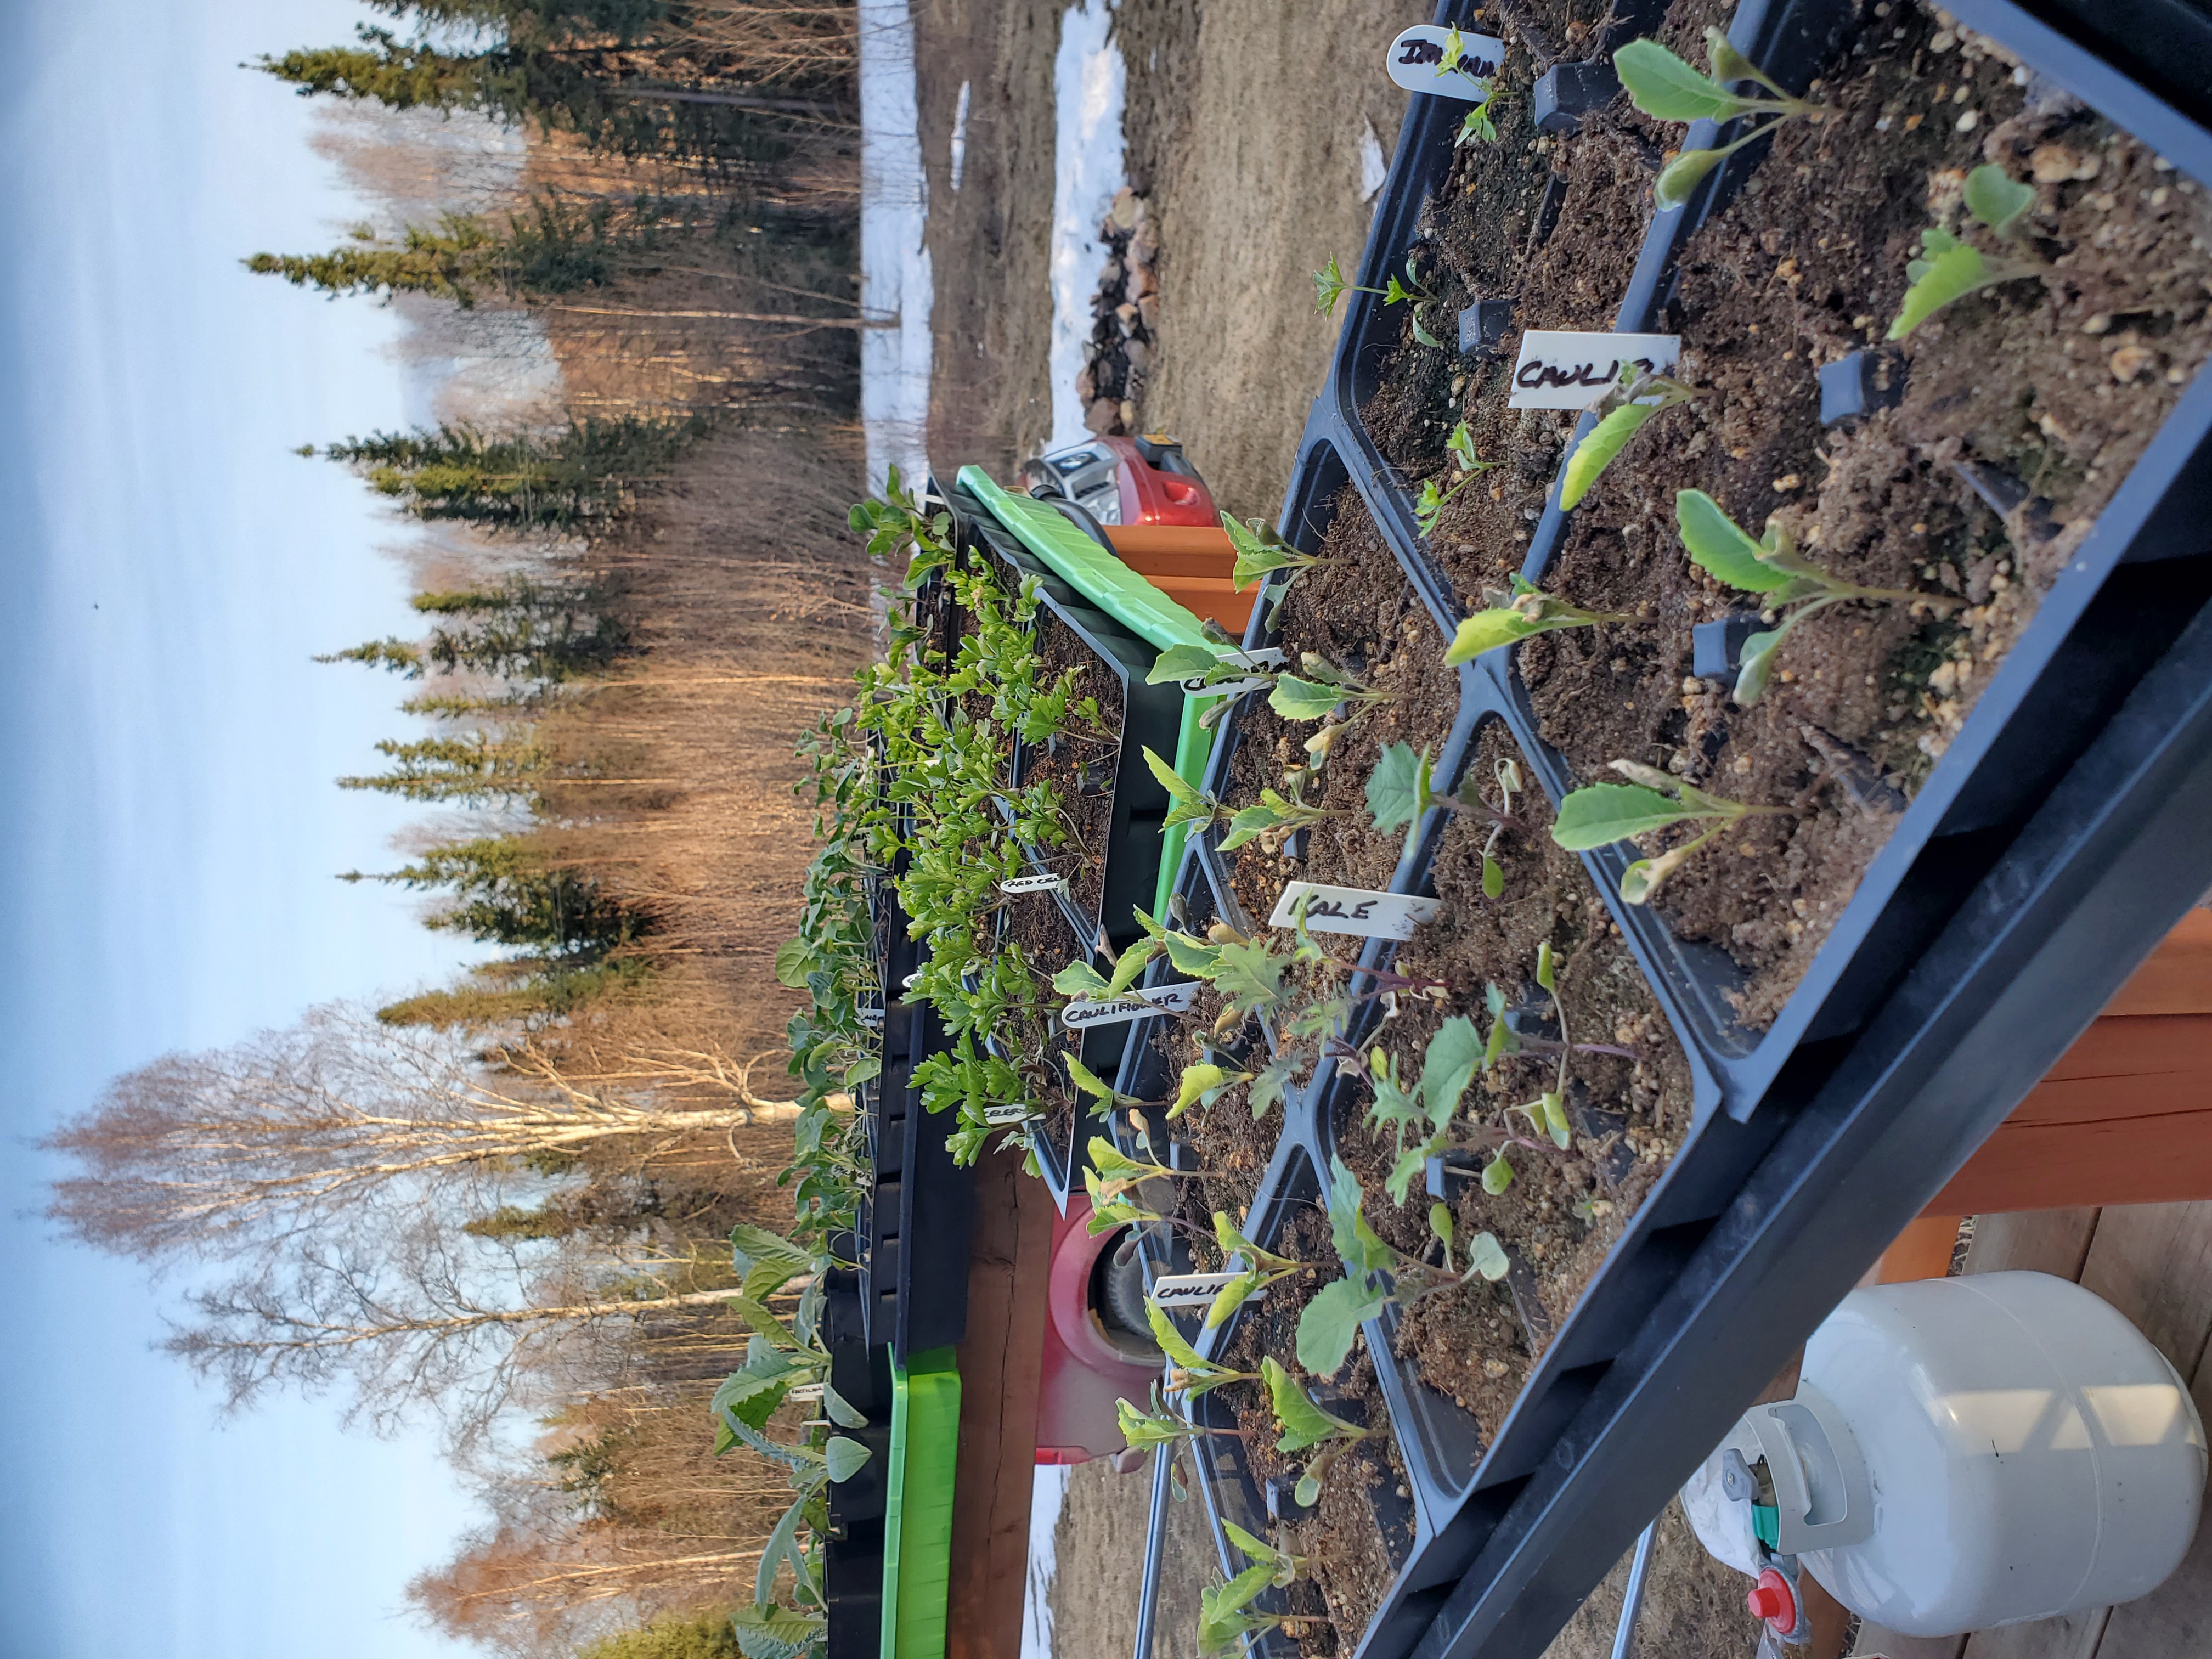
As northerners, we grow a lot of brassicas. We’ve found it valuable to stagger the sowing of brassicas to reduce sudden pressures on our indoor growing spaces.
Brussels are sort of “phase 1,” followed by broccoli for “phase 2” and finally all other brassicas in a “phase 3.” (Staggered by a week each.)
This helps ensure we don’t have hundreds of transplants to conduct in a single week, balancing the labor out over several weeks.
Label Your Brassicas Clearly To Keep Track Of Them
Once brassicas get to their transplant size, they all start looking alike. It’s difficult, even for experienced gardeners, to tell them apart from one another.
Once the brassica matures, the distinguishing characteristics become a lot more prevalent. In the early stages, those characteristics are not yet present.
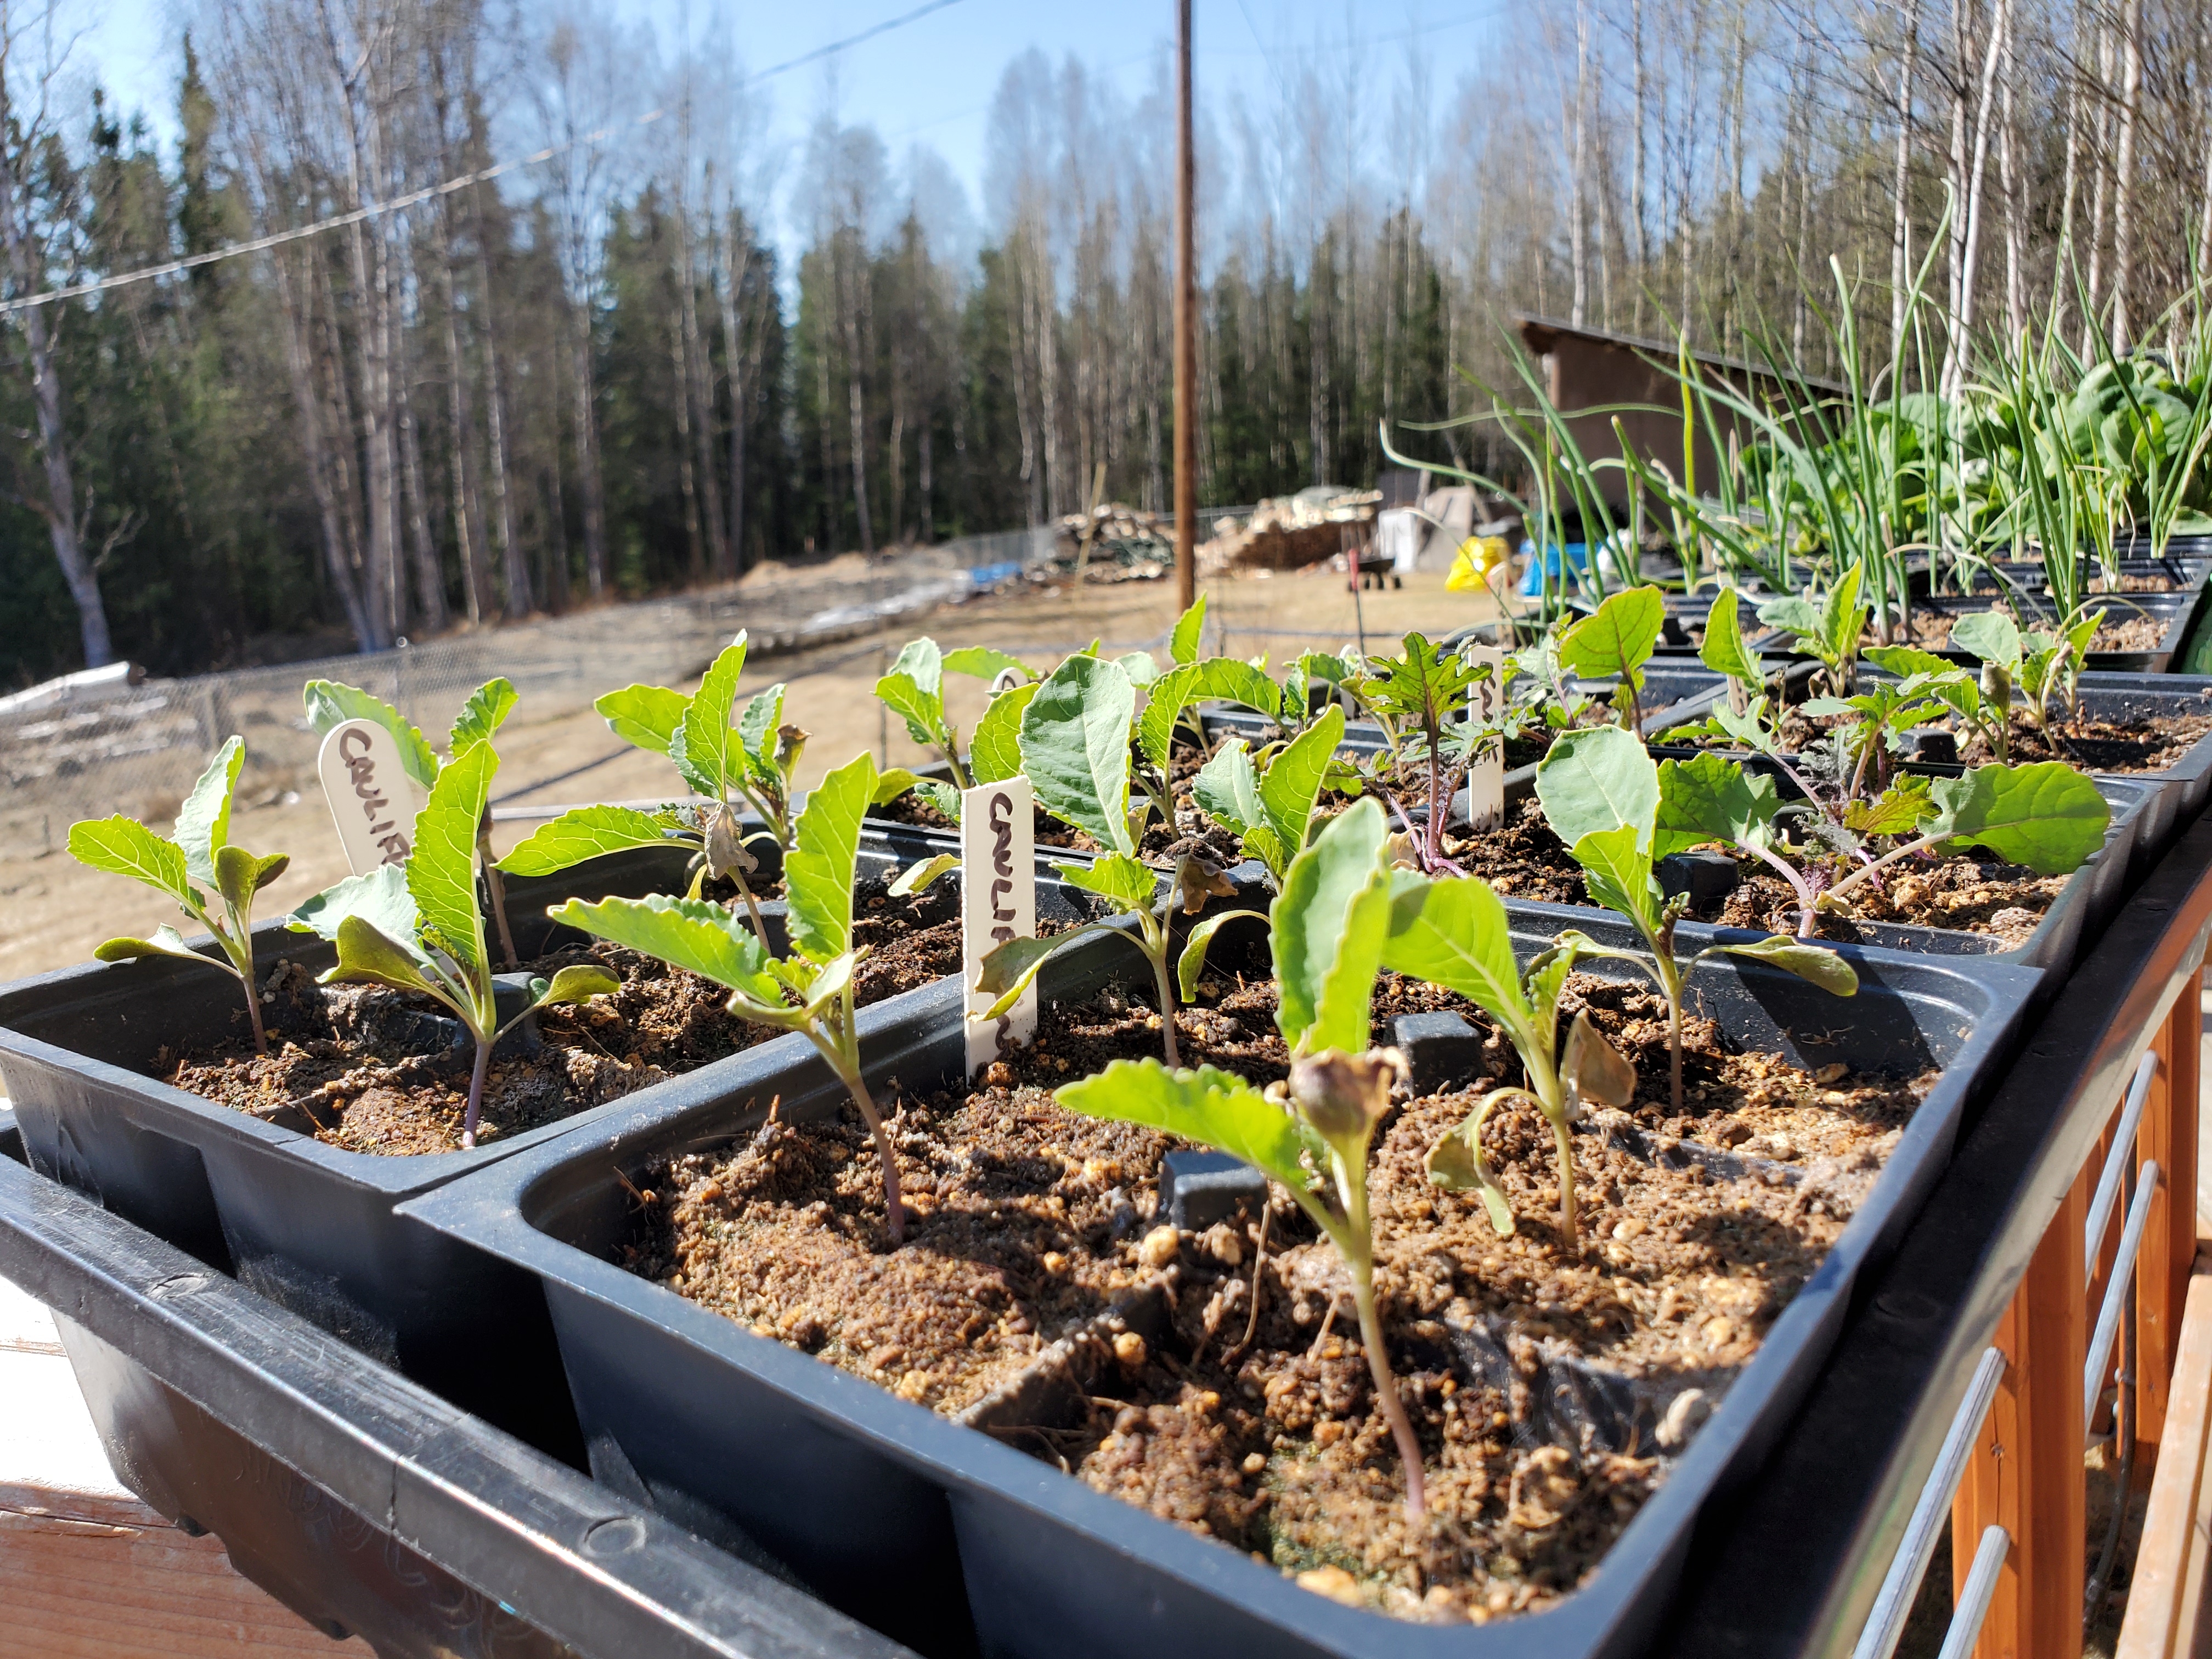
We label our brassica seedlings and transplants very clearly.
This really helps when we go to transplant into our garden, so we are sure that we are planting the correct plant.
Despite our good labelling practices, though, we have somehow confused our brassicas at times. It’s always a surprise getting a cauliflower where a Brussel should be!
Transplant Into A Sufficiently Sized Transplant Container
If you are sowing into a seedling tray like we do, it will be necessary to transplant the seedling into a more appropriate sized container.
We typically perform this initial transplant sometime after we see the first true leaves develop.
You want to select a container that will allow the plant to grow to sufficient transplant size. Using too small of a container can negatively impact growth by restricting the plant until you transplant into your garden.
We describe our germination and transplanting processes in great detail, but we’ve found that 606 jumbo inserts for 1020 trays are an ideal transplant step for Brussels Sprouts and most brassicas.
They provide enough soil to allow continued growth, without the aforementioned growth impacts.
The 606 jumbo insert offers dimensions around 2-1/4 inches, by 2-3/8 inches and 3-1/4 inches of depth per cell. Larger containers would also be sufficient.
What you really want to avoid are smaller containers to present growth restriction and frequent drought conditions.
We have not observed any difficulties with transplanting brassicas like Brussels Sprouts. They seem to be quite resilient, however, fewer transplant steps is usually better than more of them.
Brussels Sprouts Can Be Hardened Off Quite Early
As we mentioned, Brussels Sprouts are rather cold hardy. This hardiness allows them to be hardened off, and grown (mostly) outside, well before a lot of other plants you might be growing.
Hardening off is a very important step when growing from seed indoors. It is the process of gradually introducing plants to the sun. Failure to do this can cause your plants to die once you put them in your garden.
We like to start getting our cold hardy plants (like Brussels) outside four to six weeks prior to our last frost. For us in Interior Alaska, this is typically in late April to mid-May, as the weather allows.
We discuss this aggressive approach to subarctic gardening in a lot more detail elsewhere, but Brussels Sprouts are eligible for this “aggressive” subarctic growing approach.
As we mention in the above article, we do avoid having them outside on super chilly days, typically when highs or lows are expected to be below 38 degrees.
Despite being cold hardy, they are not invincible.
If you have a minimally heated greenhouse or a heated seedling greenhouse, you can usually move your plants out four to six weeks to last frost.
If you are using the outdoors or an unheated greenhouse, it’s important to bring your seedlings back inside any time temperatures will approach freezing. (Our cut off is usually 36F.)
Brussels Sprouts Can Be Planted Up To Two Weeks Before Last Frost
In most years, the two weeks leading up to last frost are quite nice with minimal frost risk. The cold hardiness of Brussies allow them to tolerate this just fine.
If you are looking for an edge, you can often get your Brussels Sprouts (and other brassicas) in the ground up to two weeks prior to your last frost. In the Interior of Alaska, this is typically mid to late May.
This little bit of extra time in the ground can be a benefit, especially on the back end when you’re trying to get sprouts to grow. A more mature plant will generally produce better sprouts than less mature plants.
It’s very important, if you do this, to be looking at your 10 day weather forecasts. If you see a bunch of crummy, cold and near-freezing weather, it would be best to keep them in their transplant containers. At least until the weather outlook is better.
Once you plant in the ground, you lose a lot of flexibility for protecting your plants from unseasonable frosts and less than ideal weather. If you have doubts about the weather, just wait until the last frost date of your region to plant.
Remove Brussels Sprouts Leaves Throughout The Growing Season
This is one of the major tricks to getting Brussels Sprouts to grow in short season cold climates like the subarctic.
As your plants mature, you want to remove leaves from the bottom of the plant throughout the season. We typically remove 3-5 leaves every two to three weeks throughout the growing season.
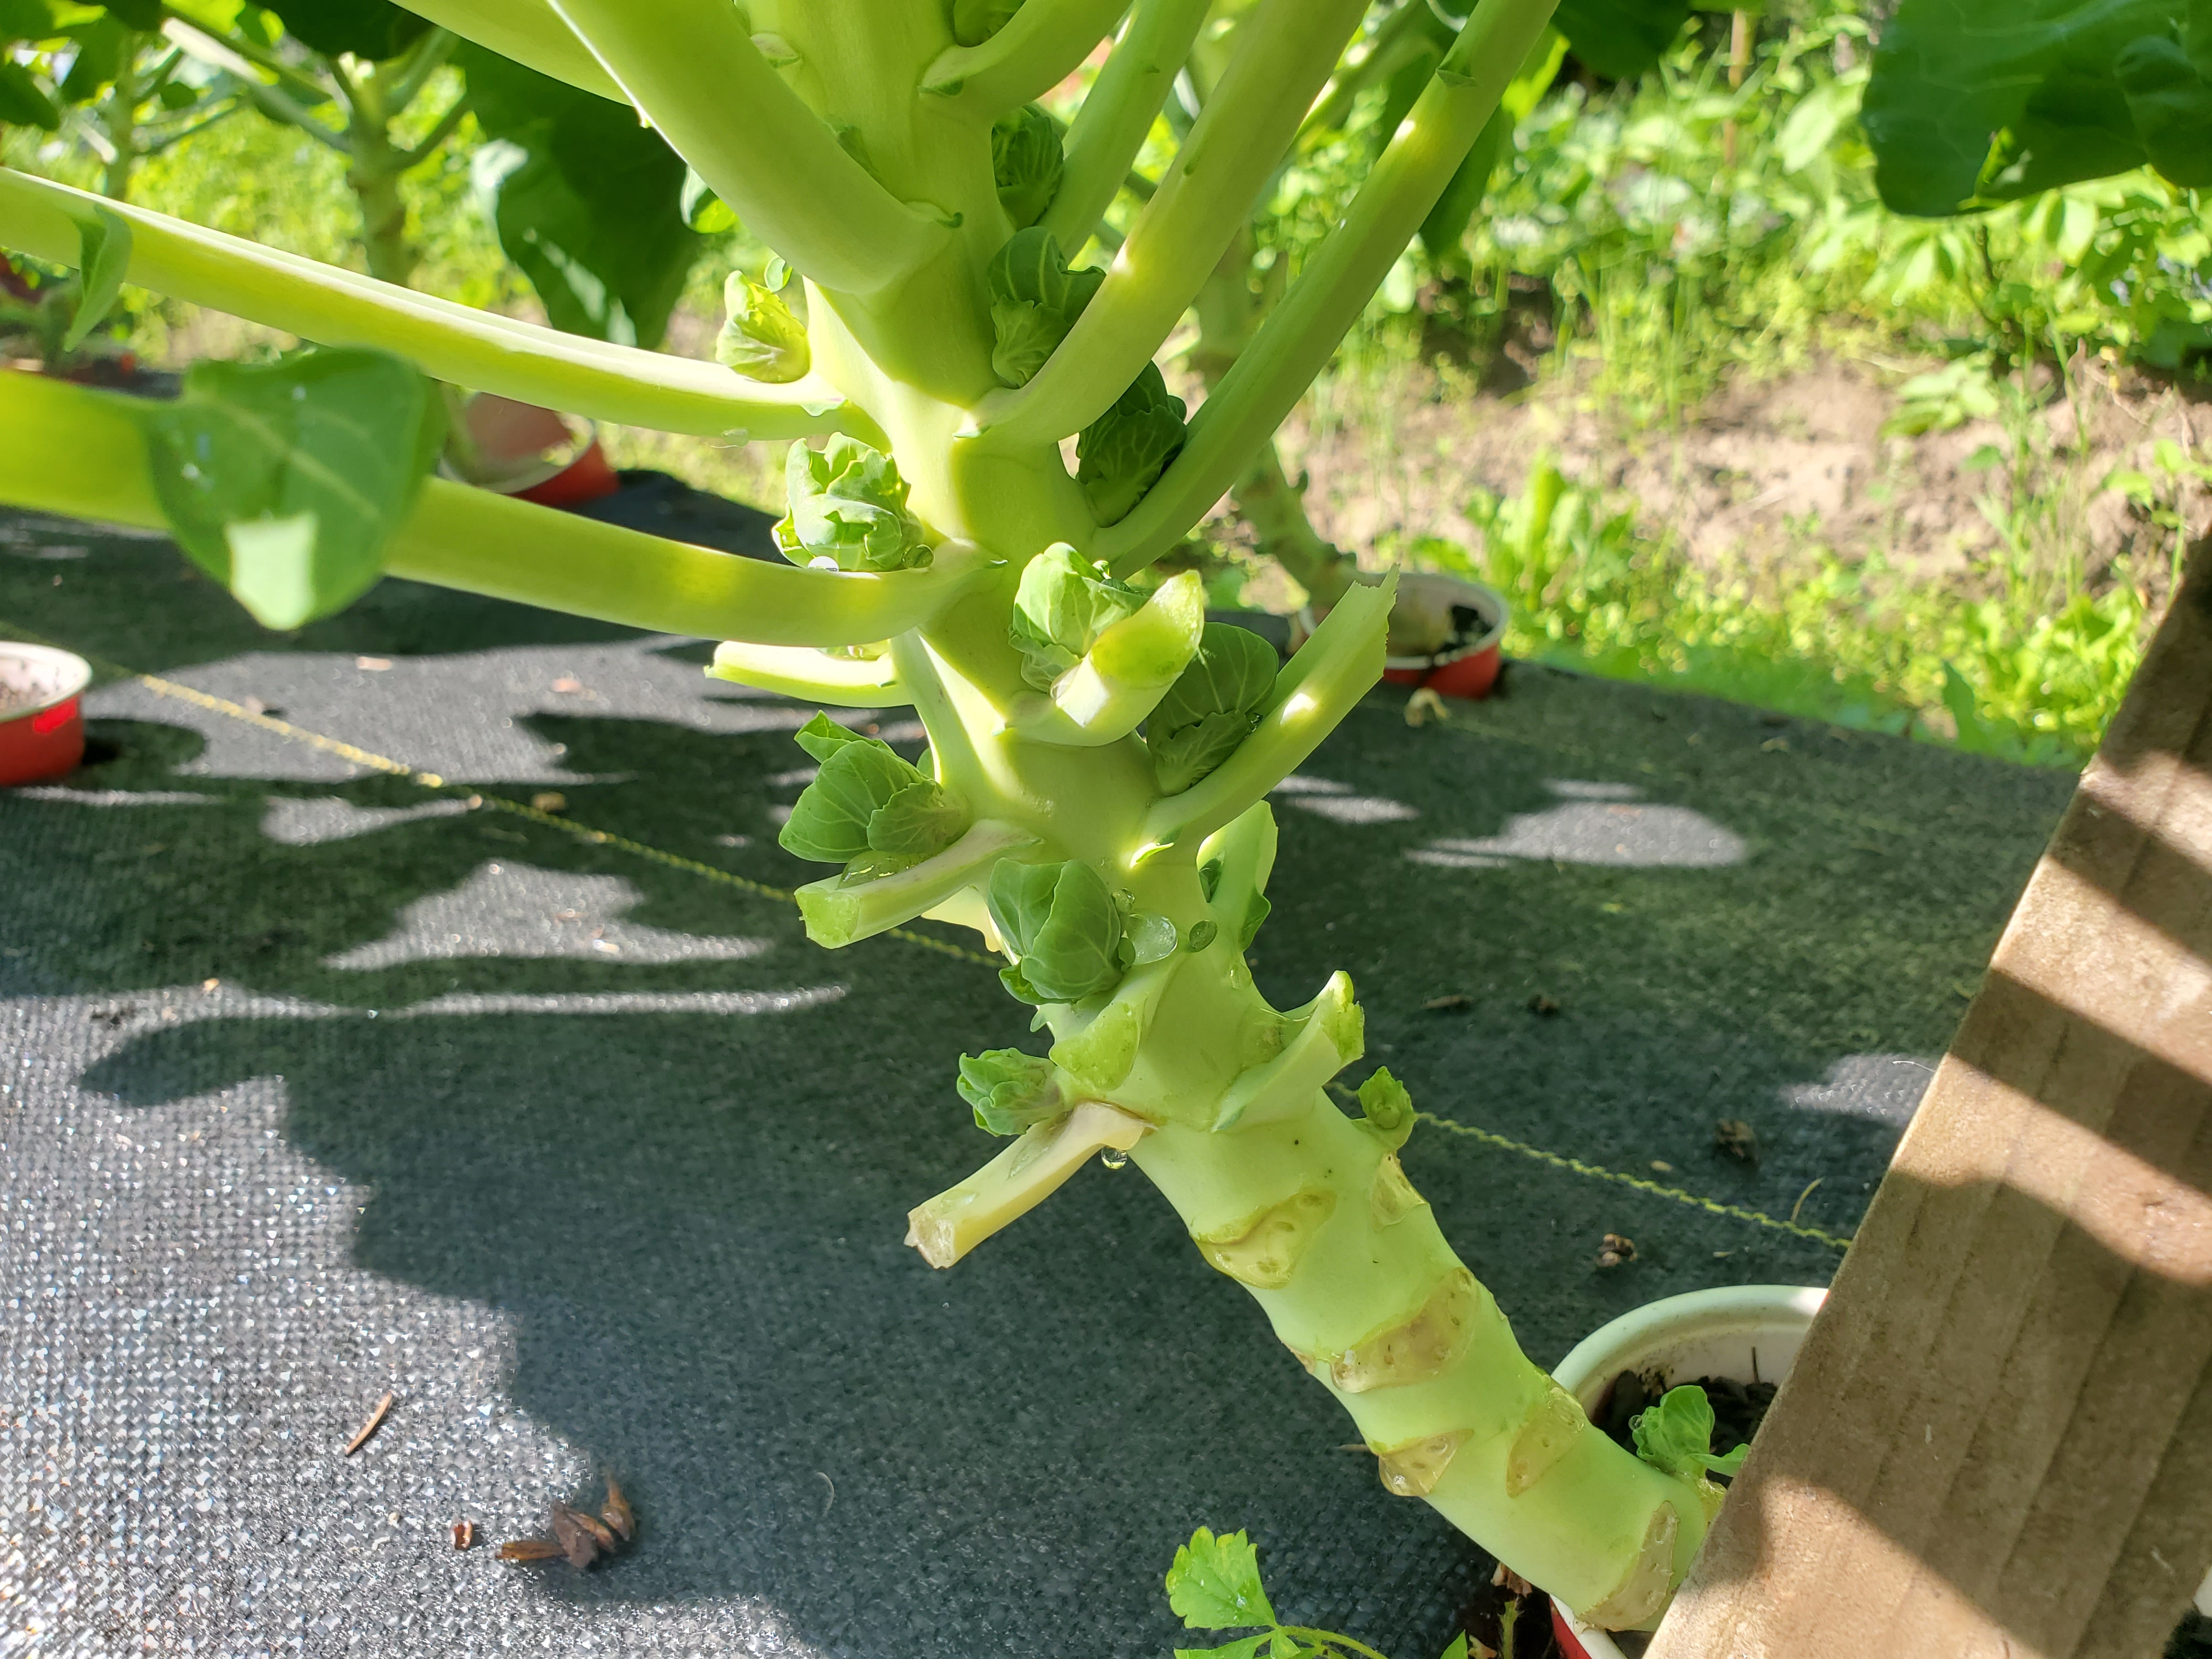
You can trim the leaves all the way back to the stem, but be sure not to damage the site where the sprout will grow. It’s typically fairly easy to see the sprout location on a mature plant, but if not, leave a little excess on the leaf’s stem.
It’s important to remember, you’re not removing all the leaves. The plant still needs to photosynthesize and it does this through its leaves. At most, you want to remove no more than about 2/3’s of the entire plant’s leaf structure.
This physical manipulation of the plant allows for two things. The first is better light penetration on the sprouts themselves, which permits better growth. The second, physical manipulation like this causes the plant to mature faster due to hormonal responses from the manipulation.
Top Your Brussels Sprouts One Month Before First Frost
This is the trick to subarctic and cold climate Brussels Sprouts and it’s the most important thing you need to do.
A Brussel Sprout is typically “pre-programmed” to grow to a specific height. Even with fast maturing Brussels Sprout genetics, there is a benefit to speeding this process up a little bit.
One month before first frost, it’s a good idea to top the plant. Literally, just cut the top off. This forces the plant to stop vertical growth and entirely focus on developing the actual Brussels Sprouts.

This is the number one technique you can use to force the growth of sprouts. In our experiments, we consider this step practically necessary for all subarctic Brussels Sprouts.
Harvest Brussels Sprouts Quite Late, Well After First Frost
As mentioned previously, Brussels Sprouts are rather cold hardy. Especially when it comes to mature plants.
Brussels Sprouts will happily survive a number of frosts without any damage or impact the sprouts themselves. Leveraging the cooler season, just before winter, gives you a bit more time to allow the plant to fully mature.
While additional growth won’t be spectacular during this time, it usually does help to offer the plant more time. Despite claims of “100 day maturity” most Brussels Sprouts can almost always use more time than that.
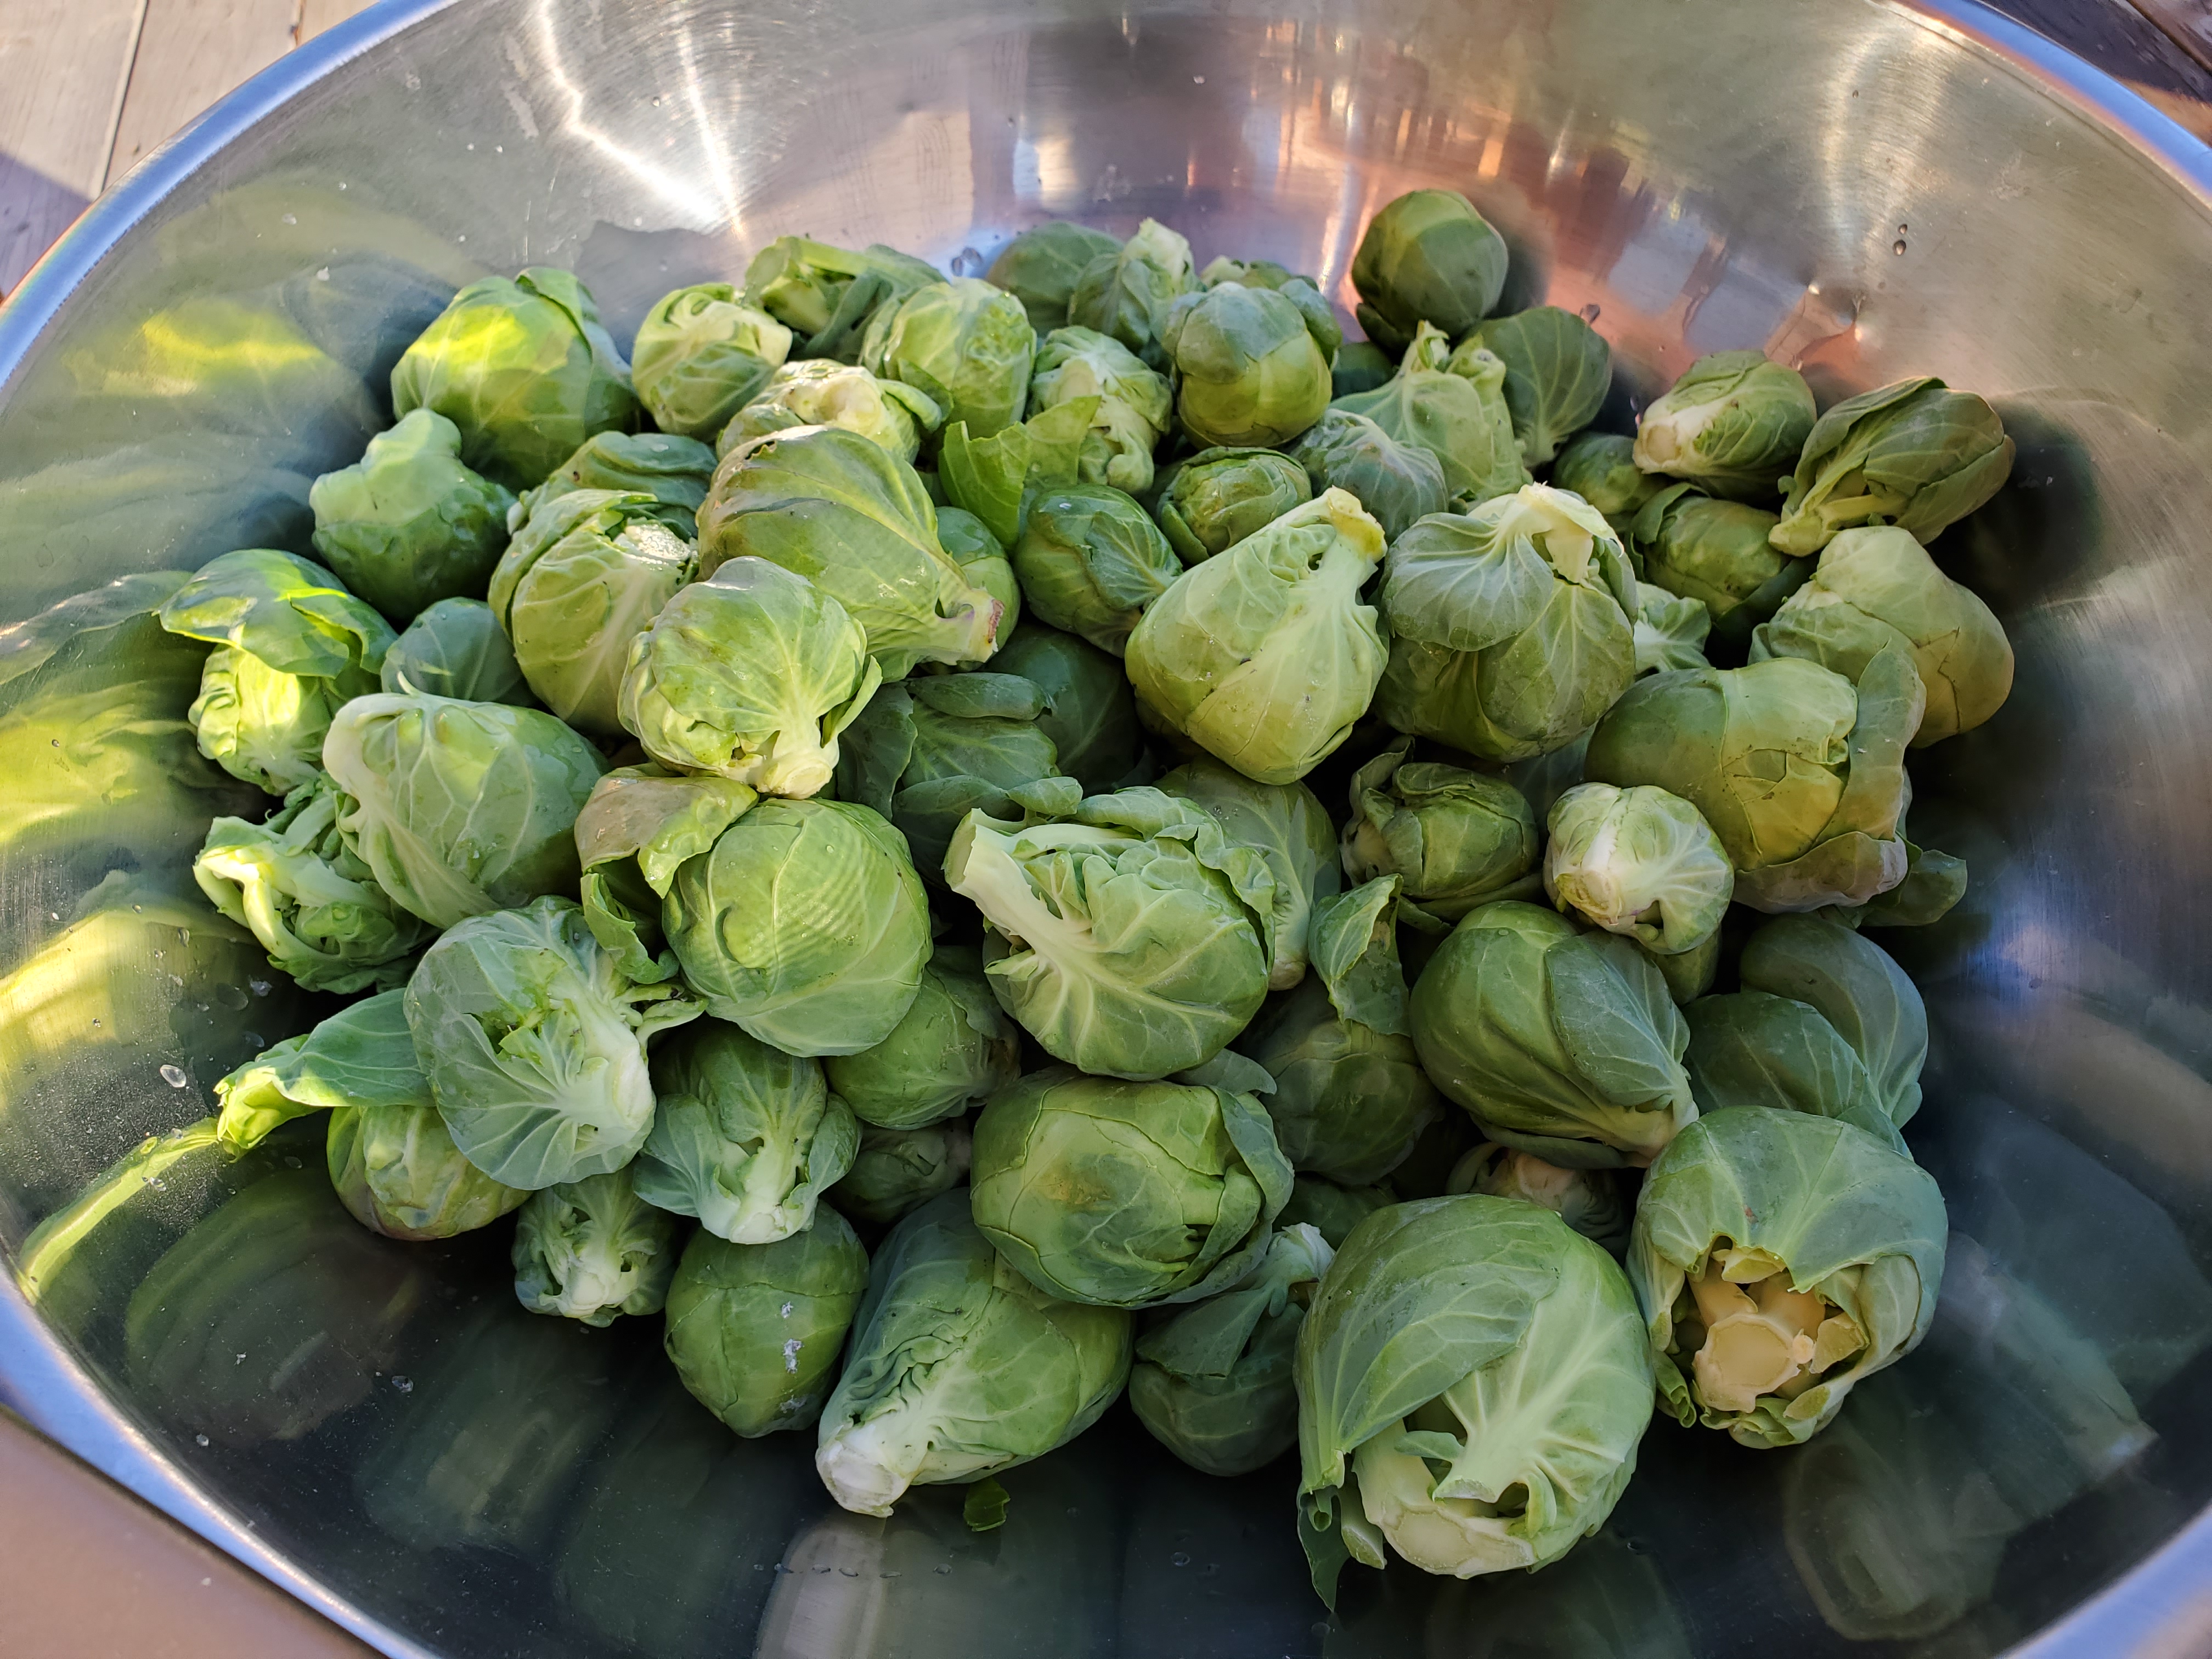
The important thing is to harvest them before hard frosts start settling in. We usually let ours go for two, possibly three, weeks after our first frost. Brussies are often one of the very last things that we harvest from our gardens.
Preserving Brussels Sprouts Can Offer Garden Treats Throughout The Winter
Brussels Sprouts lend themselves well to preservation methods. Our preferred approach for Brussies is to freeze them.
We typically prepare them with a light 2 to 4 minute blanching and place them into quart sized Ziplock freezer bags. We then freeze them immediately.
Frozen Brussels can easily stay good for around 6 months (or more), which is enough time to get into the next gardening season.
There are no known safe methods for canning Brussels Sprouts. Plus, this would be likely to change the sprout’s texture into an undesirable state.
It is possible to pickle Brussels Sprouts, even with water bath canning methods. Pickled Brussels Sprouts aren’t for everyone, though. Consult a safe canning resource for more details on this.
That’s All We Wrote!

Having a good time? Learn something? We have an ever growing list of insightful and helpful subarctic & cold climate gardening articles, just like this one!
- Cold Climate Gardening Basics 👉
- Growing Your Garden From Seed Indoors 👉
- Advanced Cold Climate Gardening Techniques 👉
- Plant Specific Cold Climate Growing Guides 👉
- Subarctic Perennial Food Forests & Foraging 👉
- Indoor Garden Lighting & Grow Rooms 👉
- Greenhouses & Temperature Control 👉
- Harvesting & Food Preservation 👉
- Solving Cold Climate Garden Problems 👉
- 700+ 1 Minute Reads 👉
- 180+ Gardening Topics! 👉
FrostyGarden.com is 100% ad-free, junk free and we do not use affiliate links or sponsorships! This resource is voluntarily supported by our readers. (Like YOU!) If we provided you value, would you consider supporting our mission?
Can Brussels Sprout be over-wintered in cold storage to start new stems next year thus getting head start. I am in frozen Ottawa as mature pepper plants can be done when the stems are cut above a few nodes.
That’s a really good question! We haven’t experimented with this much, this post is all about growing them in a single season and should work well in cold climates like Ottawa! (We are zone 2!) However, many Brussels Sprout varieties are 200+ day crops, meaning there would be a lot of room for growing some varieties into the winter and then “finishing” them outdoors over the following summer. This would mimic some warmer climates where they are sowed in late summer and are expected to produce the following spring. You could probably explore some interesting genetics this way in colder climates. Unlike peppers which are perennial in warmer climates (and with overwintering in colder ones), Brussels are only biennial at best and couldn’t be expected to perpetually produce. You also wouldn’t treat them similarly, where you cut back peppers and they’ll regrow the following year – sprouts aren’t like this at all. They grow a single stalk, with the sprouts producing along that stalk at the leaf’s internodes. Hope that helps!
Thanks for the tips, I’m in a much warmer zone 5, but getting these guys to sprout as been a journey. We will be trying your tips for 2024
Excellent, glad you found us. The tip regarding topping your brussies about a month prior to last frost is probably our best one. This alone will help your sprouts bush out. Good luck and let us know if you have any further questions!
My first year gardening in sandy soil and except for beans and some tomatoes, my garden was a bust. Though my brussell sprouts didn’t do well in the summer, they have survived into January in Maine. The tops rotted off but the babies along the stem are getting bigger despite snow, sleet and temps often in the teens at night.
Brussels are incredibly cold tolerant. Were we not so bitterly cold up north here, winter growing is actually quite common with them. Glad you’re getting some success, sandy soils are rough! People that complain about growing in loam or silt soils have obviously never approached sand and clay soils! Organics are the key. Thanks for sharing your experience with us!
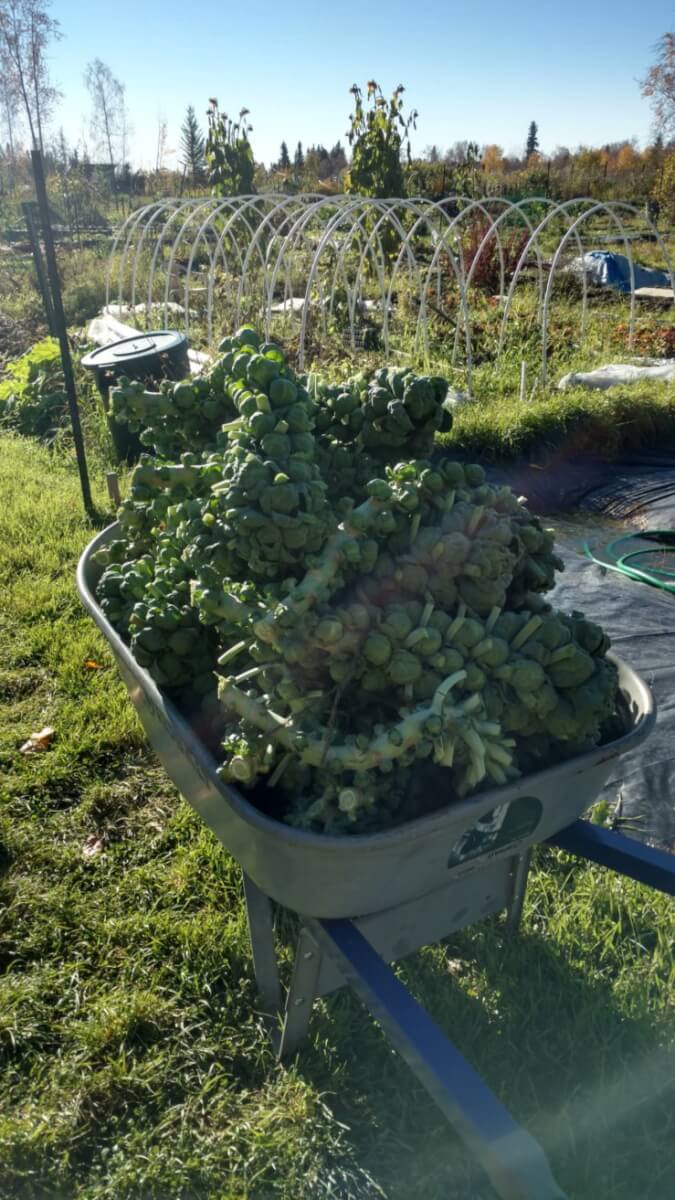
Good grief, I’ve never seen such abundantly loaded brussels plants as in the wheelbarrow picture!!!!! Is that the result of topping off? How much do you cut off the tops, just a couple inches? More? I’m in central Iowa, a longer growing season than yours (zone 4 / 5a) but we always get a couple weeks where it’s 20 below at night, 10 below during the day. So I try to get the hardiest stuff I can. I’ve lost several z4 fruit trees. But I highly recommend the z2 Carmine Jewel bush-type cherry tree!!!! Amazing taste, tart, needs sweetening but better than any store-bought cherries I ever had. Brussels – I grew 3 from store-bought plants last year, didn’t do any kind of pruning or trimming, they formed loose balls (I’ve read that is a sign of too much nitrogen, can’t help it, rich black Iowa soil) but they looked anemic and completely dwarfed by the ones in your wheelbarrow. Iowa has some of the best farmland in the US, you should really congratulate yourself for doing that well in the middle of Alaska!!!!!
To answer your question, the abundance is really three-fold. 1) Choosing varieties that mature in our short season, 2) Regular fertilizer applications and 3) Topping the plant a month to first frost. When we top them, we just cut off the growing tip, maybe an inch or two. As soon as we do this, the brussies start flourishing and bulk up to full size within 4-6 weeks.
Thanks for sharing your experiences! It has taken us a lot of years to get pretty good at extreme northern growing. We are proud of our efforts and try to help others, no matter where they live!