Living in the far north can make for some long winters. The mind can tend to wander.
One such winter, we began to ponder how a gardener, without a greenhouse, might approach the idea of increasing ambient air temperatures.
Well, we came up with something. It was the best, dumbest gardening idea we’ve ever had.
Then we tested that idea the following season.
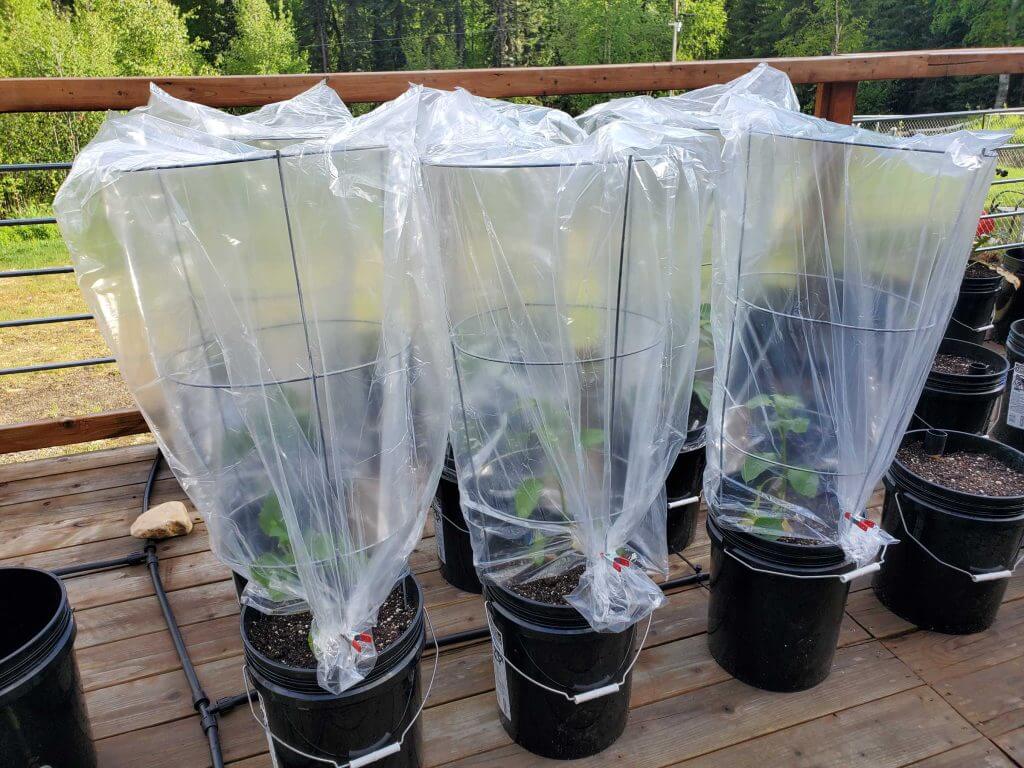
To our utter amazement, it actually worked! Thus was born the garbage bag greenhouse!
The Reality Of Warm Climate Crops & Cold Climates
The experienced northern gardeners know that the greenhouse is the right tool for the job when it comes to growing warm climate crops.
Raising ambient air temperatures provides a dramatic benefit on the growth and maturation time of most warm climate veggies. Be it tomatoes, peppers, huckleberries, ground cherries, tomatillo, cucumbers and so on.
Many of us dedicated northern gardeners have prioritized building a greenhouse at some point in our life. It’s the “best” way to solve the conflict of growing warm climate crops in a cool climate.
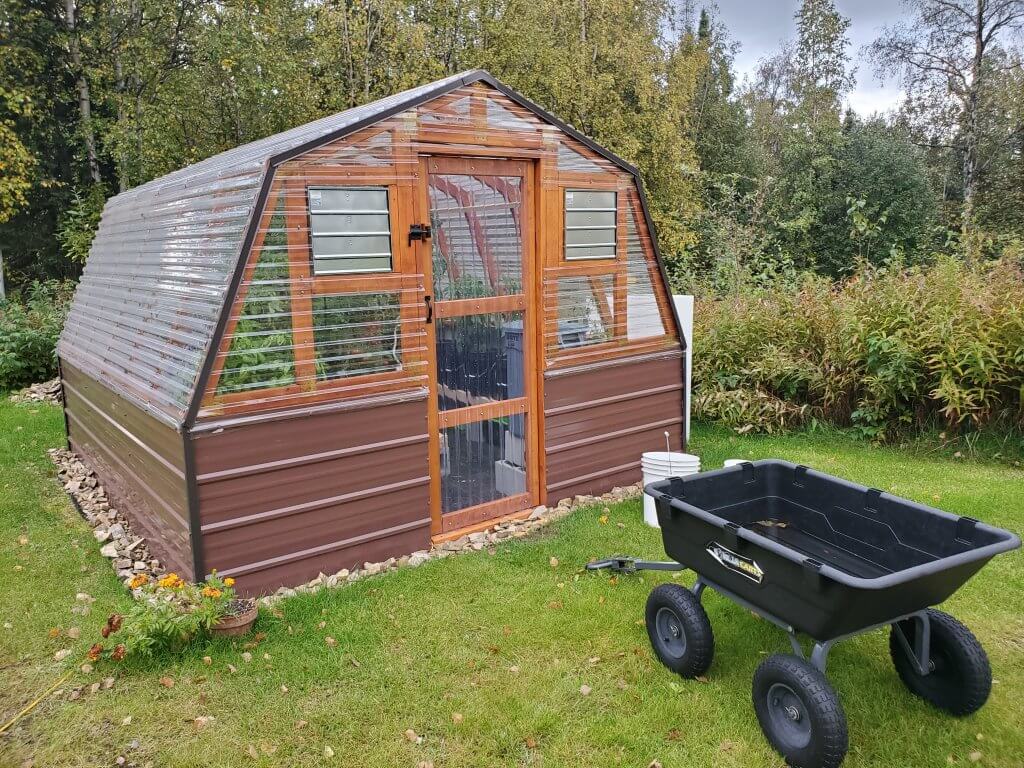
However, for us, there were many, many years that this wasn’t in the cards for us as northern gardeners.
We were either renting our living quarters, didn’t have optimal space or just simply couldn’t afford it.
That’s a reality for a lot of people that are gardening in the north.
The greenhouse is not, and shouldn’t be, a technical requirement of northern gardening.
Introducing The Garbage Bag Greenhouse Concept
We know this doesn’t sound like the most appealing gardening concept, but hear us out.
Over that long winter, we pondered that if we could make a small, individual plant-sized greenhouse, there might be some benefit.
We thought of all sorts of ways that it might be technically possible. We mentally worked through a few designs, then further refined those ideas.
Then we challenged ourselves. What’s the cheapest possible way?
That’s when the idea of the garbage bag greenhouse popped into mind.
Garbage bags are so cheap that most of us don’t even consider the cost of using them.
We had to work out a few details from there.
- It was probably pretty dumb to just wrap a plant in a garbage bag.
- A typical Hefty Heavy-Duty bag wasn’t going to work, do they even make clear garbage bags?
- Why doesn’t anything at all come up on this idea when using a search engine, is it that dumb?
- Am I dumb for having this idea?
Fortunately, this wasn’t a complicated idea. I could blow a hundred bucks testing an idea. If it didn’t work, no one would be the wiser…
The Elements Of The Garbage Bag Greenhouse
If we were going to pursue this idea of a “garbage bag greenhouse,” we had to come up with a minimal amount of required materials. And they had to be cheap.
We did figure it’d be a good idea to somehow suspend the garbage bag over the plant. It didn’t seem like a good idea to force a plant to support the weight of its own greenhouse.
So, this is what we came up with:
- Clear garbage bags (33 gallon / 96 gallon)*
- Standard tomato cage for supporting the greenhouse
- Clips to prevent the wind from stealing our precious greenhouse
* Turns out, a 96 gallon trash bag can practically be used to dispose of a small sports car. 33 gallon was the right size. Larger bags might be useful if you had a mega-tomato cage or some other support contraption.
The idea was to plant our plant, put the tomato cage over it and then wrap the tomato cage with a clear trash bag.
The approximate cost, per plant, grown in the garbage bag greenhouse broke down like this:
- Trash bag: $0.34
- Tomato cage: We had them, but average cost is about $7.00
- Clips: We had them, but probably about $0.50
- Total cost per plant: $7.08, less if you’ve got a stash of stuff
Seemed simple enough! So let’s get to it!
Testing The Garbage Bag Greenhouse
So, with a basic design and materials ordered, it was time to test out the idea!
The next season, we transplanted a few plants we wanted to test with right around last frost.
We chose the plants to test with based on the fact that we had years of outdoor growing experience with them. We generally knew they produced well outdoors and would also show improvement if the method worked.
The plant varieties we tested with were:
- Ground cherries (nightshade)
- Garden huckleberries (nightshade)
- Jalapeno peppers
- Poblano peppers
- Small sweet peppers (Lunchbox variety)
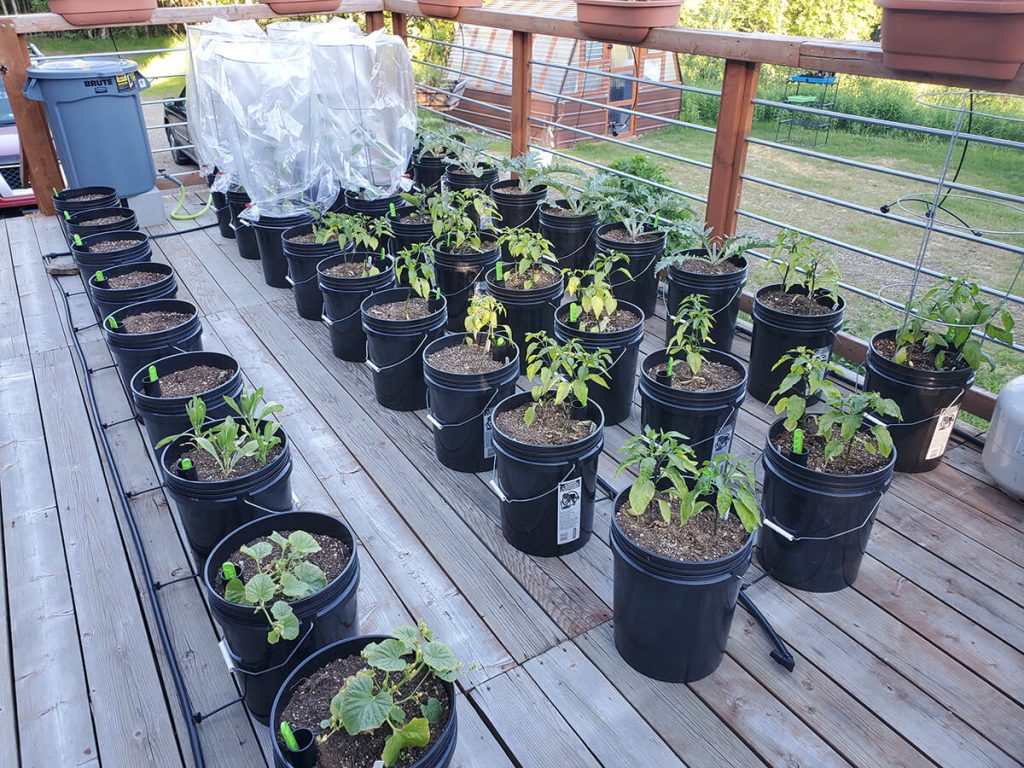
We decided to try our new garbage bag greenhouse idea on a few plants in our container garden.
A little bit later in the season, after we had harvested our radishes, we had some room in our raised beds for further experiments. We picked up a few more pepper plants from late-season fire sales at our favorite commercial nursery.
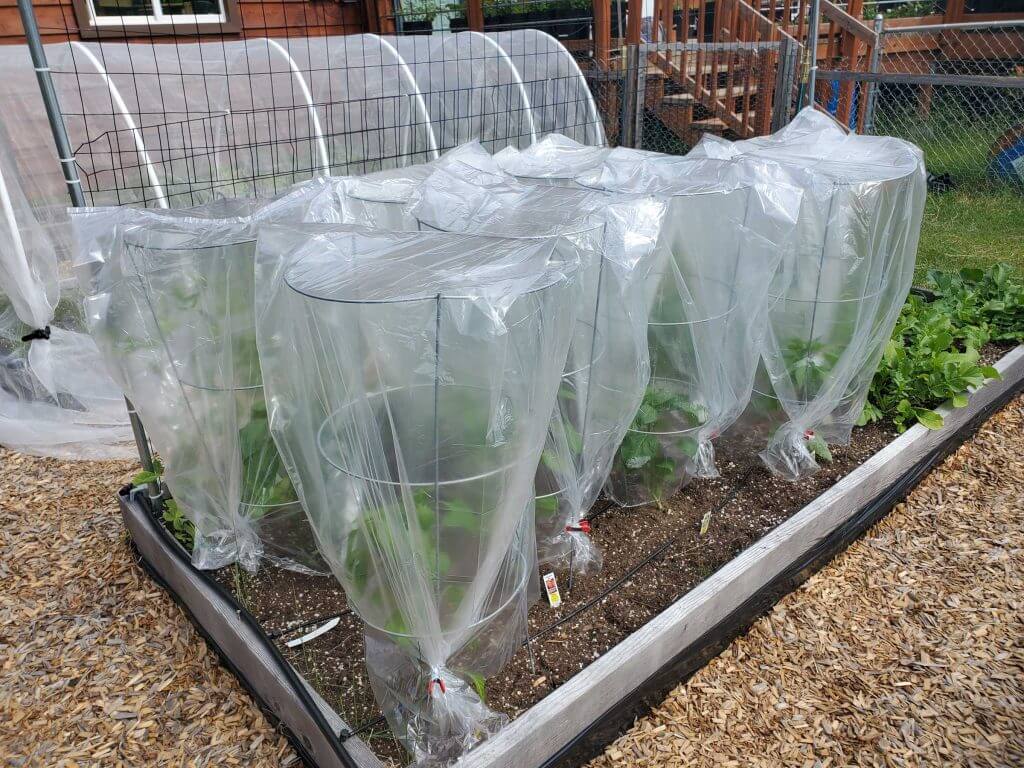
As planned, we wrapped the trash bags over the tomato cages. We then used the clip to secure the bottom of the trash bag to the tomato cage.
That’s it, greenhouse built!
For our testing, we kept the bags on the entire season. We did occasionally remove them to conduct harvests and generally observe the growth of our plants.
Unfortunately, we didn’t really do any “super scientific” testing with double blinded randomized control or anything. We do like plant science, but we are just not geared and funded well enough to do it right.
If someone’s interested in conclusive trial data, they can perform their own experiments. We’re just here to wrap our plants in trash bags and see what happens.
We figured if the technique was marginally helpful, we’d never write this article. And that crazy, long winter would eventually just be forgotten. In which case, the internet may never have known about the garbage bag greenhouse!
Since you’re reading this, and we even told you as much in the beginning, you can probably infer we had some success.
The Garbage Bag Greenhouse Results
Overall, we could tell this technique made a difference. Our results ended up being generally better than purely outdoor grown equivalents.
We did check temperatures several times through the season. There were definitely elevated temperatures inside the garbage bag greenhouse.
To assess the method, we compared our general results to typical outdoor grown plants. Again, we chose varieties that we knew would do well outdoors. We were simply trying to know if we saw improvement.
Overall, we can tell you this:
- The ground cherries produced sooner and with more total harvest than usual outdoor growing. The plant size was considerably larger than typical outdoor grown.
- The huckleberries nearly completely turned color and fully ripened. We usually only see about 50-60% achieve full ripeness. The plants were also considerably larger, almost nearly uncontained by the makeshift greenhouse.
- All tested peppers produced sooner and were largely fully ripened (had changed color) prior to harvest, also much earlier than usual
Overall, we’d say that this garbage bag greenhouse had measurable effect on our tested plants. It was somewhat comparable to what we see in our “real” greenhouse.
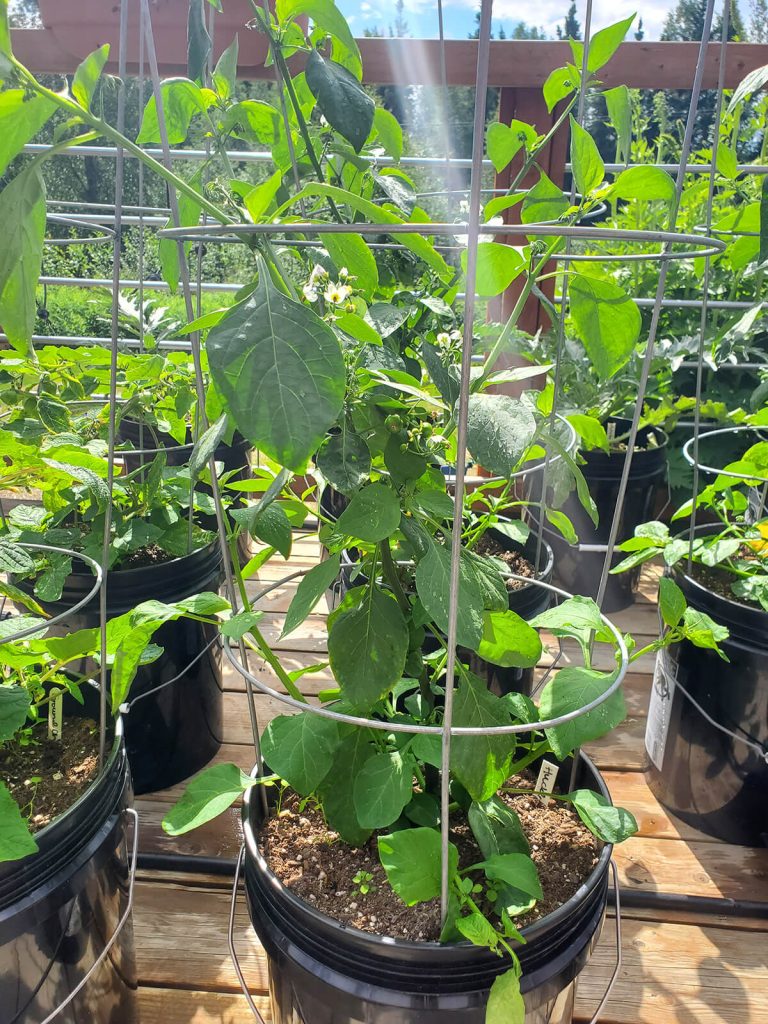
This was one of our garden huckleberry plants grown under the garbage bag greenhouse. By the end of the growing season, it was so large the makeshift greenhouse could hardly contain it.
We can say with relative confidence that the northern gardener, with limited resources or means, would likely see improvements to their warm weather crops using this method.
Or possibly some variation on this method.
The Problems With The Garbage Bag Greenhouse
We did uncover a few unforeseen problems with this method when we practiced it.
First and foremost, rain water tended to collect on the top of the garbage bag and sink into the tomato cage. Surprisingly, the bag didn’t burst and deluge the plant. We’d consider poking some very small holes (pin size) in the very top of the bag. This would allow it to drain slowly, but it’ll also result in the tradeoff of loss of heat retention.
Second, the method does largely obstruct natural rain water from reaching the proper roots of the plants. One must water underneath the garbage bags, which made things a little more difficult. The “hole poke” advice above would certainly help with this to some degree.
Third, harvesting was a lot more difficult with the bag obstructing the plant. It also made general observation for fruit readiness more difficult. We unfortunately lost some crop due to not harvesting in time, but this was likely also due to our busy lifestyle and inability to be constantly attentive.
Lastly, our garbage bag greenhouses were super gaudy. We aren’t the most aesthetically driven individuals, but the garbage bag greenhouse draws some visual attention. And it isn’t eye candy.
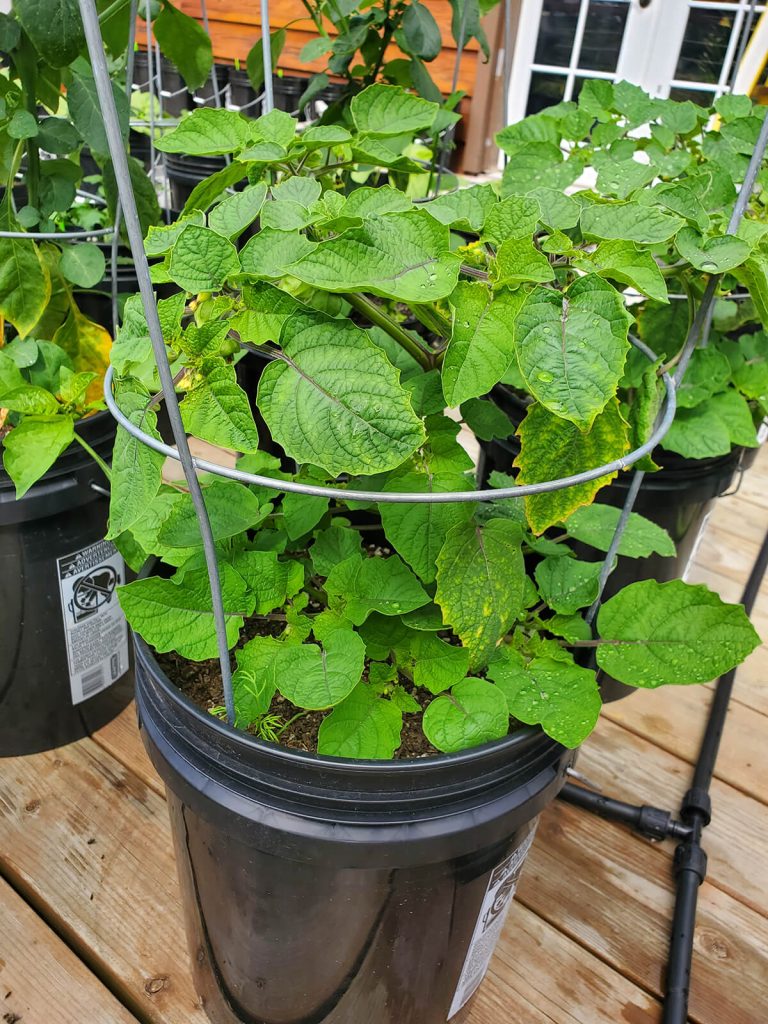
This was one of the ground cherry plants we grew under the garbage bag greenhouse in the early season. The ground cherry was much better behaved and didn’t try to burst out of the garbage bag. It produced incredibly well.
We did not try tomatoes in our garbage bag greenhouse. Mostly because at this point, we’ve pursued indeterminate tomatoes exclusively and they’d be incompatible with this greenhouse method. We’d definitely suggest determinate varieties only in this method, as these will grow to a particular size and no larger.
It’s also appropriate to mention, this worked for us in the far north. In warmer climates, this method could run a risk of overheating your plants. We measured 100+ degrees inside the garbage bag on an 80 degree day. Temperatures above this could risk sending your plants into heat shock. (Hint. You can always remove the garbage bag!)
Overall, though, the garbage bag greenhouse fits well into the “function over form” world. If you don’t care what your garden looks like and just want good harvests, the method is well worth trying.
We’d recommend thinking about and addressing some of the above issues we observed. Otherwise, the method works.
Will We Continue Garbage Bag Greenhouse Experiments?
Though it might come as a disappointment to some of our readers, it is unlikely we will continue with our garbage bag greenhouse experiments.
One of our general goals is to think about and generally push the cold climate gardening space into places it has never been. This experiment is the result of exactly that line of thinking.
From the beginning, our desire was to put ourselves back in those days where we had more limited resources and technical growing abilities. What we lacked back then was knowledge and money.
Back then, we certainly could have spared a hundred bucks to try and make a few plants grow much better. We just couldn’t spare three+ grand for a greenhouse and much more for land/property we could build on.
In our estimation, we proved the idea worked well enough. Hopefully this offers our fellow northern gardeners, that might be following in similar foot steps, some good information to work with.
The End Of The Garbage Bag Greenhouse Experiment
If we decide there’s something more interesting to pursue in this space, we’ll certainly pick it back up.
We’d love to see other people try to pick up this method and run with it. We’d love to know the things you run into, the problems you solve and best of all, the improved results you receive.
As always, if you have any comments, suggestions, improvements or general comments, we’d encourage you to slap them in the comment section below.
That’s All We Wrote!

Having a good time? We have an ever growing list of insightful and helpful subarctic & cold climate gardening articles, waiting out there for you!
- Cold Climate Gardening Basics 👉
- Growing Your Garden From Seed Indoors 👉
- Advanced Cold Climate Gardening Techniques 👉
- Plant Specific Cold Climate Growing Guides 👉
- Subarctic Perennial Food Forests & Foraging 👉
- Indoor Garden Lighting & Grow Rooms 👉
- Greenhouses & Temperature Control 👉
- Harvesting & Food Preservation 👉
- Solving Cold Climate Garden Problems 👉
- 1 Minute Reads On Tons Of Garden Topics 👉
FrostyGarden.com is 100% ad-free and we do not use affiliate links! This resource is voluntarily supported by our readers. (Like YOU!) If we provided you value, would you consider supporting us?
