
Listen To This Article!
Starting your garden from seed is not particularly difficult, but it can present some challenges. The first part of the whole process is getting the seeds to germinate!
This early phase is one of the more difficult for the “from seed” gardener to get through, though. Once you can get plants well established, it tends to be much easier!
We also produced a video that covers this topic, in the event you’d like to check it out.
Without further ado, these are the top reasons you might have problems with vegetable and fruit seed germination!
Germinate At The Correct Temperature
This is probably one of the most common problems people run into, especially in cold climates.
All vegetable and fruit seeds have a range of temperatures that they will germinate within. If you are outside of that range, germination can be difficult or impossible.

Additionally, there is usually an optimal temperature at which you will get the fastest germination rate.
It is not really worth chasing the “optimal temperature” for every seed, you’ll go crazy! We’re here to show you good, general guidelines that work for everything.
Many people try to germinate their seeds next to a window or maybe in a garage, which can often be far too cold for germination. Or, they might use a heat mat and accidentally exceed the maximum seed germination temperatures.
Both of these can present problems by bringing seeds outside of their preferred germination temperatures.
We recommend keeping your germinating seeds between about 70 and 80 degrees Fahrenheit. Even a typical ambient home temperatures of 65-68 degrees are usually “good enough” for most seeds.
Below you will find a chart with the generally recommended germination temperature for many common seeds:
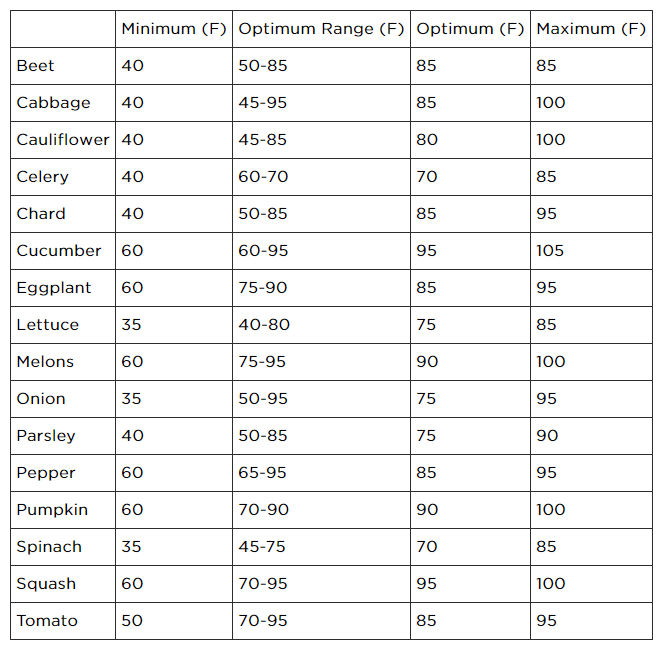
As you get further away from the optimal temperature for each seed, the longer germination can take. When you exceed the temperatures too much, that’s when problems can really creep in.
Provide The Correct Humidity
For many of us in subarctic, we experience a fairly dry climate. Humidity in our homes can be quite low and this isn’t a good thing for seeds and seedlings.
Seeds, and more importantly seedlings, need some humidity to survive. When there’s an overall lack of humidity, the seedlings can quickly dry up. As a result, seedlings can experience a difficult time getting established.
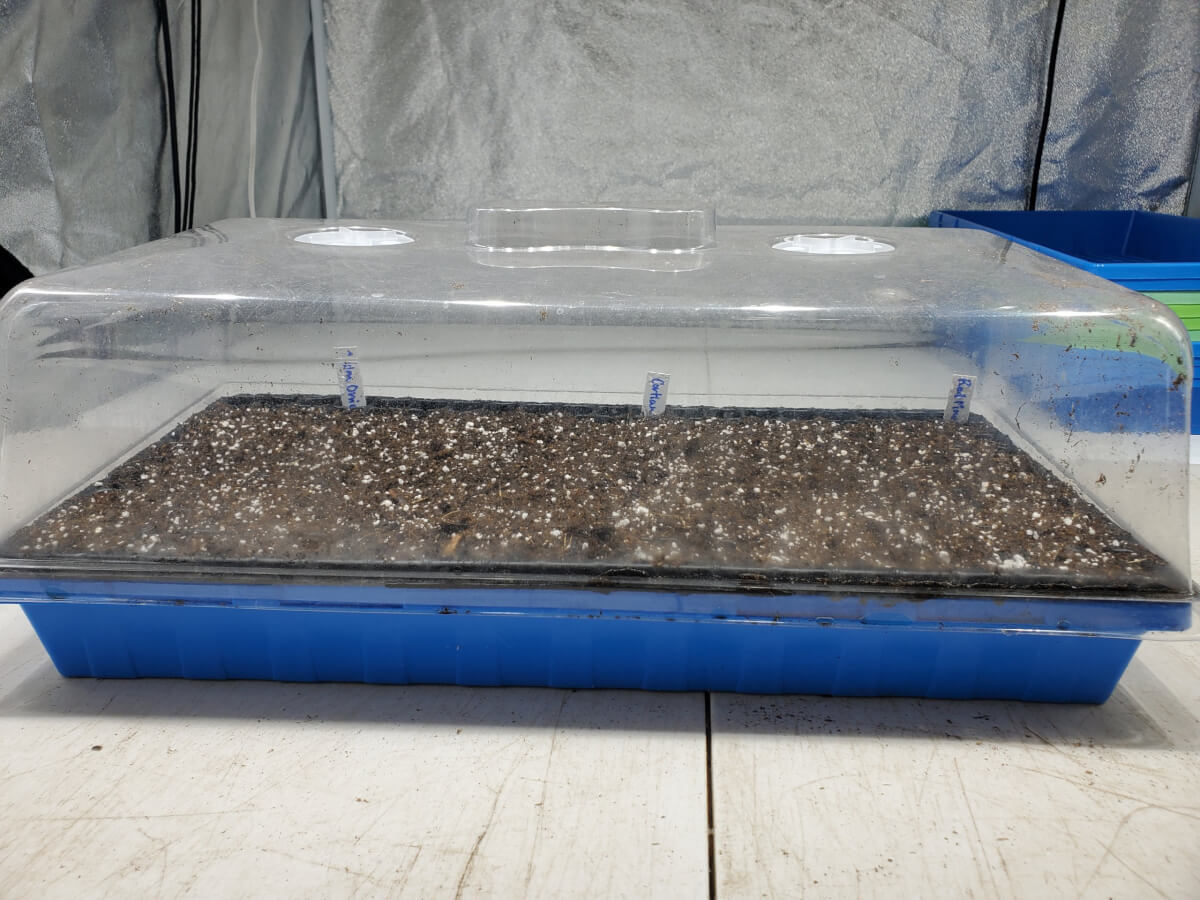
For our indoor garden, we’ve standardized around the 1020 tray system. This allows us to use commonly available humidity domes that help trap moisture and create the right environment for seeds and seedlings.
The domes also have vents that allow us to dial in the amount of humidity, more or less, to address our needs. The concept is to trap the soil’s moisture as much as possible. This creates a high humidity environment, which is ideal for seeds and seedlings.
On the flip side, too much moisture can also be a bad thing. You know you have too much when you see green stuff (commonly algae or moss) growing on your seedling’s soil. This indicates you need to vent moisture a little bit more, which will help curb that undesirable growth.
You don’t usually have to get into exact specifics of certain humidity percentages. The goal is to simply create a reasonably humid environment for your seeds and seedlings.
Once seedlings are a little more mature, they are usually more tolerant to “normal” indoor humidity levels. We usually use “roughly” the second set of true leaves as an indicator for when to remove the humidity dome.
Unexpected things that grow in your soil is also a sign that your soil isn’t sterilized. This isn’t an absolute requirement, but it does create competition for your plants. It is best to be avoided, if possible.
Huh, Your Seeds Are Too Old?
Seeds do have a limited amount of time where germination is still ideal. Past this point, germination rates can start to decline, sometimes quite rapidly.
To make this a little more complicated, there is no universal age when different types of seeds are past their prime.
For the most part, seeds have a lifetime somewhere between one and five years for optimal germination rates. That’s not to say that your seeds can’t exceed this, by even decades.
But, at a certain point, germination rates will become lower and lower.
If you think this is of concern, you can test your seed viability!
The easiest way to do this is to dampen a paper towel to the point of being moist, but not saturated with water. Place 10 or so of the seeds you want to test on the paper towel. Insert the dampened paper towel and seeds into a plastic ziplock bag. Wait for a few days, or the expected germination time, and check the seeds that have sprouted.
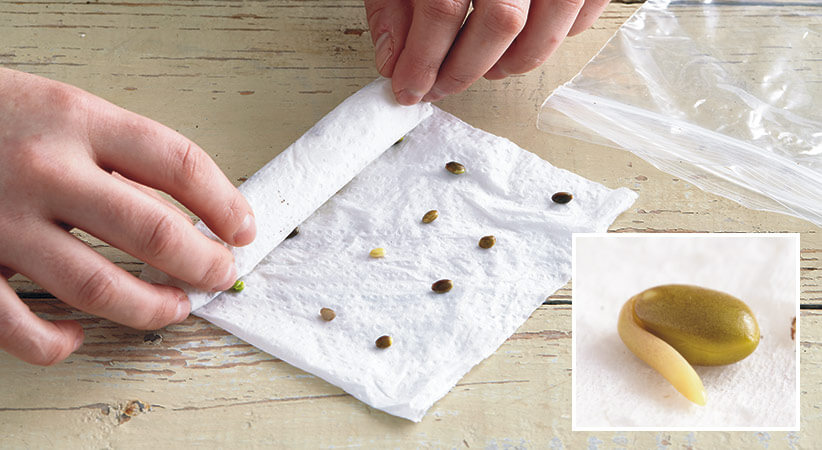
You can calculate the viability percentage by dividing the number of sprouted seeds by the total number of seeds. (BTW, you can also sow these test seeds!)
This can give you insight into how many seeds you might want to plant to get the total number of plants you desire. If you have low germination, you’d typically choose to germinate more seeds than usual.
For example, if your germination rate is 60% and you need 8 total plants, you should plant at least 14 to 16 seeds to achieve the desired quantity of plants.
We also write the purchase year on all of our seed packets. While most seed packets have the year on them, it’s convenient to have a consistent labeling technique.

When the age of a seed starts to show, at least a few years prior, we check our seeds against seed viability charts.
If we’re working with “old seed” and are trying to achieve a super accurate number of a particularly questionable seed, sometimes we actually test the seed’s viability as discussed above.
For the most part, we generally over plant and cull the plants, as necessary, we don’t need. It’s generally easier this way, but there are some exceptions.
Some seeds should be purchased annually (or at leat bi-annually) for best germination rates. The commonly grown vegetable seeds that fit into this category are typically:
- Onions (1-2 years)
- Parsnip (1-2 years)
- Corn (1-2 years)
- Leek (1-2 years)
We’ve found these seeds do have a particularly quick lifespan, it’s not a joke by “Big Seed” to get you to buy more. Dramatic drops in viability are seen into the 3rd and especially 4th years!
Soil Is Too Moist or Too Dry
Similar to the humidity issues, a lack of moisture of your seed starting soil can also greatly impact seed germination rates.
You want your soil to be somewhere between lightly moist and soaked. Bone dry will be very bad for seeds since the seed sprouts based on contact with water.
Too moist can cause the little seedling to drown before it gets a chance to grow. It also sets you up for algae or moss growth.
You also want a fairly consistent moisture level throughout the soil you are planting in.
The temperature of your growing area and the intensity of your indoor grow lighting can dramatically impact the soil’s moisture. Check your seeds and seedlings often to make sure they have sufficient moisture. Humidity domes, as discussed above, can slow down evaporation rates.
We use a pressurized sprayer to create a fine mist for watering our seedlings. This works well as it minimizes disturbance of the seeds. It also is much easier on our hands than a typical bottle sprayer. We try to assess the soil’s moisture and provide the balance in between soaking wet and lightly moist.

When you are watering your seedlings, make sure you are providing enough moisture for the entire amount of soil. A light watering will often just moisten the top layer of soil, which can evaporate quickly.
When our plants are in larger containers (typically 3.5 inch pots or 606 insert trays), we strongly prefer to “bottom water” our plants. Since we use 1020 trays without holes, we can simply fill up the tray with about 1/2-3/4 inch of water. This will be absorbed into the soil and creates a nice, consistent soil moisture.
When we bottom water, we check the tray about a couple hours after adding the water. Any excess water that is still remaining is discarded. This prevents the seedlings from drowning.
Poor Seed Storage Techniques
Seeds do have a need to be stored correctly. You don’t need to get into a highly exact storage condition, but there are a few guidelines to follow.
The best storage environment for seeds is a dry, cool and dark place.
By cool, we don’t necessarily mean “refrigerator cool” – but rather a comfortable ambient room temperature or less. You definitely want to avoid extremes.
Too hot or too cold can affect seed viability. You definitely want to avoid freezing temperatures and hot temperatures above 90 degrees Fahrenheit.
Also, avoid highly humid areas as this could inadvertently cause your seeds to sprout.

This is our current seed storage technique. This is called a photo organizer and it is the best storage method we have ever used. Highly recommended!
We recommend storing your garden seeds in either a shoe box or other basic container. It is ideal if you can cover the box, which further protects your seed storage.
If you’re one of those that store seeds in the refrigerator (we don’t), be sure to use air-tight containers for storage. This will prevent moisture from accidentally getting into your seed storage.
If you have a lot of seeds, we have found that a photo organizer (pictured above) is a great storage method. This makes it easy to tuck into a cabinet or other storage space that will remain relatively consistent.
Use Of Heavy / Compact Soils
Seedlings are somewhat sensitive to the soil they are being germinated in. If a soil is too compact, it can negatively affect the germination of the seed. The seedlings only have so much energy available to them and compact soil can be too much for them to bear.
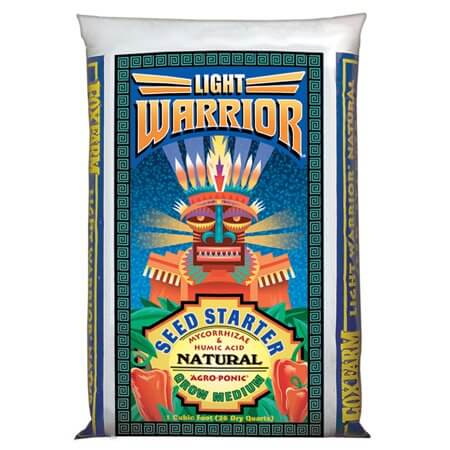
Seedling mix is slightly different from general potting soil. These soil mixes are very good at resisting compaction, retaining moisture and creating an ideal soil environment for starting seeds.
Additionally, seedling mixes are often sterilized. This makes them biologically inactive, which means there will be no competition for your intentional seedlings.
Using seed starting mix can solve a lot of common problems gardeners face with germination. Issues such as damping off will largely not be an issue with seedling mix.
You definitely want to avoid the use of “garden soil” in all cases as this will tend to compact quite heavily.
Potting mix can be used in a pinch, but it’s still less than ideal for most seedlings. This is a “slippery slope” since it highly depends on the potting soil.
If you prefer this route, our only recommendation is to use Pro-Mix with Mycorrhizae. Definitely avoid “pre-fertilized” types of soils for germinating seeds in.
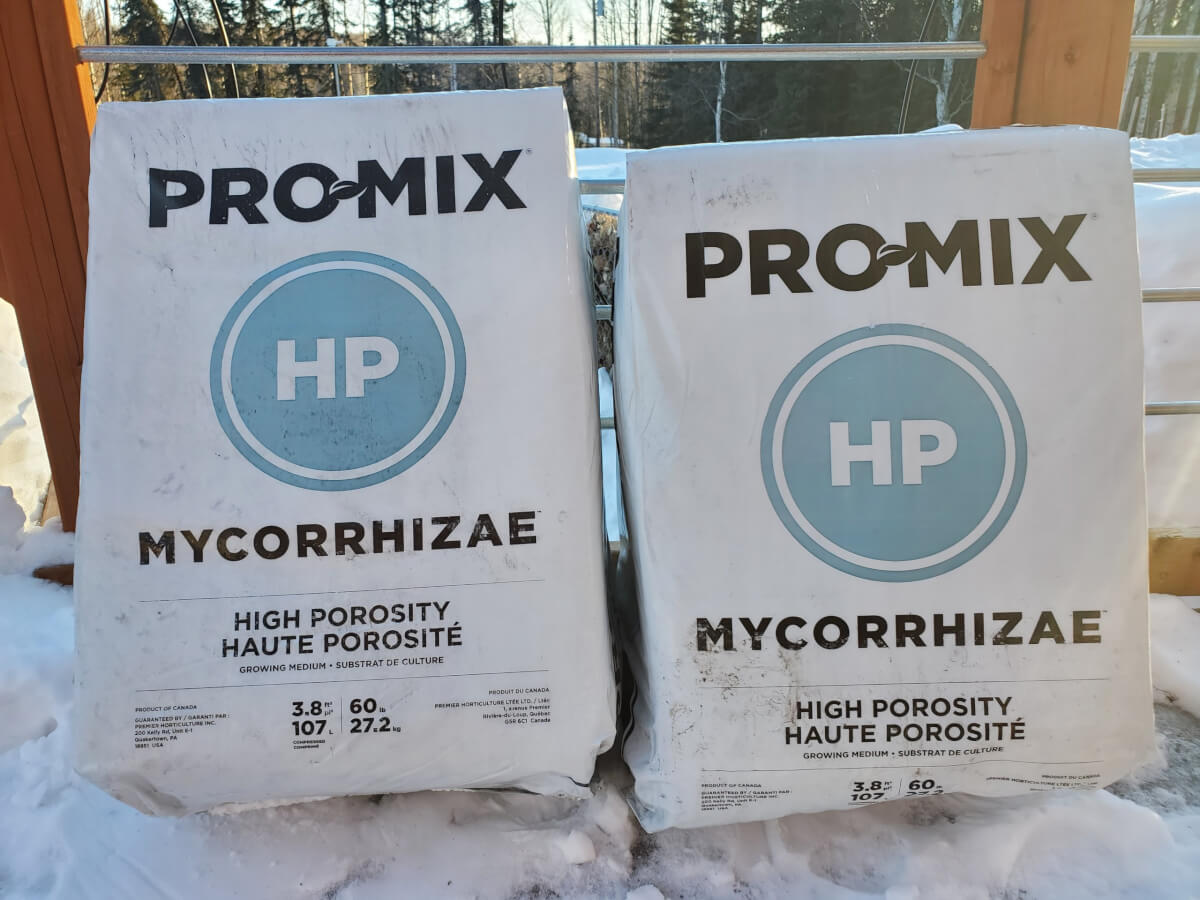
We have personally done testing with seed germination directly in Pro-Mix. Not all potting soils are good or appropriate for seed germination!
We do have some exceptions to the use of seed starting mix.
For a small number of our plants, we tend to plant these directly into potting soil. This is because these plants grow very fast and it’s ideal if they can just sprout and continue growing in one step. Examples of these exceptions are:
- Cucumbers
- Squash (Summer and Winter)
- Melons
- Sunflowers
- Typically anything with a large seed (1/4 inch or so) as these typically will grow fast and large
When you plant your seeds, you want a firm, but not compressed, soil above the planted seeds.
Seeds Planted Too Deep
Planting your seeds into the soil at the correct depth is important for high germination rates. If you plant too deeply, the seedling may struggle to reach the soil’s surface.
If planted too shallow, the seedling may not be able to establish a good, stable root structure.
There is a general guideline that you can follow that gets you “close enough” in most cases.
Most seeds should be planted roughly two times the seed’s diameter (or width) into the soil. For example, if your seed is 1/16 of an inch, plant about 1/8 of an inch beneath the soil. If it’s roughly a 1/4 inch, plant at depth of 1/2 inch.
For very small seeds, it’s usually sufficient to just lightly cover the seeds with soil or vermiculite.
Some seeds don’t like being covered at all. If this is the case, it will be called out on the seed packet’s instructions, located on the back of the packet.
Larger seeds, such as beans, can be planted up to an inch beneath the soil.
Too Many Seeds Growing In One Space
We generally have a “mantra” around here that we like to call “one plant per space.”
For the most part, most seeds will do best if only a single plant is allowed to grow when you’re seeding them. It’s often a good practice to sow more than one seed, but be sure to eliminate the second plant if more than one seed germinates.
Too many seeds growing increases competition, which generally harms the growth of all of the seeds as a whole. When you allow one plant to grow, it can maximally use the soil.
We generally snip any extra plants that germinate with a pair of fine tipped garden scissors. Be careful with them, it’s easy to accidentally “whack” more than you intended!
Alternatively, you can also reconcile the issue when you transplant to larger containers. This works well if you have extra small seedling trays, such as 128 or 200 cell trays. Typically, you’re transplanting after 2-3 weeks anyway with these.
Very few plants like to be “clustered” together. Examples of plants where you can grow more than one seed together include:
- Mint (max of 3-4 seeds)
- Lemon balm (up to 3-4 seeds)
- Bunching onions (should still be spaced out a bit)
- Lobelia (up to 7 seeds)
- Portulaca (up to 3-4 seeds)
- Livingstone Daisy (up to 3-4 seeds)
These plants have growing characteristics that allow them to better handle the competition from others in their growing space.
No Light For Germination
You may have heard that seeds don’t require a source of light to germinate. That’s generally true. But, some seeds do absolutely require light to germinate properly.
It’s been our experience that germinating under light is not problematic for any kind of seed. If you think about it, this more closely replicates nature where they day cycle is generally consistent.
Unless you have space issues that limit you from providing light to your seedlings, it’s not a bad idea to give it to your seedlings. Plus, offering light from day one allows the seedlings to transition from germination into growth without further intervention.
Some examples of seeds that require light to germinate are:
- Dill
- Ornamental Peppers
- Lettuce
- Begonia
- Columbine
- Geranium
- Petunia
- Impatiens
- Poppies
- Snapdragon
What is nice about always providing light to all of your seedlings is you just don’t have to worry about any of this to begin with!
Although not specific to germination, if your seedlings end up “leggy” this is an indication your indoor lighting is not strong enough. Plants will “stretch” to try and reach for light when they don’t get enough light.
If you run into this problem, you need to either get your indoor lighting closer to your plants or purchase more sufficient indoor grow lighting.
Special Seed Requirements
Most general garden seeds don’t have highly specific requirements or specific treatments that are required to get successful germination. But, some seeds (or sometimes specific varieties of certain plants) do have special requirements.
- Soaking your seeds in water. This softens the seed’s shell, provides immediate moisture and often hastens germination.
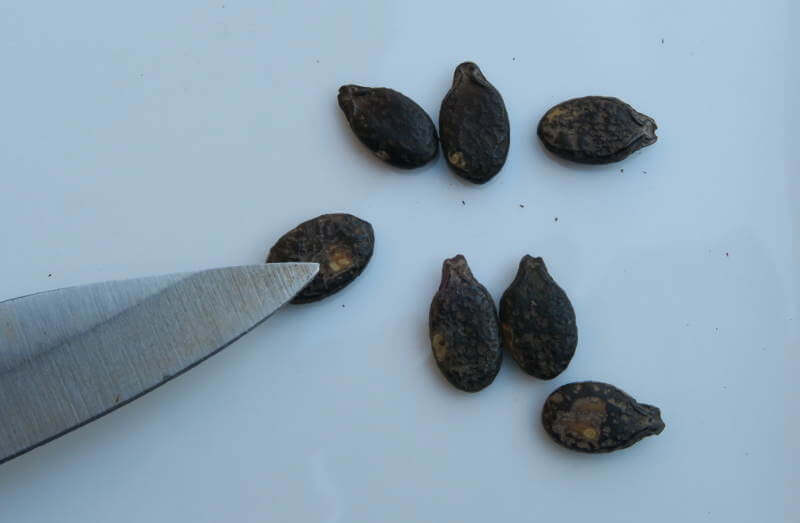
- Scarification, or scoring the seed to make it easier for the seed to germinate. This simulates seed movement or rough treatment, such as being eaten by an animal.
- Stratification, or the process of simulating winter by placing seeds in a refrigerator or freezer for a period of time.
- Boiling, or the process of simulating extremely hot temperatures such as being on the ground in the baking sun.
- Radical temperature or humidity changes, simulating natural seasonal changes that might occur if the seed were growing in a natural environment.
In general, if the seeds require a special treatment like this, the seed packet will specifically identify the process that is required. The seed packet will often provide detailed instructions that involve the amount of time or specific parameters for the treatment.
Fortunately, for most common vegetables and fruits, you don’t have to worry about these special techniques.
If you are growing from collected seed, or are growing some relatively eccentric plants, it’s worth doing a little bit of research to see if any specific treatments are required.
When it comes to growing cold climate perennials, especially those hardy within zones 2 through 5, it’s very common to see seed stratification requirements. These seeds would typically experience a winter, so thus the seeds need to simulate that winter.
Bonus Tip 1! Leggy Starts Are Not Good!
While not specifically tied to germination, a lot of new gardeners face problems with what are called “leggy” starts. This is where the plant gets super tall, very fast and just sort of “falls over.”

This is generally not an ideal result. Seeds grown like this will often not fare too well in the garden.
This problem is caused by insufficient grow lighting. The plant is trying to “reach” for the light to get enough for photosynthesis.
We’ve found things like using “window-sill lighting” is generally not enough for raising plants. Even plants grown under “grow lights” can experience this issue, it means your lights are not providing enough light to your plants.
If you’re facing this problem, you have a few options:
- Bring your lighting closer to your plants
- Increase lighting through more lights
- Upgrade your lighting to more powerful lighting
Our general preference has been to use grow lights that provide way more than our seedlings technically need, resulting in compact and high quality garden starts.
This allows us to raise the lights to accommodate larger garden starts while also using the same lighting for successful seed germination.
Bonus Tip 2! What Isn’t Causing Your Issues!
A somewhat common misconception is that “seed starting mix” doesn’t have the nutritional ability to start your seeds. While it’s true that seed starting mix is mostly inert and isn’t high in nutrients, it doesn’t need to be!
A seed contains everything the plant needs to get established. Every seed contains enough reserves for the seed to hatch, put down a tap root and practically everything up to the first set of true leaves.
Isn’t that amazing?
It is important to transplant out of seed starting mix once the plant does become established.
Common potting soils are good for the next stage of your plant’s growth as they usually contain enough compost or diluted fertilizer to help the plant get through the early stages of life.
You usually don’t need to worry about fertilizing your plants until they are several weeks to well over a month old. We usually start thinking about fertilizing our plants once the second (or even third) set of true leaves develop on the plant.
Everything Is Easier Once You Get The Hang Of It!
We’re not trying to communicate that growing plants from seed is particularly difficult. It’s surprisingly easy when it comes down to it.
But, there are some things that can go wrong and the point of this post is to indicate to the reader most of the things that can go wrong.
The goal if you’re having trouble is to figure out what, in your process, is causing you difficulties. It’s likely something on this, but it can also be other things too.
If you’re experiencing any stubborn issues or have further questions, feel free to slap a comment down below!
That’s All We Wrote!

Having a good time? Learn something? We have an ever growing list of insightful and helpful subarctic & cold climate gardening articles, just like this one!
- Cold Climate Gardening Basics 👉
- Growing Your Garden From Seed Indoors 👉
- Advanced Cold Climate Gardening Techniques 👉
- Plant Specific Cold Climate Growing Guides 👉
- Subarctic Perennial Food Forests & Foraging 👉
- Indoor Garden Lighting & Grow Rooms 👉
- Greenhouses & Temperature Control 👉
- Harvesting & Food Preservation 👉
- Solving Cold Climate Garden Problems 👉
- 700+ 1 Minute Reads 👉
- 180+ Gardening Topics! 👉
FrostyGarden.com is 100% ad-free, junk free and we do not use affiliate links or sponsorships! This resource is voluntarily supported by our readers. (Like YOU!) If we provided you value, would you consider supporting our mission?
Have you experimented with “winter sowing” in milk jug containers? I’ve heard it’s quite successful here in the Interior, and am trying it for my first time this year, but, of course, am skeptical….time, as always, will tell if it works for me. I live at an elevation of 1400 ft which means widely flucuating temps at night and during the day….will be interesting to see the results come May!! Thanks for all the information you post on your website!!
We have! It does work! I’ve been meaning to write an article about it, we’re finally taking pictures this year for it! The gist is that the seeds will come up when the conditions warrant. The “gotcha” with winter sowing, and why we don’t practice it in general, is that it really only works for fairly cold hardy plants. (e.g. cabbage, broccoli, kale, other brassicas, etc) You could not, for example, expect to grow tomatoes or peppers well that way, given the likely frost, temperature risks and extremely low germination temperatures. Also wouldn’t work for crops/flowers that require sowing more than 6-8 weeks before last frost. So, lots of limitations that don’t work for us, but would absolutely work for some people! We should have our in-depth article ready next season where we’ll cover ALL the details, but hopefully the above gives you the “key” guidance for this season.
Also, this spring is whack, meaning there’s a seasonal component too. We’d suggest waiting until temperatures are reliably above 20 degrees before putting them outside!