
Listen To This Article!
Potatoes weren’t the first thing we ever wanted to grow. They were cheap enough to buy at the grocery, why spend a bunch of effort on cheap vegetables?
Well, as it turns out, potatoes have become one of our most favorite crops that we grow today!
This guide will walk you through some of the things we’ve learned about growing potatoes in cold climates.
Potatoes Are A Perpetual Crop & Grow Great In Cold Climates
One of the things that “sold” us on growing our own potatoes is that they are basically a perpetual crop.
Once you buy seed potatoes, you’ll never have to buy them again. Potatoes are effectively a perpetual crop. You can use the prior year’s potatoes to seed the following year’s potatoes, essentially into perpetuity.
This means there are very little input cost related to growing them. Unlike most other vegetables, your only costs are related to soil nutrition and the initial investment into seed potatoes!
Also, potatoes grow exceptionally well in cooler climates like the subarctic. They are very cold tolerant and will produce well in pretty much every summer season, partly due to our cooler summers.
We advocate for growing the things that grow well in your climate. Potatoes fit that bill nicely!
Lastly, potatoes are a very hands off crop. You pretty much put seed potatoes in the ground, provide minimal maintenance through the season and harvest them at the end of the season.
What You Need To Know About Seed Potatoes
Seed potatoes are basically just potatoes, there’s nothing particularly special about them.
Specifically, though, seed potatoes will feature what is called an eye. This is a piece of the potato that will eventually turn into a growth, which is how the potato continues its lineage.
If you’ve ever left a potato for a long time, you know that it’ll eventually soften and start to grow white, purple or red growths from the softened body. This is the manifestation of the eye.

The growths from this aged potato are called eyes. This is how the potato continues its lifecycle.
A seed potato can be an entire potato or even just a slice of a given potato. We’ll talk more about this later.
One important thing note for Alaskans, though, is that we need to pursue “Alaska certified seed potatoes.” This is related to a concern over particular diseases that could be brought into Alaska via potatoes grown in other areas.
These diseases are of genuine concern, prevention is the absolute best way to make sure we don’t get these problems in our area. Some of the most influential and impactful famines in history were related to potato disease!
If you’re outside of Alaska, it’s worth checking whether your state or country has similar requirements as this can be somewhat common to prevent spread of disease.
Choosing Seed Potato Varieties
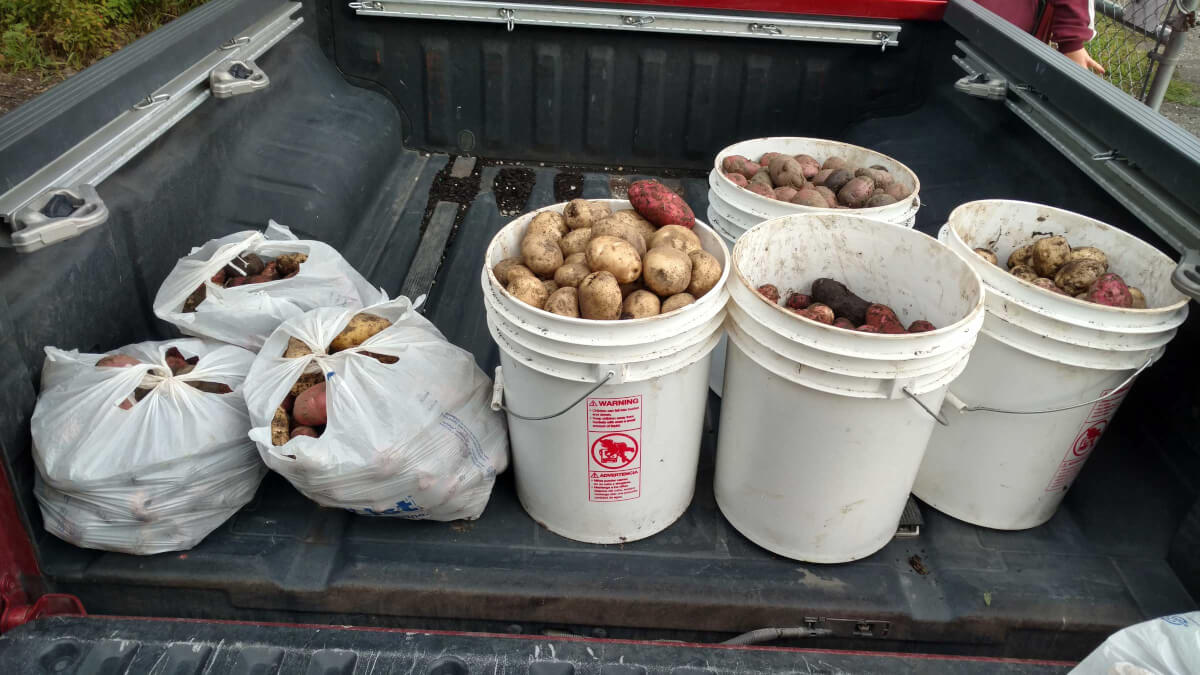
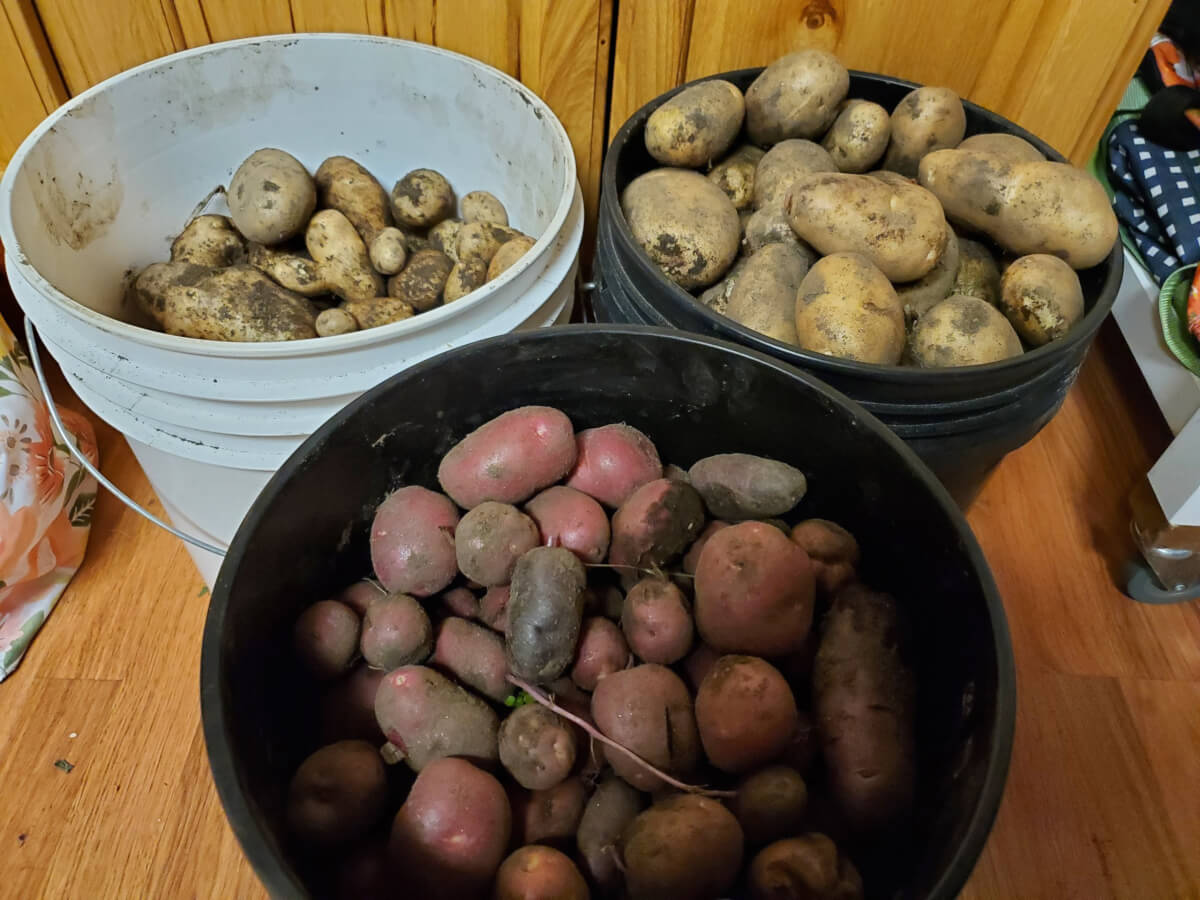
One of the best things about growing your own potatoes is there are a ton of different varieties available. Dozens upon dozens.
You aren’t limited to Russet, reds and golds like you’d see at the grocery store.
You can find purple potatoes, multi-color potatoes, white potatoes, gold potatoes, red potatoes, brown potatoes. Each will have its own flavor and benefits.
There are varieties that are better for baking, mashing, fries and just flavor all around.
Unlike some crops, the varieties that you choose will not matter much in a cold climate. All will produce. There is some variability in production between varieties and also potato size.
Nonetheless, we’d encourage the northern grower to pursue what they find interesting and varieties that they’d prefer.
When we initially purchased our seed potatoes, we selected about five red/purple types and five white/gold types. We try to make sure we retain each variety for future years.
Preparing Your Seed Potatoes
As mentioned above, a seed potato can either be a whole potato or part of a potato.
You can just toss an entire seed potato, with eye(s), into the dirt and up will come a potato plant. This is the easiest method, but you can get a little bit more for your money if you’re buying seed potatoes.
If you want to extend your seed potatoes, you can cut up the seed potato. So long as each piece has an eye, a potato plant will grow.
For larger potatoes, you can cut three or four pieces, again retaining at least one eye per chunk. For smaller potatoes, halving them is best. You want each chunk to have a fair bit of potato left as this will act as the plant’s early nutrients.

This seed potato could be sliced up to three times, as it has three eyes. Each slice would need to have an eye. You don’t have to cut this potato, it would also be fine on its own.
It’s important that if you cut up your potatoes like this to go through a process called curing. (Some call it scabbing.) This involves just leaving the potato out for a few days, it’ll sort of scab over. This helps protect the cut potato from soil borne diseases and spoilage.
It doesn’t really matter what way “up” you plant cut seed potatoes, the plant will figure it out. A lot of folks prefer to plant “eye side up.” Do so if that makes you feel better.
About The Soil For Growing Potatoes
Potatoes are quite tolerant of a lot of different kinds of soil.
Like most root vegetables, they will perform best if they’re given nice, airy soil to grow in. Loamy is the term gardeners use. Compact soils can cause misshapen potatoes and lower than expected yields.
If you have particularly dense soil, it’s a good idea to add things that will break up the soil, such as compost, greensand, sand, vermiculite, perlite or other organics.

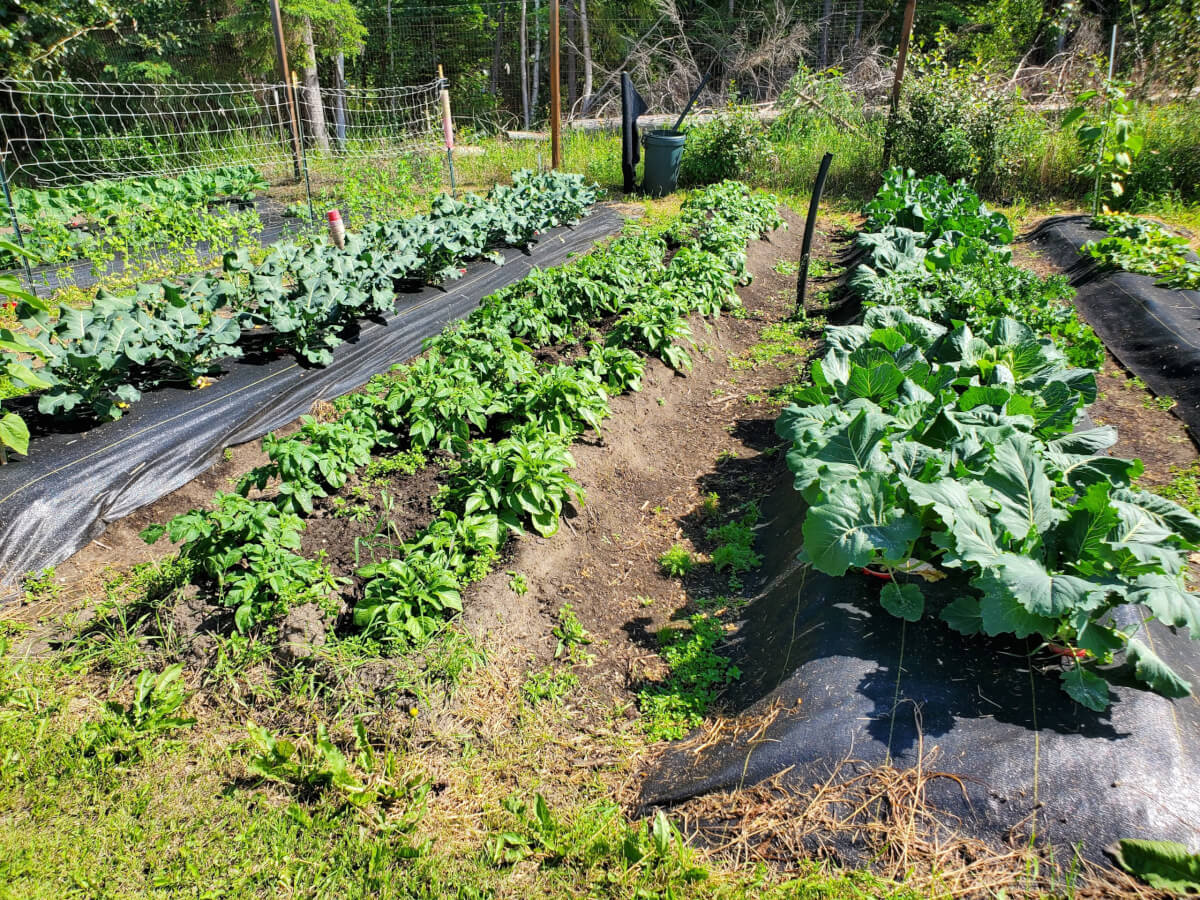
This image shows our uncovered potato bed. We use wide raised rows to grow our potatoes. It will well tilled with additions of compost and other organic materials.
Potatoes are so tolerant of the “ground” they grow in that they can even be produced in things like hay bales and compost piles.
For in ground potatoes, we find it’s a good idea to deeply till the ground prior to planting them. This helps the potatoes grow comfortably into the soil.
We use our potato bed rotation as a mechanism for deeply tilling the soil on infrequent occasion. This deep tilling occurs both initially (actual tilling), as well as when we both plant and harvest the potatoes. Our crop rotation means we deeply till each of our beds once every six years.
Notes About Potatoes Growth
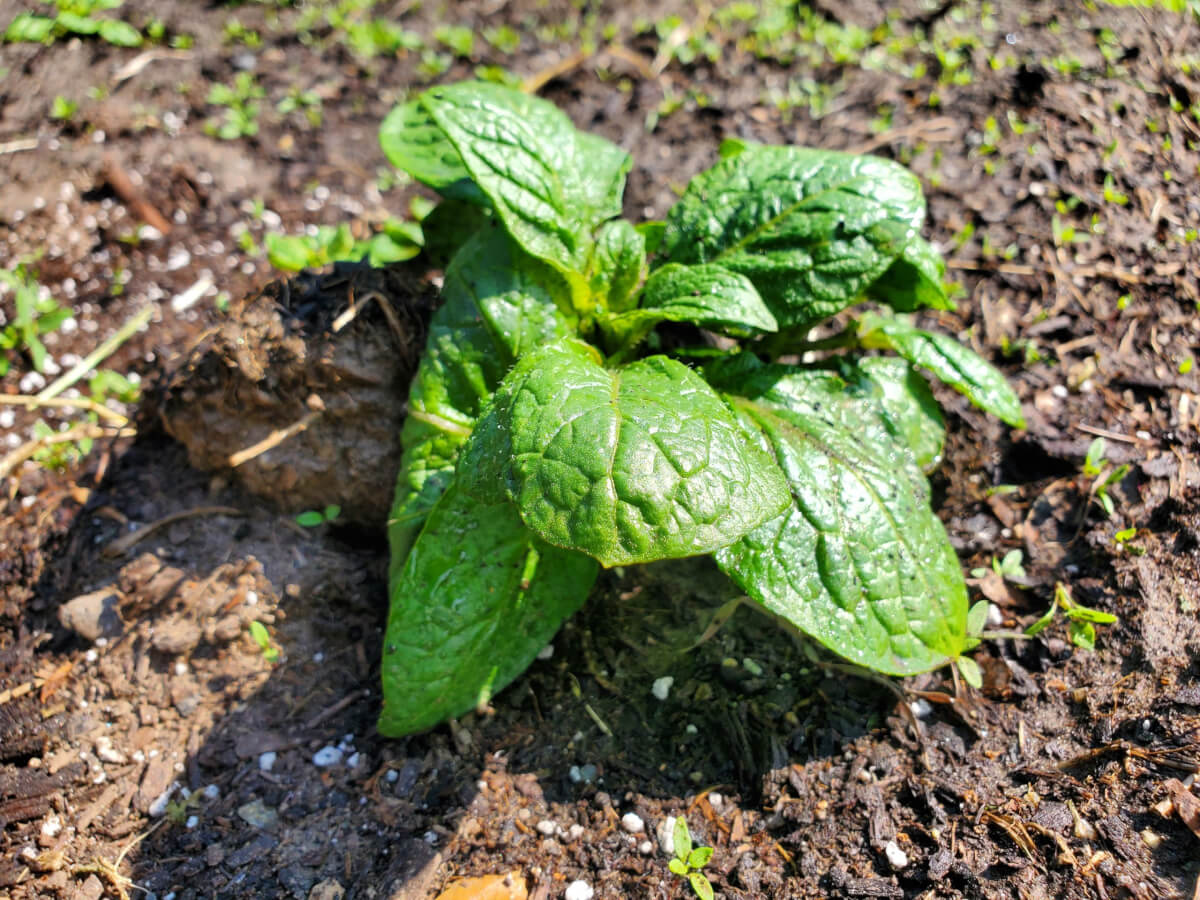
When you plant a seed potato, potatoes can grow every direction from that seed. Up, down and all around. On average, new potatoes will produce around 6 to 12 inches from the initial seed potato.
A lot of gardeners prefer to continually add soil or compost, once the green tips start poking through the soil. This helps form additional potatoes above the seed potato.
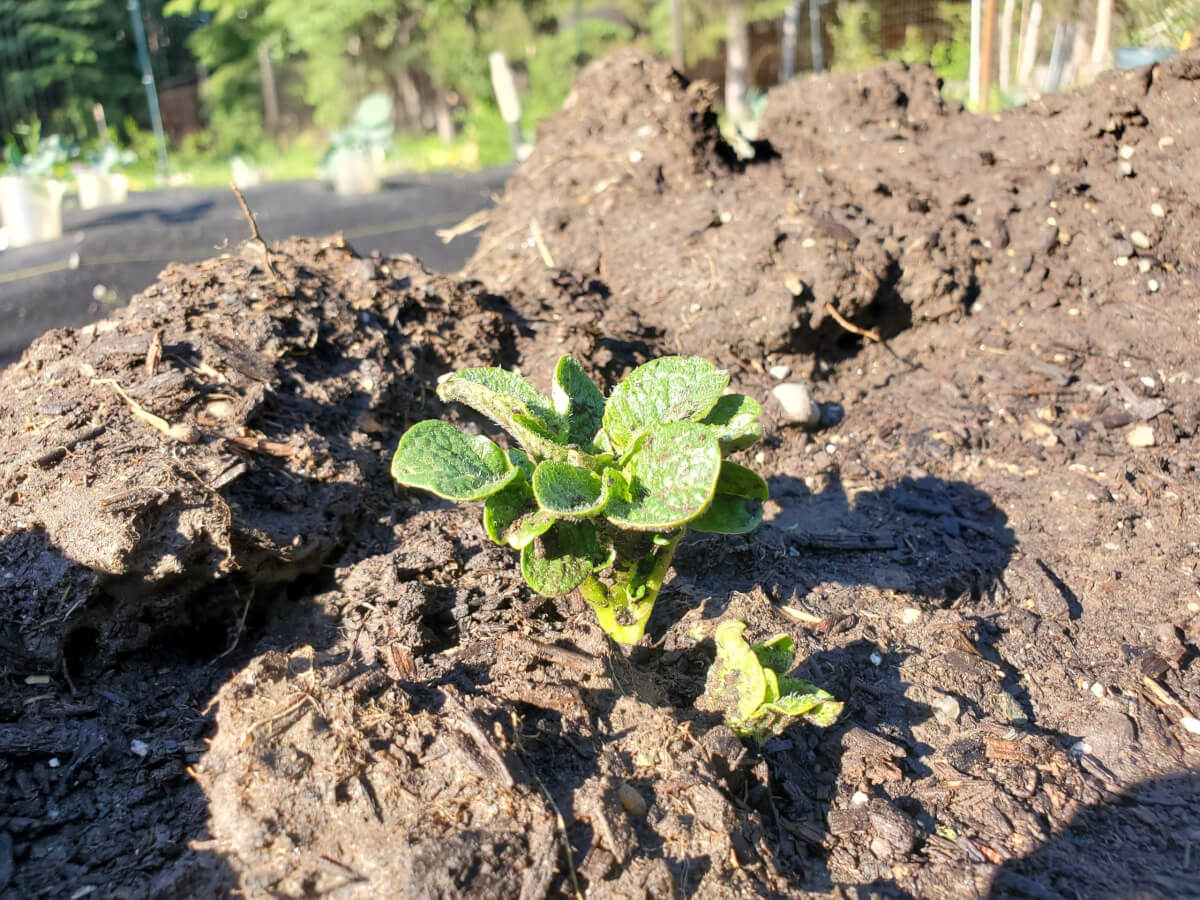
Note that we have a bit more available soil behind the developing potato plant. We use this soil to cover this baby potato plant, increasing the harvest. Sometimes we also add compost on top.
There’s a popular myth that you can just continually cover potatoes with more and more soil and they will continue to produce. There’s a little truth to that, but it’s mostly myth.
Potatoes will only produce about one foot above the actual seed potato, so that’s at most what you want to cover them with additional soil. There is no measurable benefit to continuing to cover potatoes.
Growing Potatoes In Containers
Growing potatoes in containers is a very popular idea. You want to seed your potatoes shortly before of right around last frost.
If you do this, it’s good to fill the container with about 4″ of soil then plant your seed potato. Cover the potato with another 4″ of soil. Water and wait.
Once you see green tips pop out of the soil, it’s a good idea to continue to put soil on top to encourage further potato growth. Usually filling it all the way up to the top of the container is good.
The handy thing about this method is you can just dump the container out at the end of the season and fish out your grown potatoes. It makes for easy collection and provides certainty you got all of them.
We recommend a minimum of a 5 gallon container for growing potatoes. This can be of most any type of container, but it should be well draining. From buckets, to grow bags to a regular planter.
We’ve personally found that container grown potatoes are bit more limited than their soil grown counterparts. We average about 3-6 potatoes in an average season per five gallon bucket.
Some people prefer to use a very large container (e.g. 10-15 gallons) and plant two to three seed potatoes. This provides a little more “bang for your buck” when it comes to container grown potatoes.
Potato plants can get somewhat thirsty late in their lifespan, so it’s important to keep on top of watering.
We have also successfully grown potatoes in our sub irrigated bucket systems as well. They handle the constant moisture contact in these systems fairly well, so there are no major concerns about that.
Growing Potatoes In Soil
This is our preferred technique. Potatoes grow quite well in the ground, so it means we don’t have to use more expensive growing techniques.
We sow our potatoes shortly before or right around last frost.
We’ll tell you that there’s are a bunch of different ways to do plant potatoes in the ground. Pretty much all of them work.
What we do is dig about a 8 to 12 inch hole with a shovel, then place our seed potato. We cover the seed potato with at least some of the soil. We try to leave a little bit of soil left to cover them further, later in the season.
We try to space our potatoes about 12 inches apart from one another. In our case, we grow two rows of potatoes in a single wide-raised row and each row of potatoes is about 12 inches from the other.
Once we see the tip of the potato plant breach the soil’s surface, we cover the plant with several more inches of soil. This increases your harvest.
Again, once we see the green tips, we try to go back in and cover the potato plant with additional soil or sometimes compost. Our general goal is to get about 8 to 12 inches of soil above the seed potato.
Some people prefer to dig a trough and just space their potatoes every 12 inches or so. This adds a lot of unnecessary digging, so that’s why we don’t do it.
Another technique some gardeners use is to place the seed potato on the ground and simply place 4 to 6 inches of soil on top of the seed potato. Again, you want to re-cover with additional soil (about 4-6 inches, for a total of about 12 inches) once the potato plant’s growth tips show.
Soil Nutrition & Maintenance For Your Potato Garden
Potatoes are not a particularly hungry plant. They will do well, even with basic compost additions.
That said, we have found improvements by regularly fertilizing our potato crop with a well balanced NPK fertilizer. This increases both the quantity and size of the potatoes that we are able to harvest.

In general, we apply fertilizer approximately a quarter as often to our potato garden as we do our other plants. So, if our schedule is to fertilize weekly, we might fertilize our potatoes once a month. We aren’t religious about it, though, a few times per season is perfectly adequate.
Potatoes do require a fair bit of water and are sensitive to drought. You can get by with watering them once every 4 to 7 days, less if you’ve experienced rainfall. Your target is about 1 inch of water.
As for other maintenance, that’s the beauty of potatoes. There’s almost nothing to it. Just let them grow.
It’s a good idea to weed out your potato beds. Increased competition from roots will reduce your crops potential, so weeding your beds somewhat regularly is well worth it.
Harvesting Your Potato Crop
Unlike a lot of vegetables, harvesting potatoes can take a bit of work. But, this is truly the fun part!
We generally harvest our potatoes at the end of the season. Sometimes around first frost, sometimes a bit after first frost. Potatoes are quite cold tolerant, so you can put them off a little bit past your first frost time if you need to.
Allowing your potatoes the full season will provide the largest and most numerous harvest. You can harvest after about 60-70 days, if you’re in a hurry.
If you grew your potatoes in containers, harvesting is simple!
Just cut or pull the plant’s greens off, dump your soil out somewhere, sift through the dirt and collect your potatoes! It’s really that easy.
If you grew your potatoes in the ground, prepare to get a little dirty!
We generally start at one end of our potato row. We pull up the greens, sometimes releasing a potato or two. From here, we just dig with our hands to find more potatoes.
We liken it to digging for gold and it’s a really good time in the garden!
It’s important to really root around in the soil. Remember, potatoes can grow all around where the seed potatoes were. Sometimes they’re pretty deep or off to the sides of the plant.
Sometimes we need to use a pitchfork or shovel to really work the ground. This can be a bit dangerous as it’s not uncommon to stab or slice your potatoes. Whenever possible, we try to dig by hand.
Cure Your Potatoes For The Long Haul
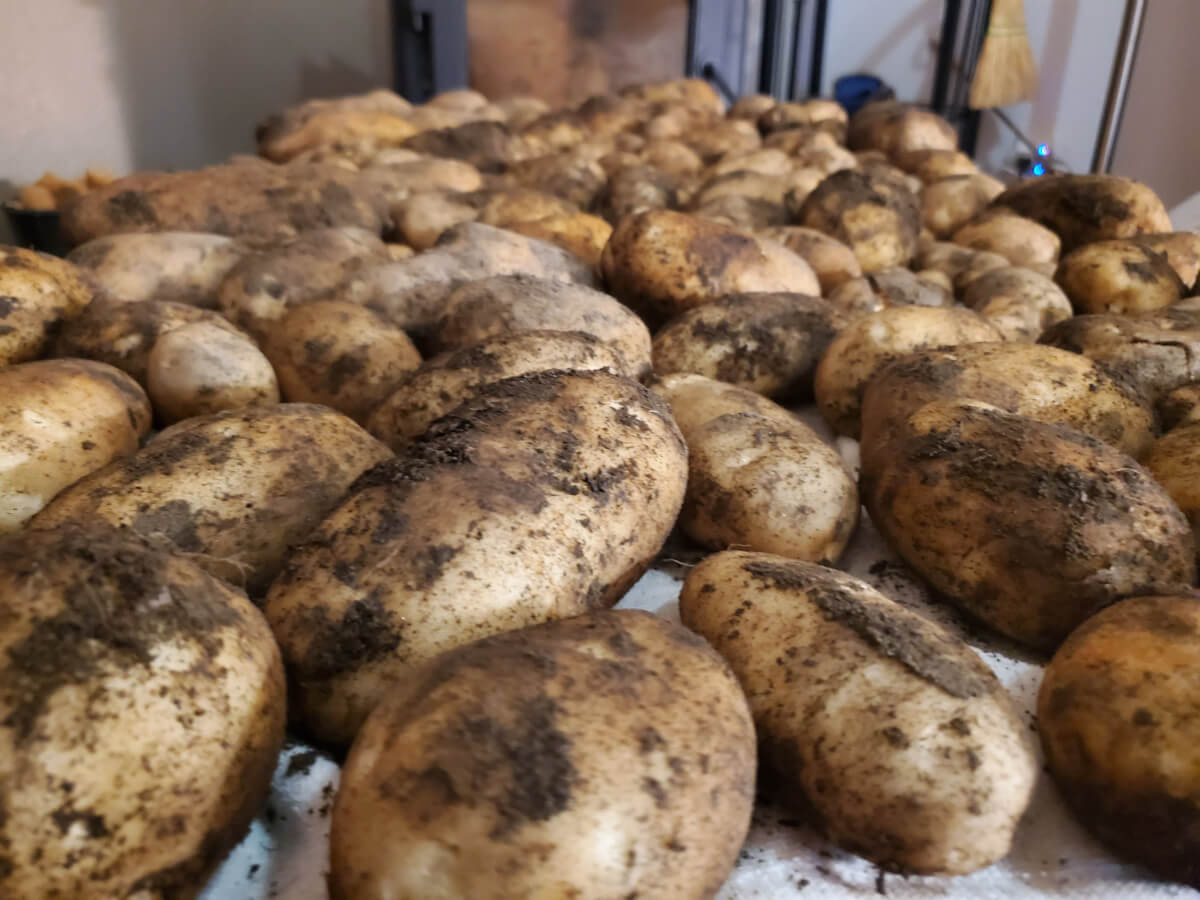
An important step for long term storage of your potatoes is to make sure they are fully dried out.
We put our potatoes through a curing process, which ensures that moisture won’t spoil our potatoes.
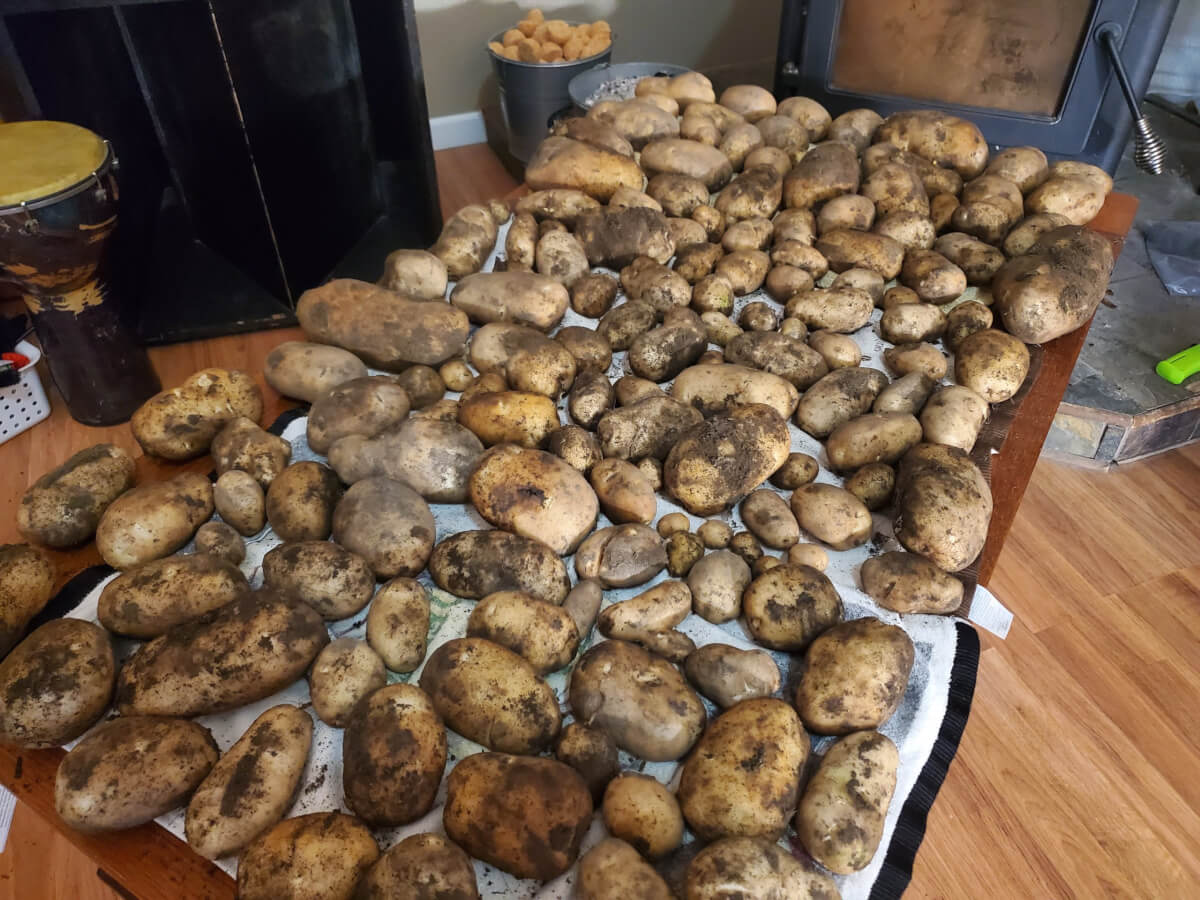
Curing is fortunately really simple. We just lay out a single row of potatoes on whatever surface we have available. We will cover them with kitchen towels to make sure light can’t get at them.
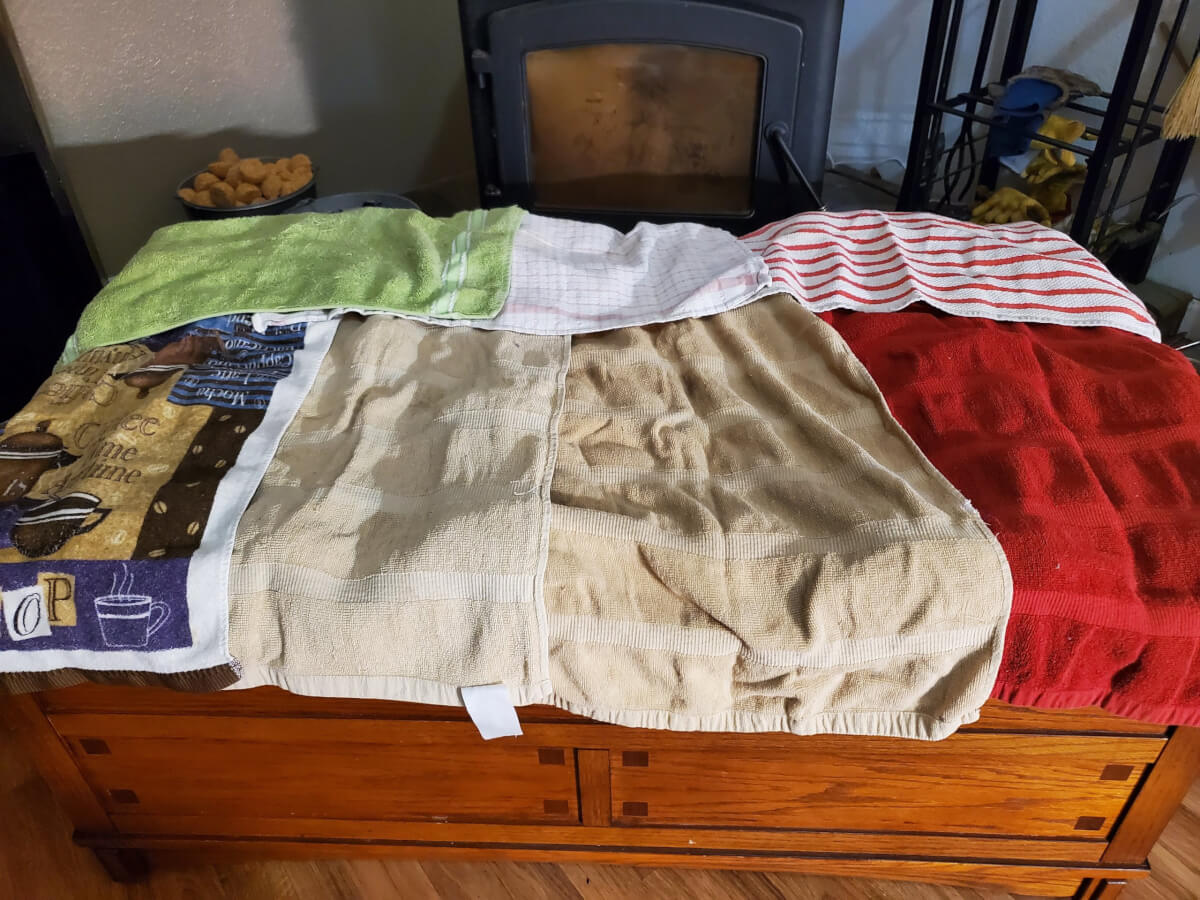
We briefly lift the towels once a day to allow moisture to escape.
We leave our potatoes to dry for several days until they are sufficiently dry. That’s all there is to it.
It’s VERY important to keep your harvested potatoes away from sources of light, both direct and indirect. Light can cause your potatoes to produce solanine, which is a toxic substance to humans. You’ll notice your potatoes will turn a bit green and that’s a bad thing.
Also, you don’t want to clean your harvested potatoes. The dirt provides a bit of a protective layer for your potatoes and will ensure your harvest is well protected for storage. You can knock off big chunks of dirt, but don’t wash them clean!
Storing Your Potatoes For The Winter
If you have a relatively cool storage space, this will be the best possible location for your potatoes.
Ideally you want a storage space that is between 40 and 55 degrees Fahrenheit. The area should be absent of light sources for the most part, otherwise take precaution to protect your harvest from light.
You also want decent air circulation around your potatoes. You don’t need a circulating fan or anything, you just want air to be able to exchange. This will allow additional moisture to release.
The above storage conditions are not in the cards for everyone. Fortunately, potatoes are quite flexible in their storage requirements!

This is one of our two potato storage boxes. We like this because we can slide it under our guest bed. The holes allow for good air circulation around our potato harvest. We get about 4 months of storage this way.
We store our potato harvest at room temperatures. We did choose our potato storage room because it’s the coolest in the house, but it’s typically well above 60 degrees Fahrenheit.
We have two little totes that we place under our guest bed for storage. We drilled some holes in the top to ensure good air circulation with the rest of the environment.
With this method, we are still able to get about four months of storage from our potato crop. This allows for quite a few winter months of access to potatoes.
Very Long Term Storage Of Your Potato Harvest
Even in ideal storage conditions, your potato harvest will likely only store well for between four to six months. At this point, they will soften and start to develop eyes, making your potato harvest less than desirable.
This is what makes the crop perpetual, this process develops your next year’s seed potatoes!
To get very long term storage of our potato crop, we will often use blanch and freeze preservation methods to achieve long term potato storage for upwards of a year.
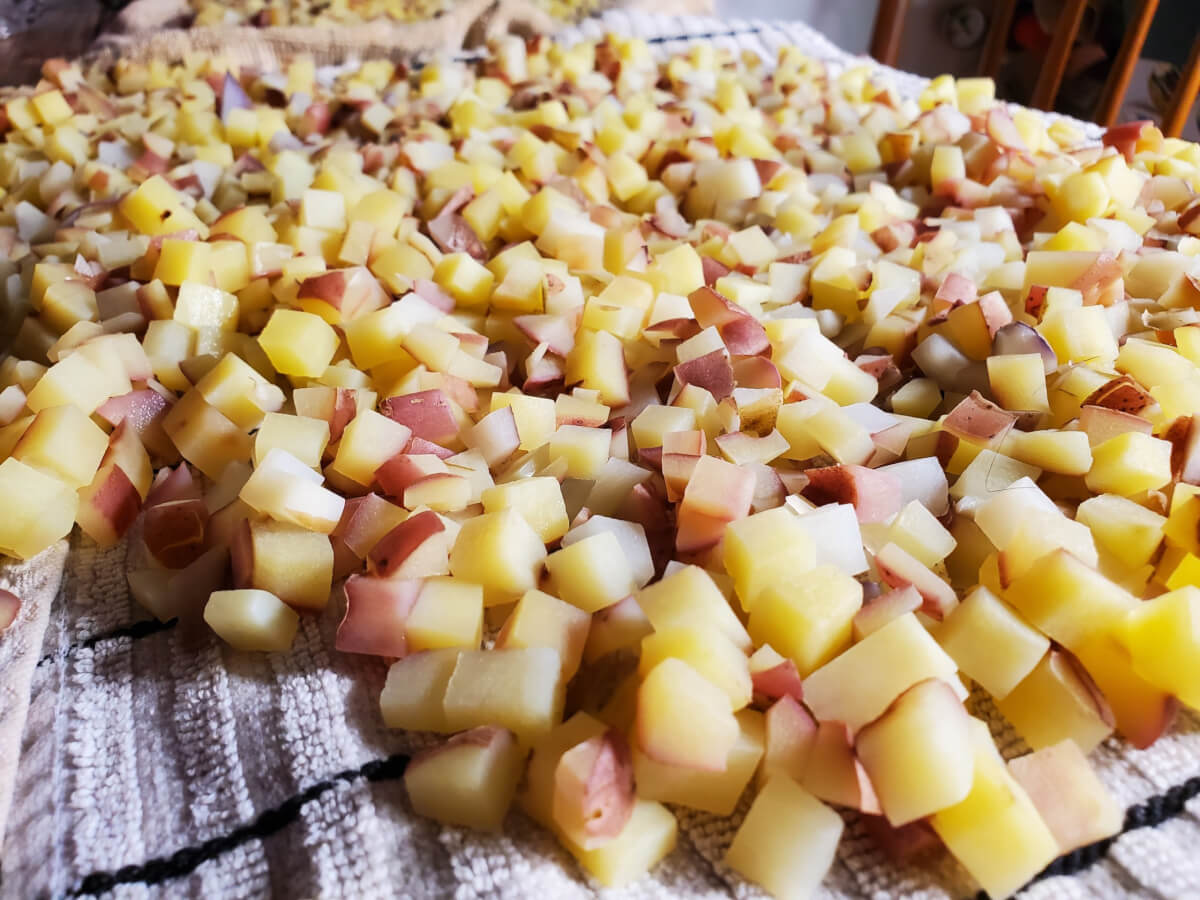
These are ready-to-cook hashbrowns that have been blanched and are almost ready to freeze. This allows us to get one additional year of storage from our potatoes!
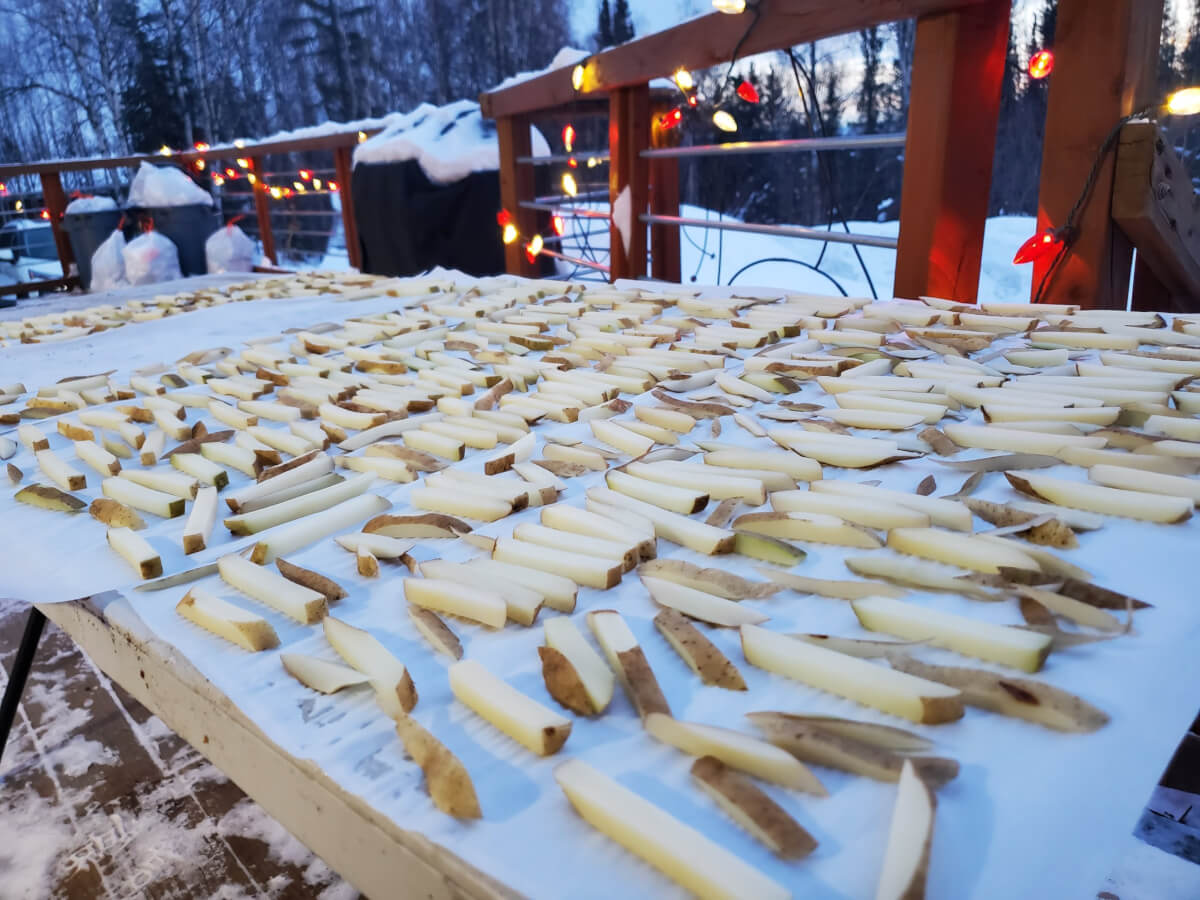
We often make French fries and hash browns out of our potato harvest, just before they start to make eyes. You can also make and freeze mashed potatoes, casseroles and other dishes that are good for freezing.
The great thing about doing the blanch and freeze process with your potato crop over the winter is that the outdoors can act as your freezer.
We will always leave enough potatoes to do a bit more cooking and baked potatoes. And of course, we leave enough potatoes to act as our seed potatoes for the following year.
Go Forth & Make Many Potatoes
Hopefully you have found this “full cycle” growing guide for potatoes helpful.
Potatoes have become one of our most favorite crops to grow. We hope that our passion about growing potatoes inspires you to grow them as well.
As always, if you have any questions, comments or things to add, we’d love it if you add a comment down below.
That’s All We Wrote!

Having a good time? Learn something? We have an ever growing list of insightful and helpful subarctic & cold climate gardening articles, just like this one!
- Cold Climate Gardening Basics 👉
- Growing Your Garden From Seed Indoors 👉
- Advanced Cold Climate Gardening Techniques 👉
- Plant Specific Cold Climate Growing Guides 👉
- Subarctic Perennial Food Forests & Foraging 👉
- Indoor Garden Lighting & Grow Rooms 👉
- Greenhouses & Temperature Control 👉
- Harvesting & Food Preservation 👉
- Solving Cold Climate Garden Problems 👉
- 700+ 1 Minute Reads 👉
- 180+ Gardening Topics! 👉
FrostyGarden.com is 100% ad-free, junk free and we do not use affiliate links or sponsorships! This resource is voluntarily supported by our readers. (Like YOU!) If we provided you value, would you consider supporting our mission?
Chlorophyll isn’t toxic to humans. If it was, leafy greens (green from *checks notes* chlorophyll) which most people enjoy would make 100% of the population sick, rather than the very small amount that are oxalic acid sensitive. What is toxic is the solanine that potatoes produce as an anti-herbivory strategy, which is said to be produced in greening-up potato tubers.
I 100% knew that! I think when I was writing it, my brain must’ve been like “green = chlorophyll” for some stupid reason. These articles can be exhausting to write, it definitely results in brain fatigue after a few hours. Thanks for catching it, I got it corrected.
Always welcome. Sorry for the prescriptive and rude manner of my comment.
No worries! We appreciate it, especially when it’s one (very important) word that isn’t likely to get caught through simple editing passes!